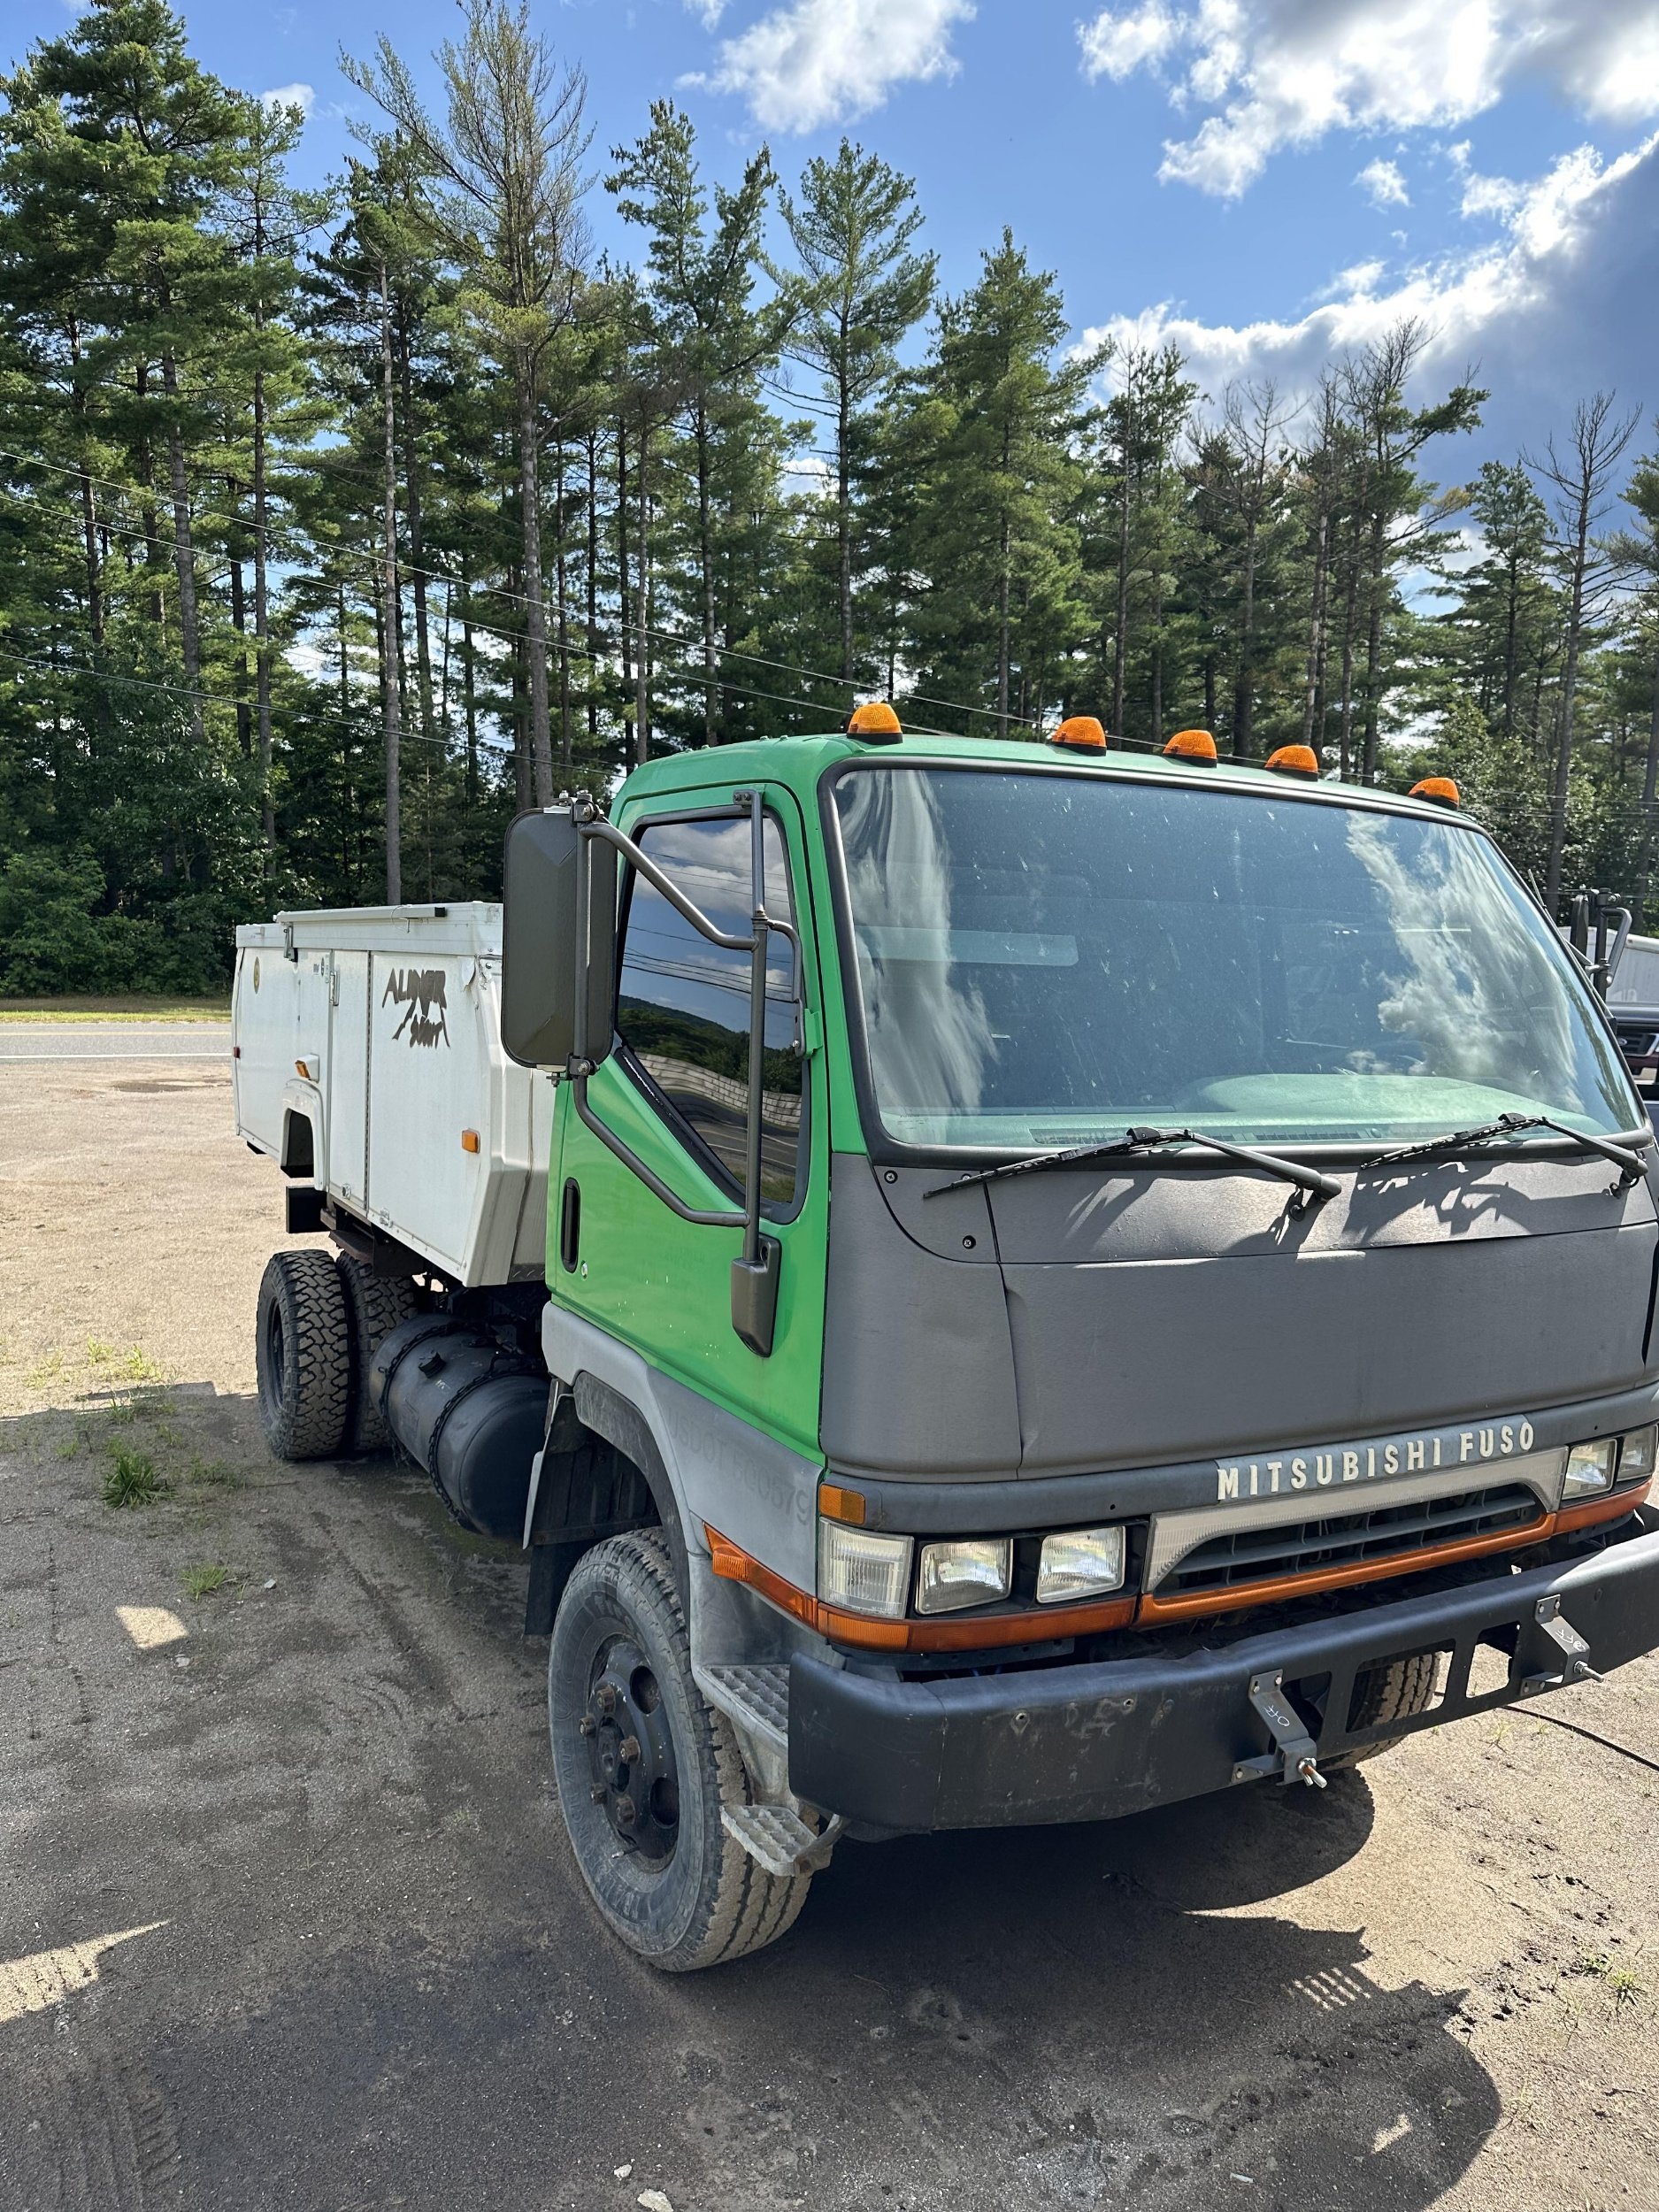
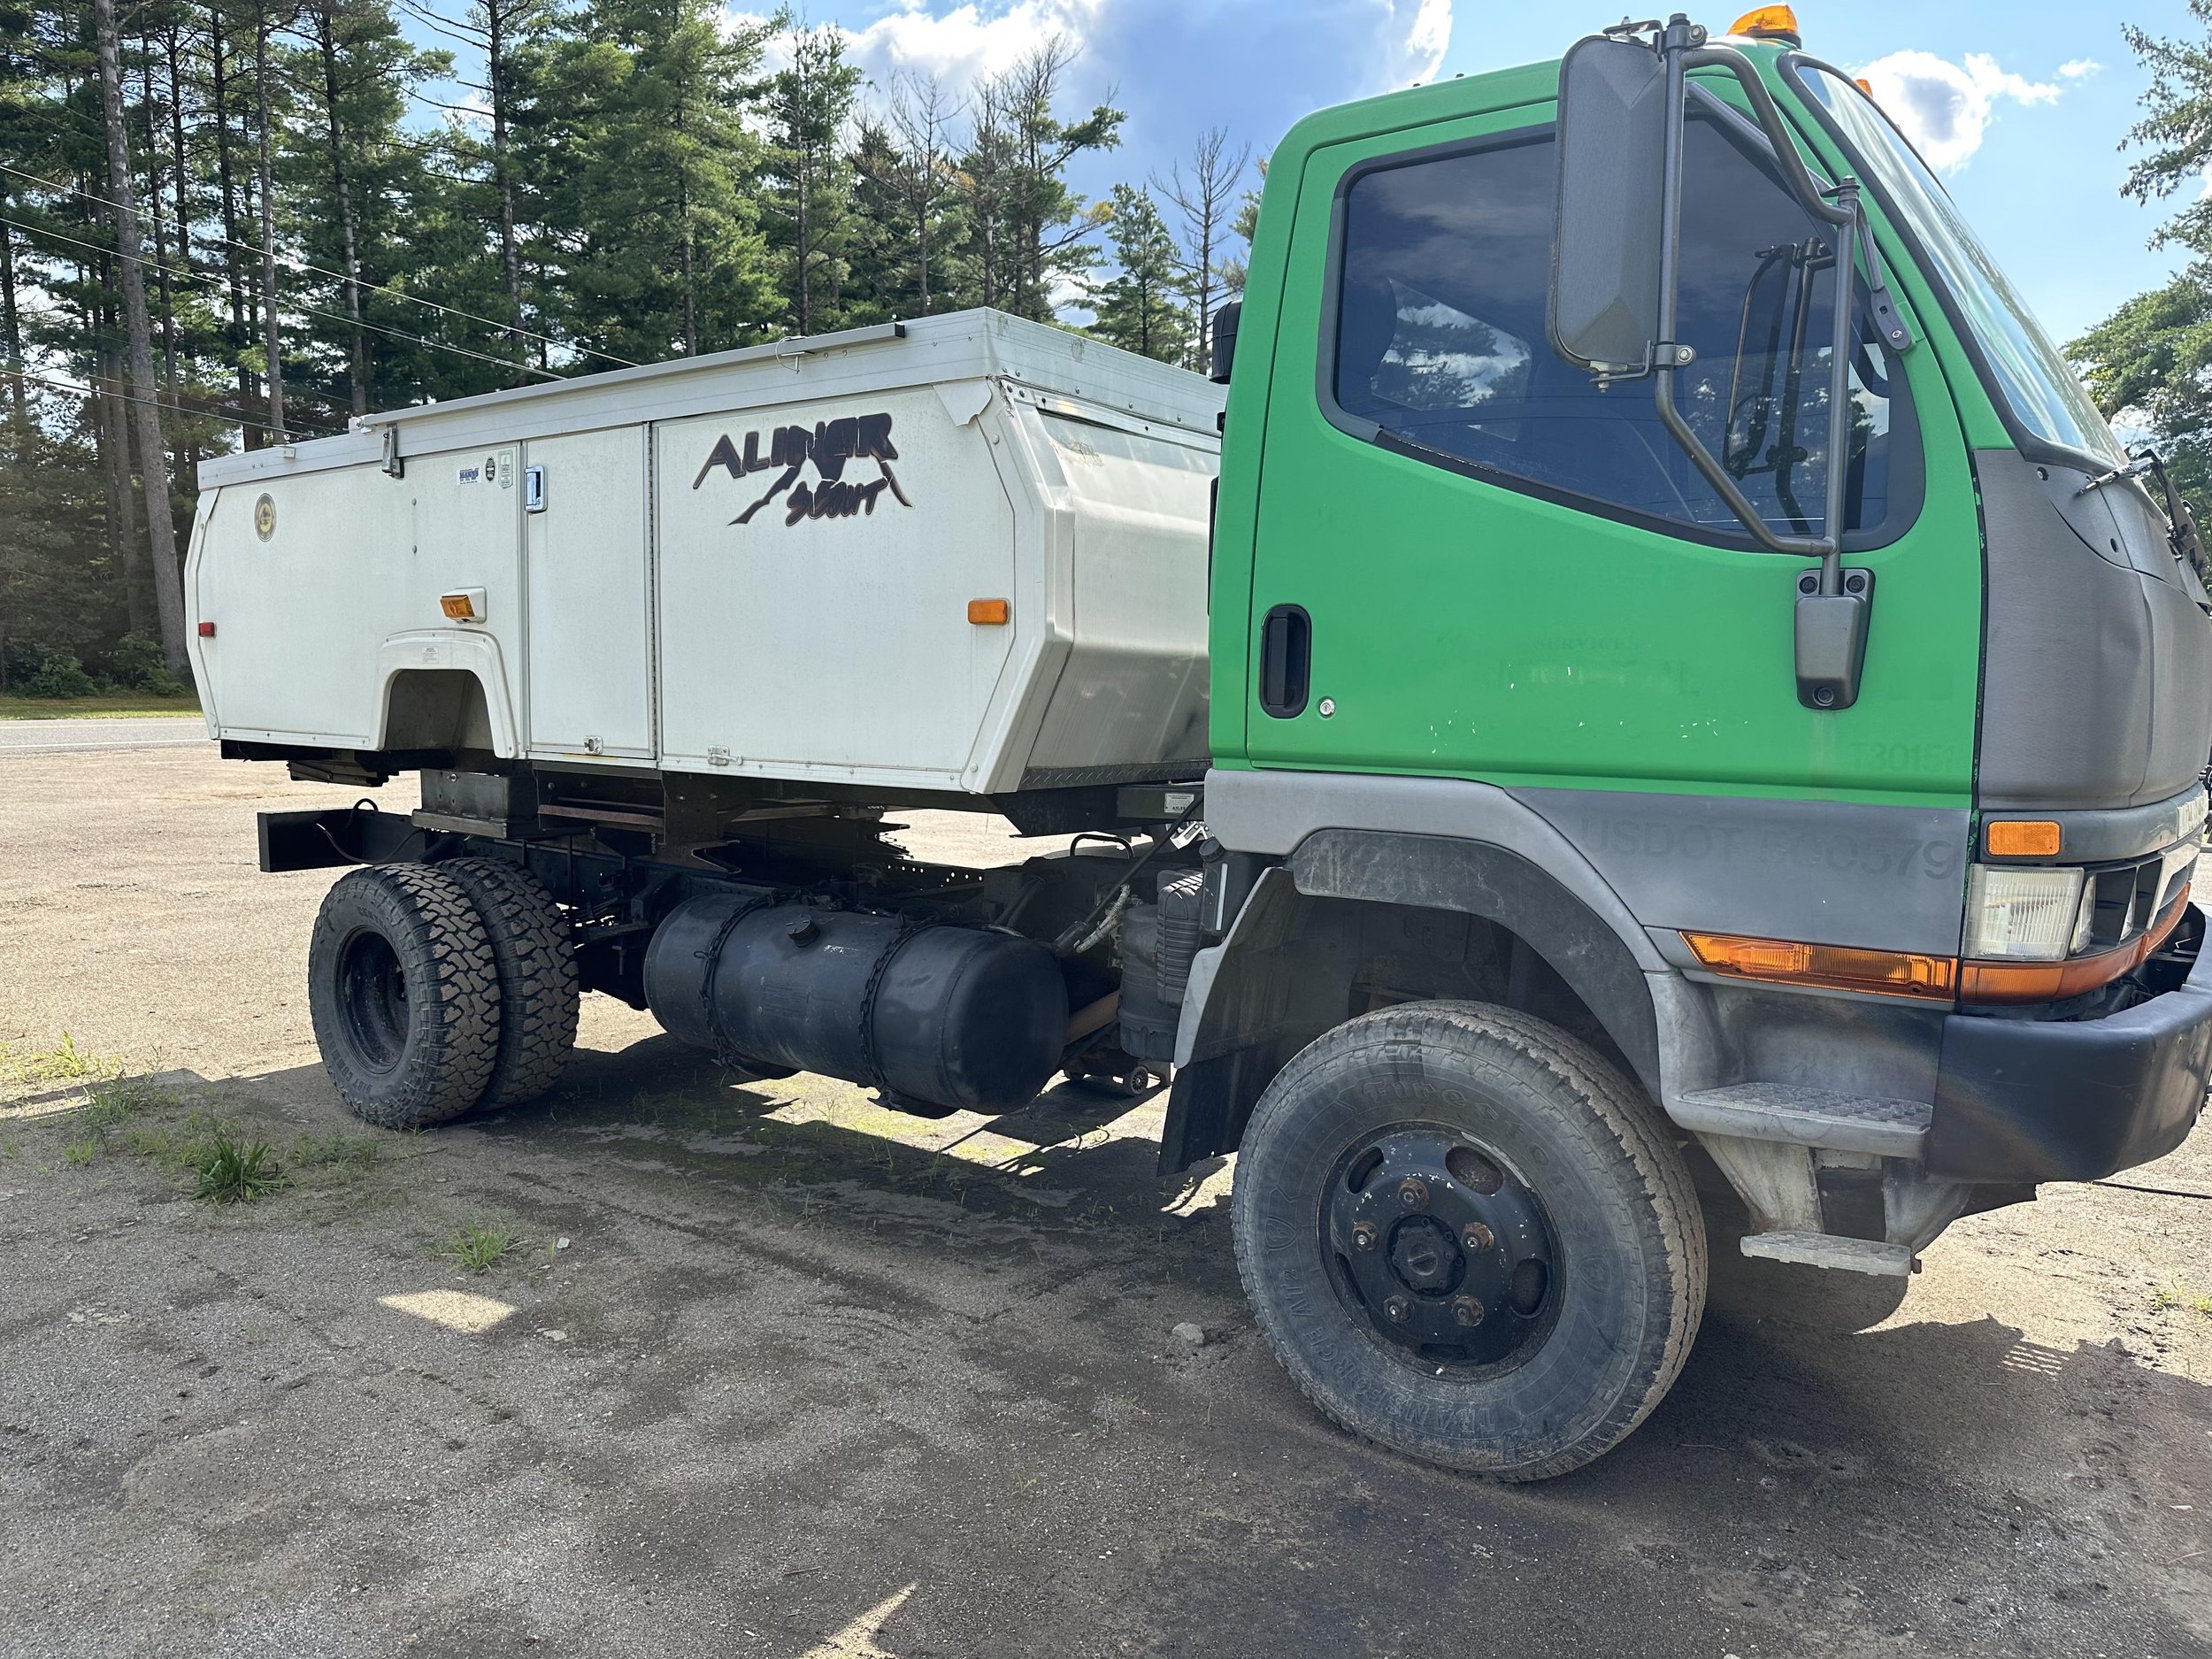
Build pics!
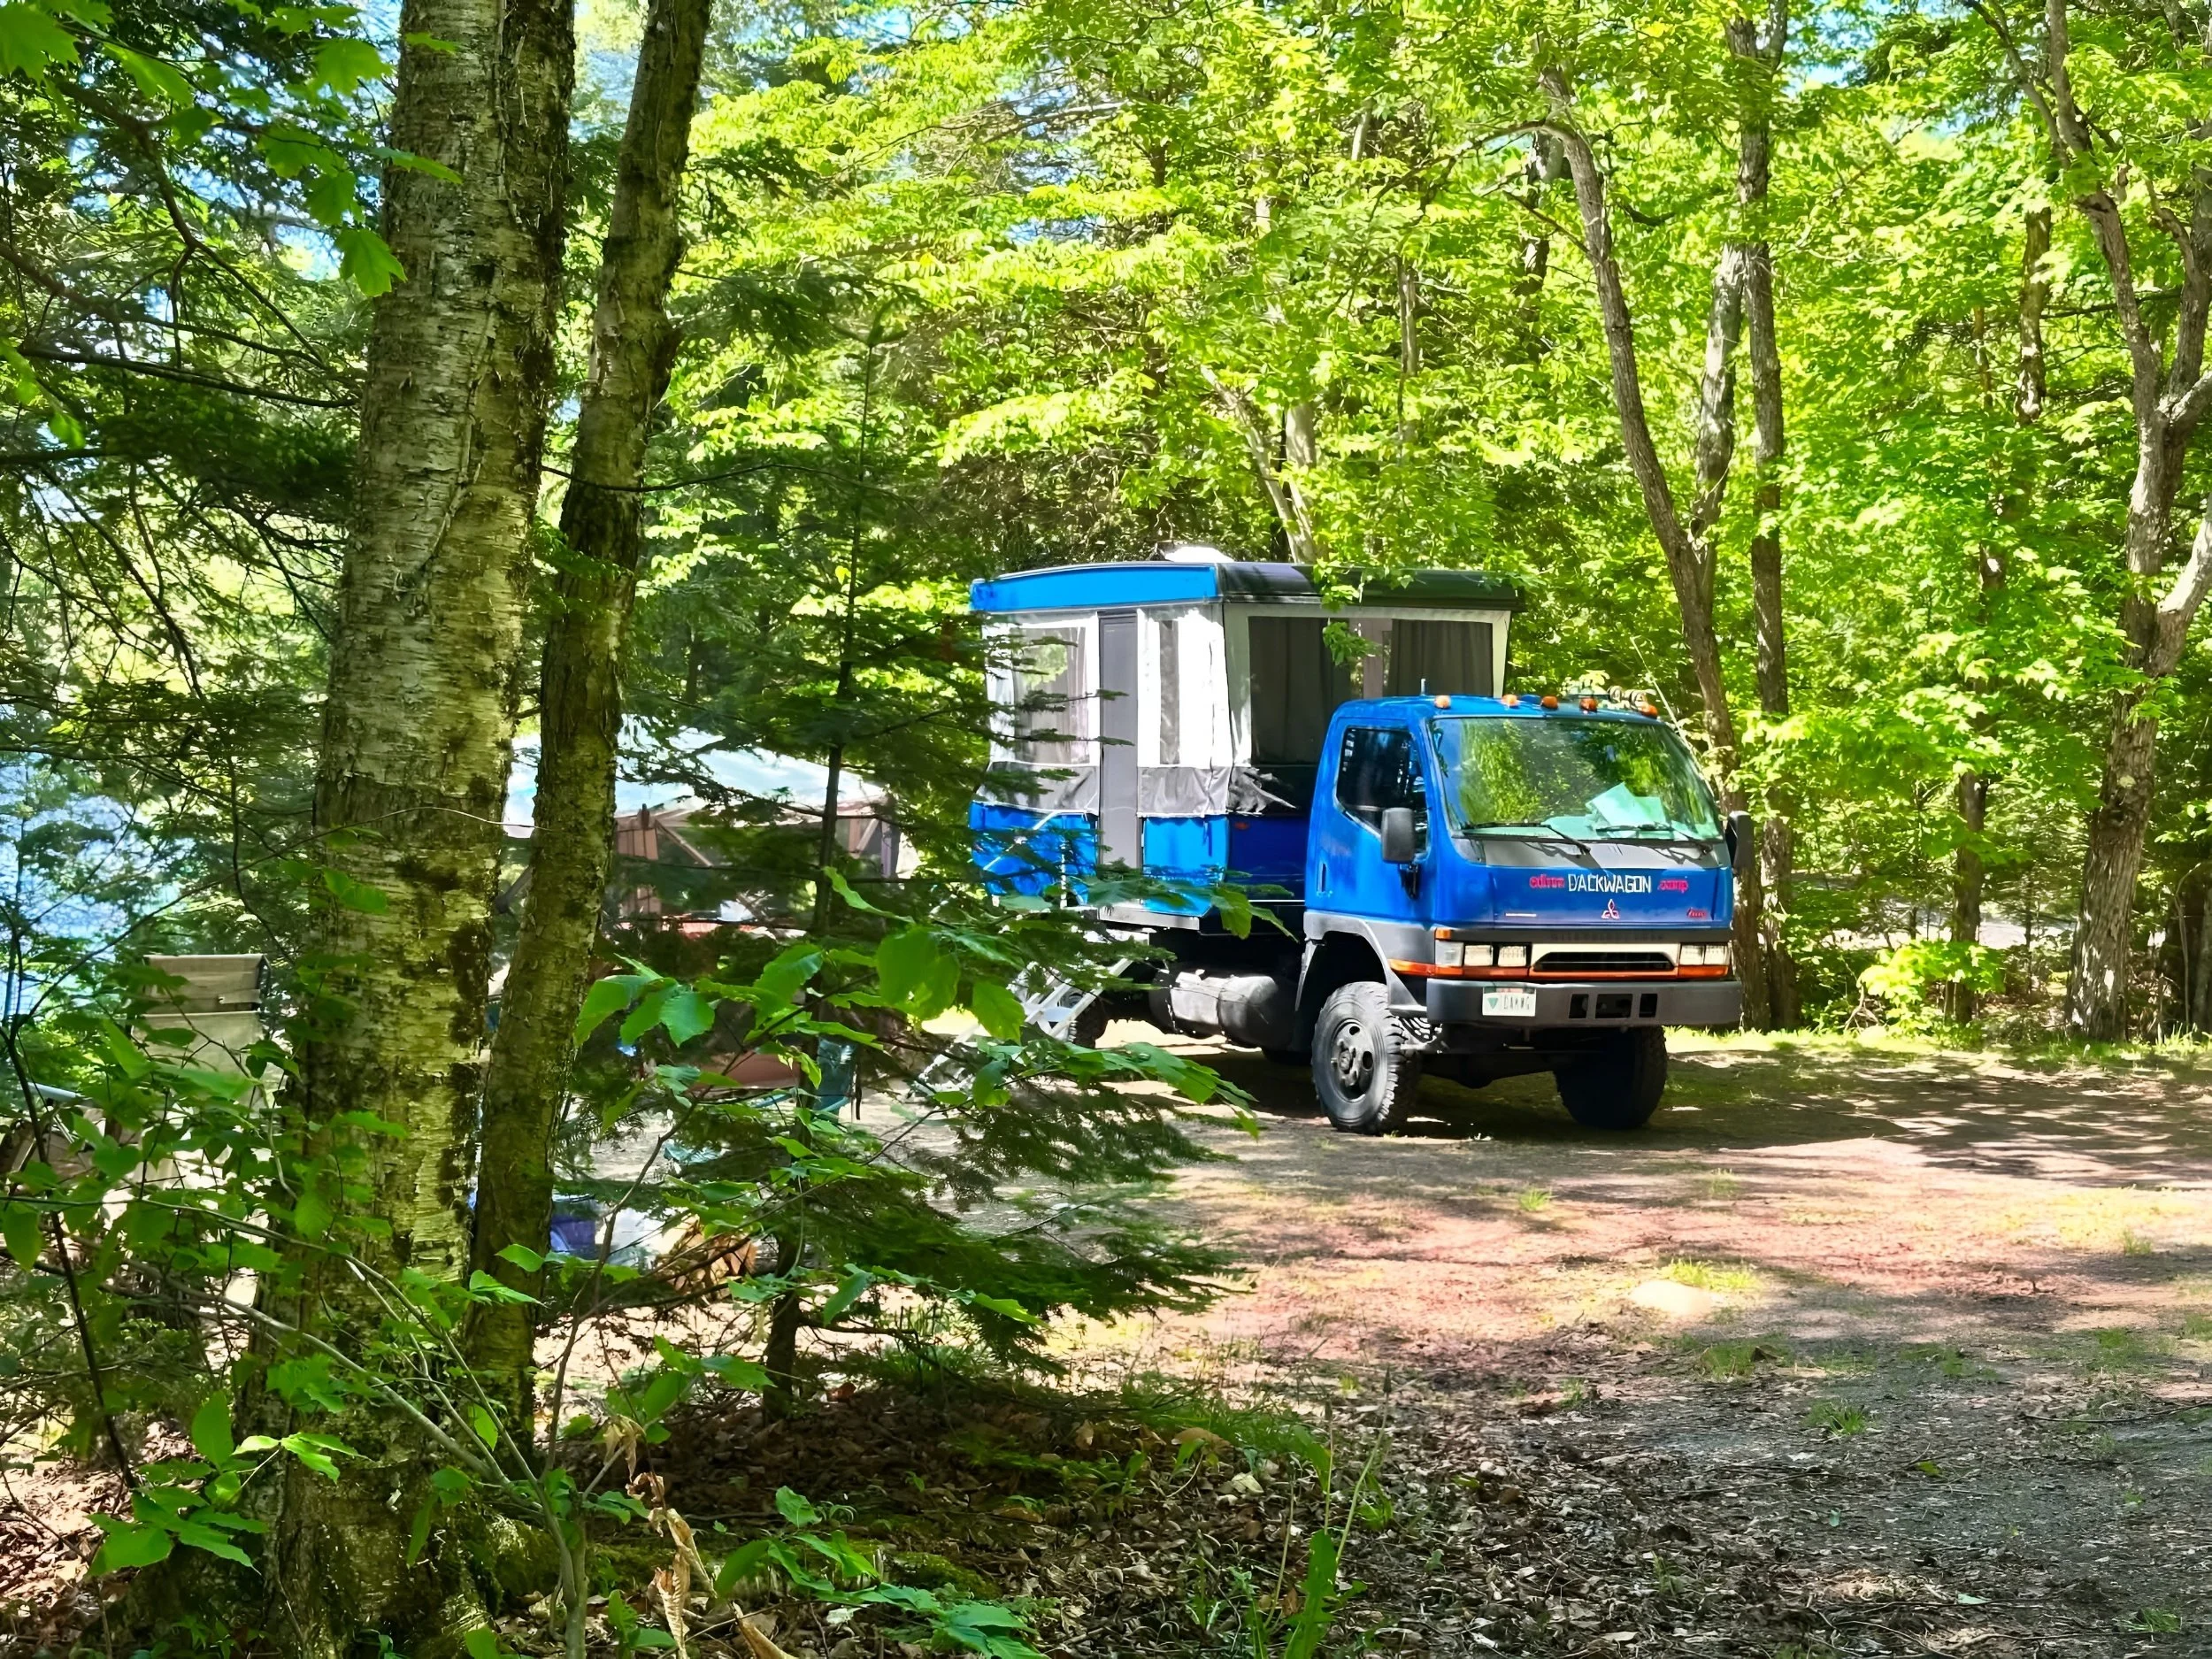
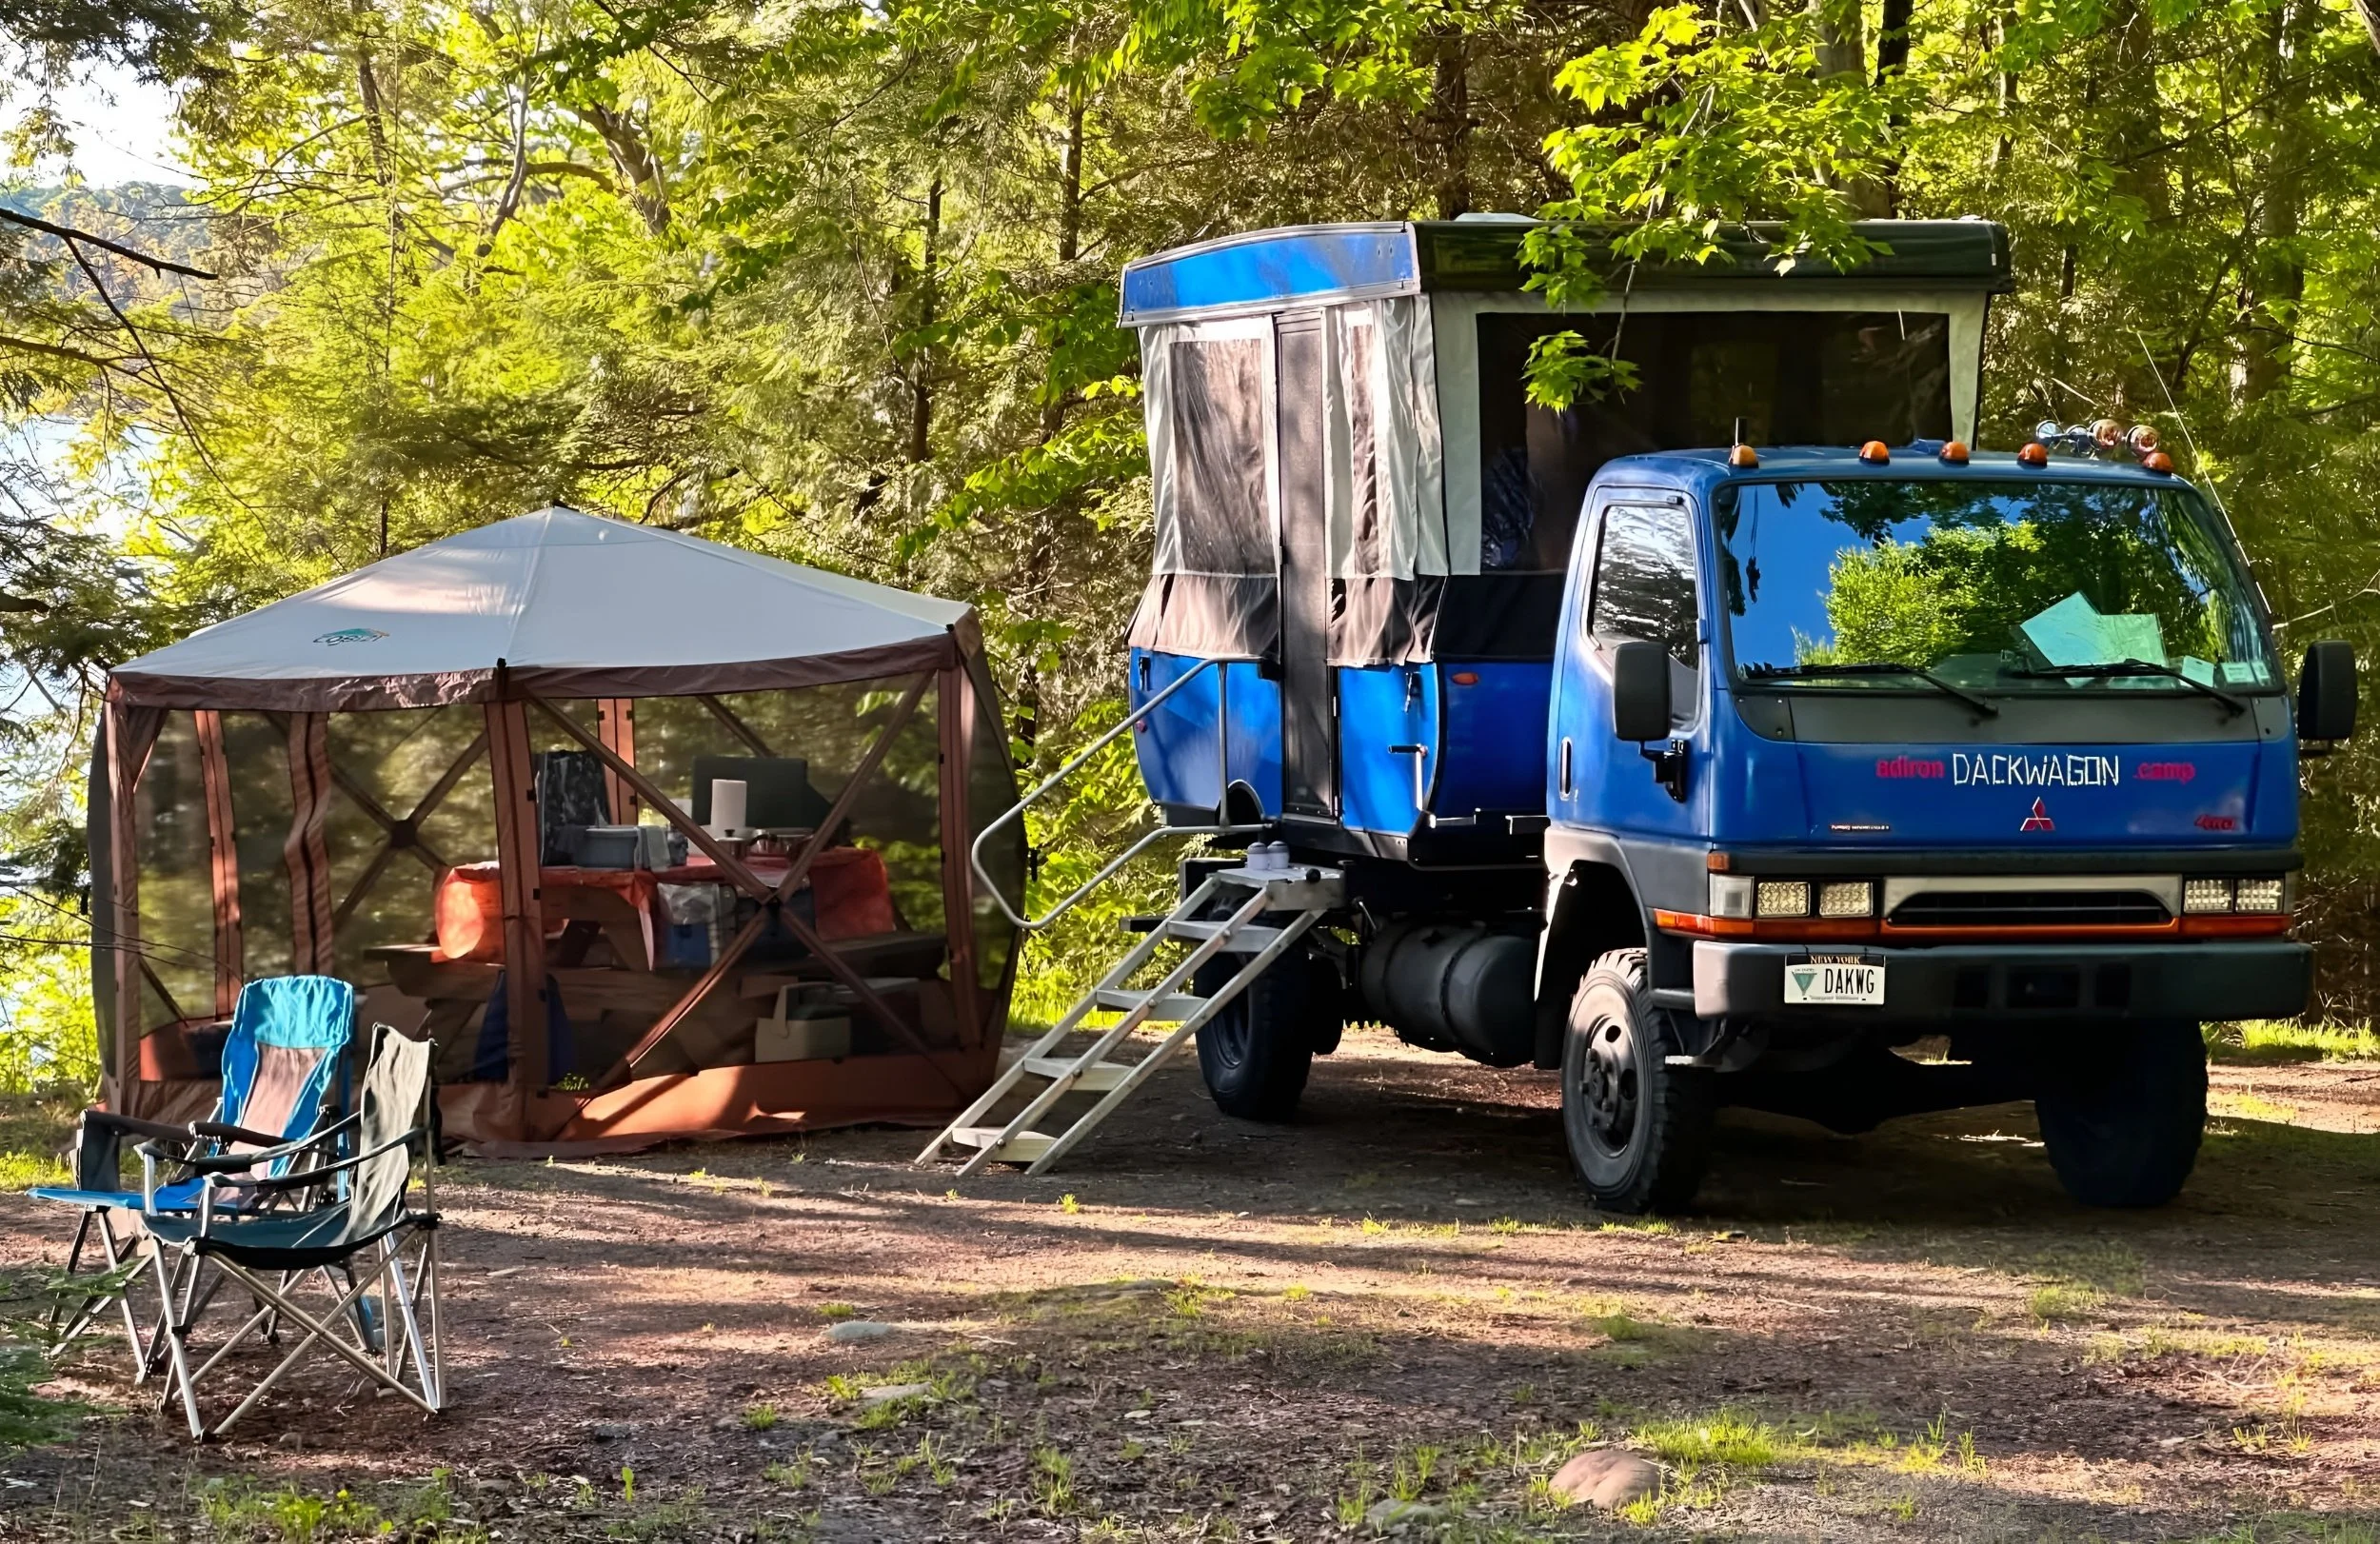
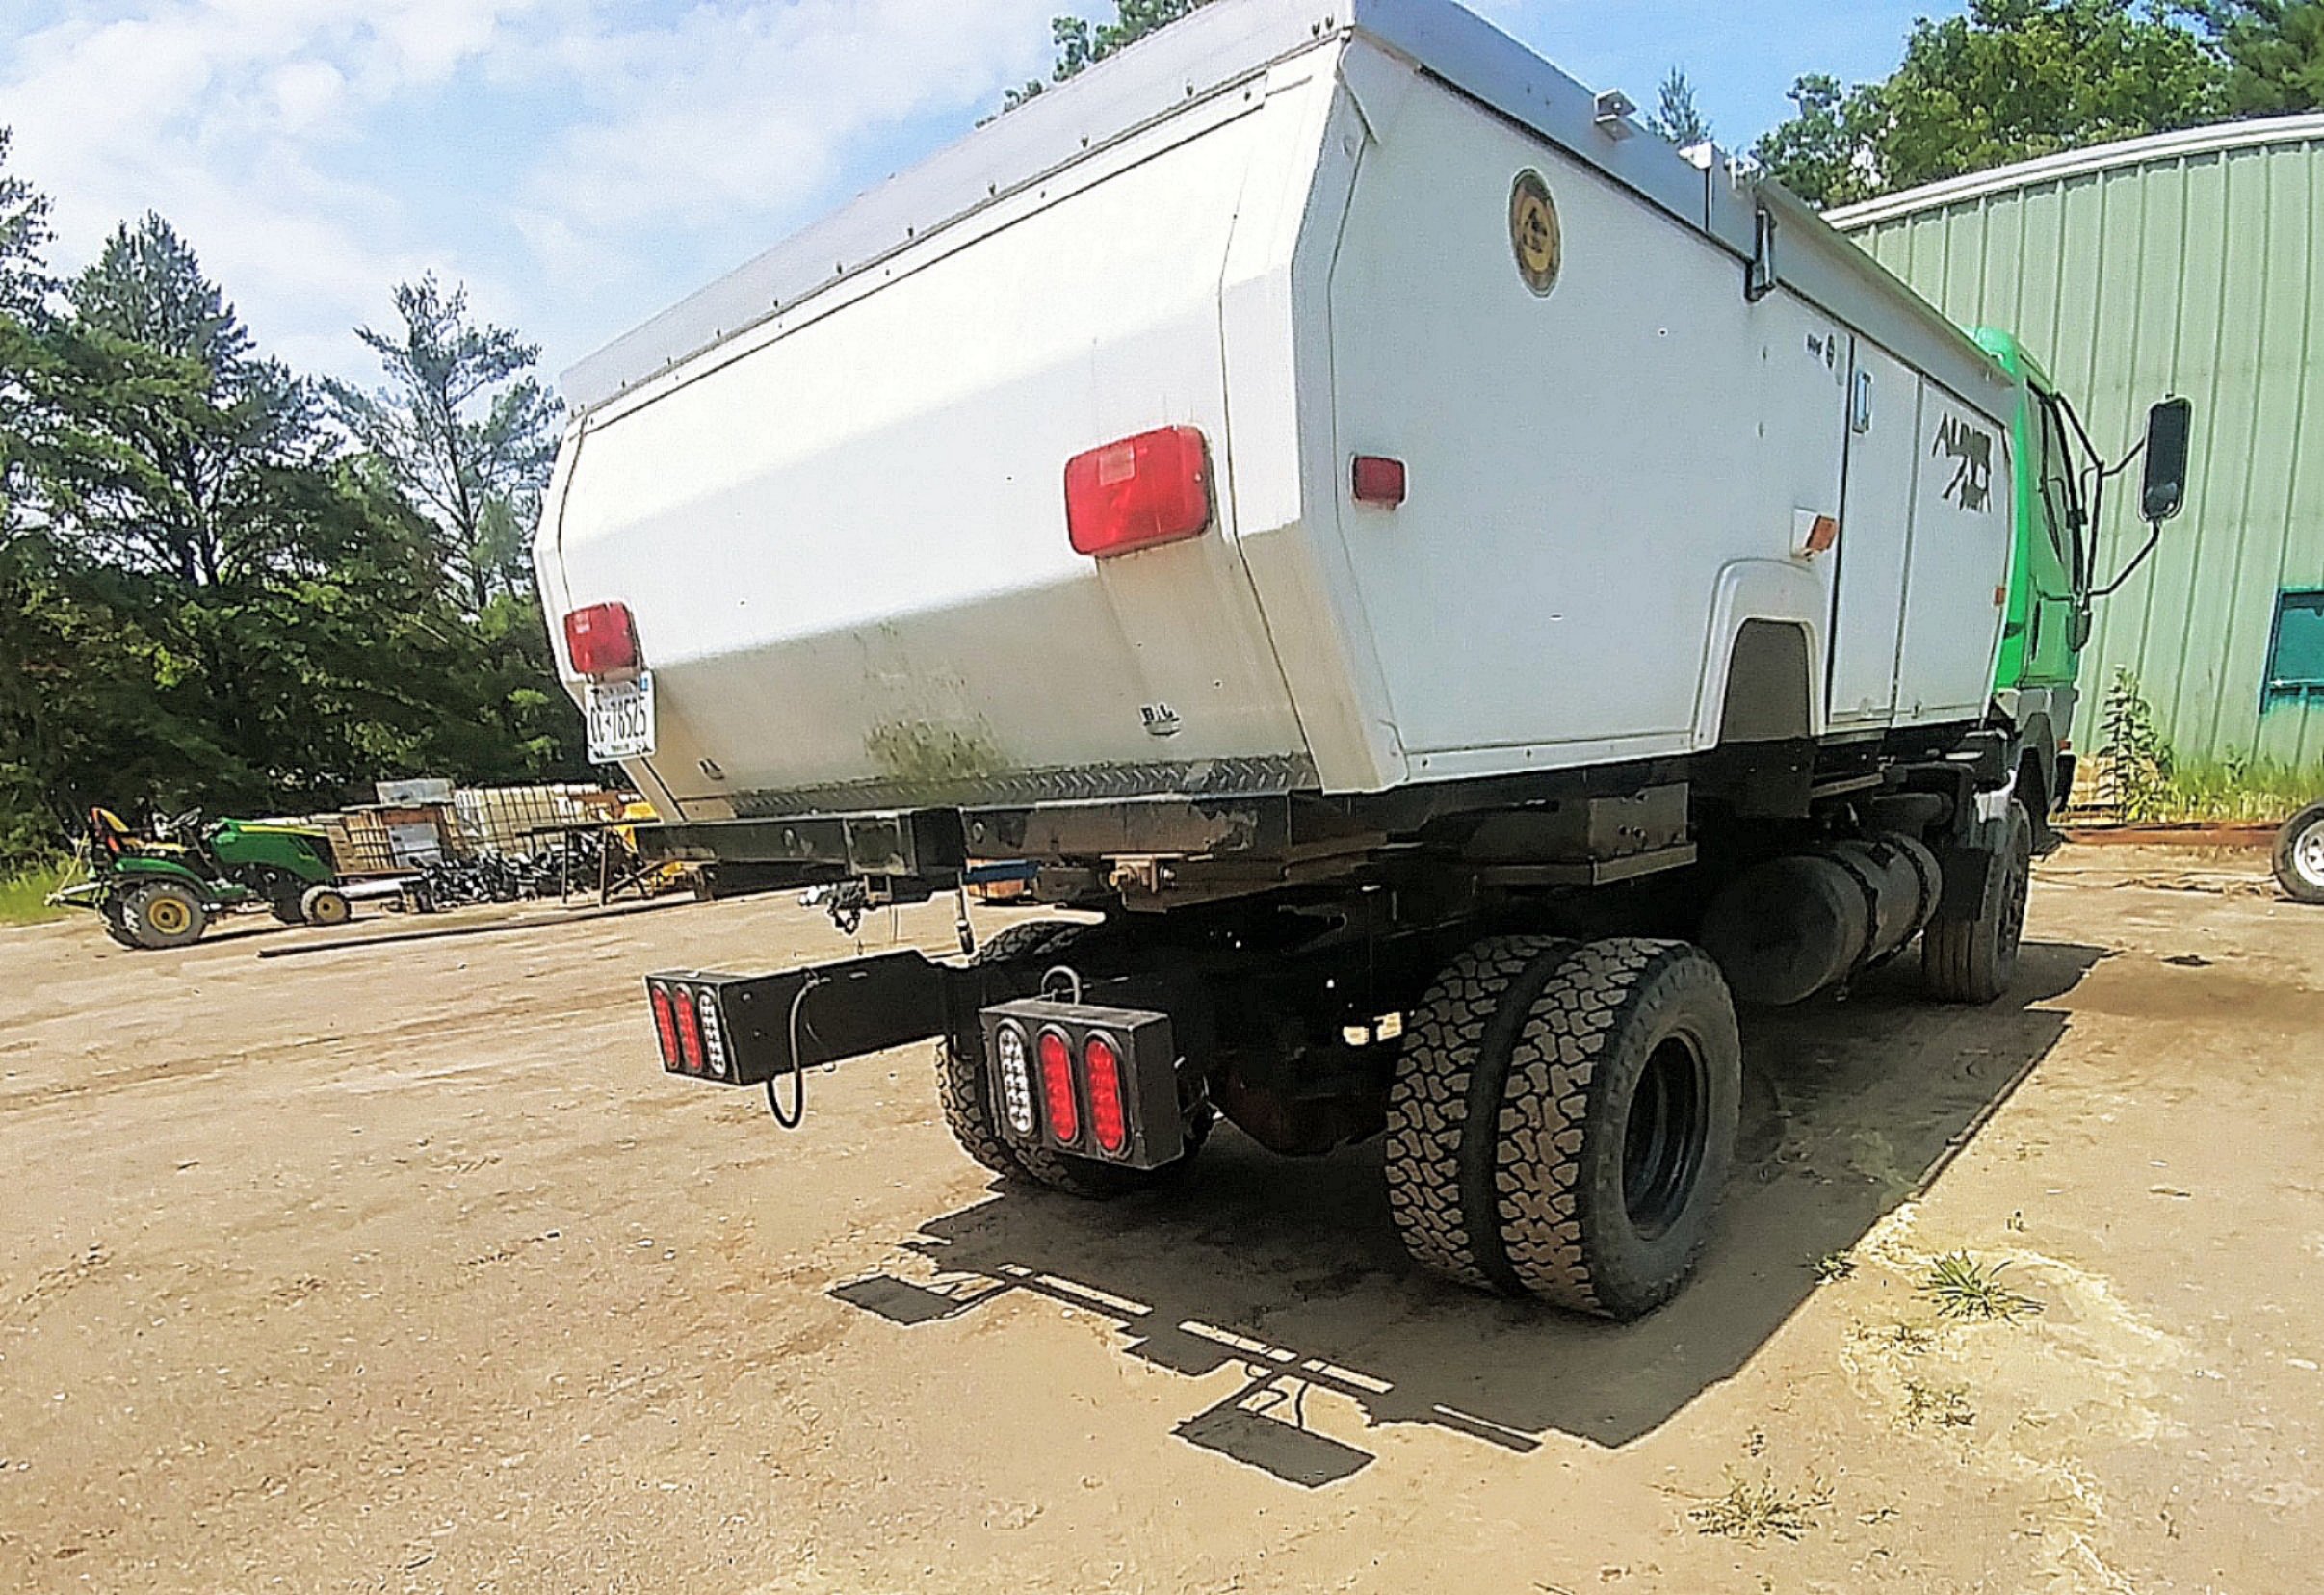
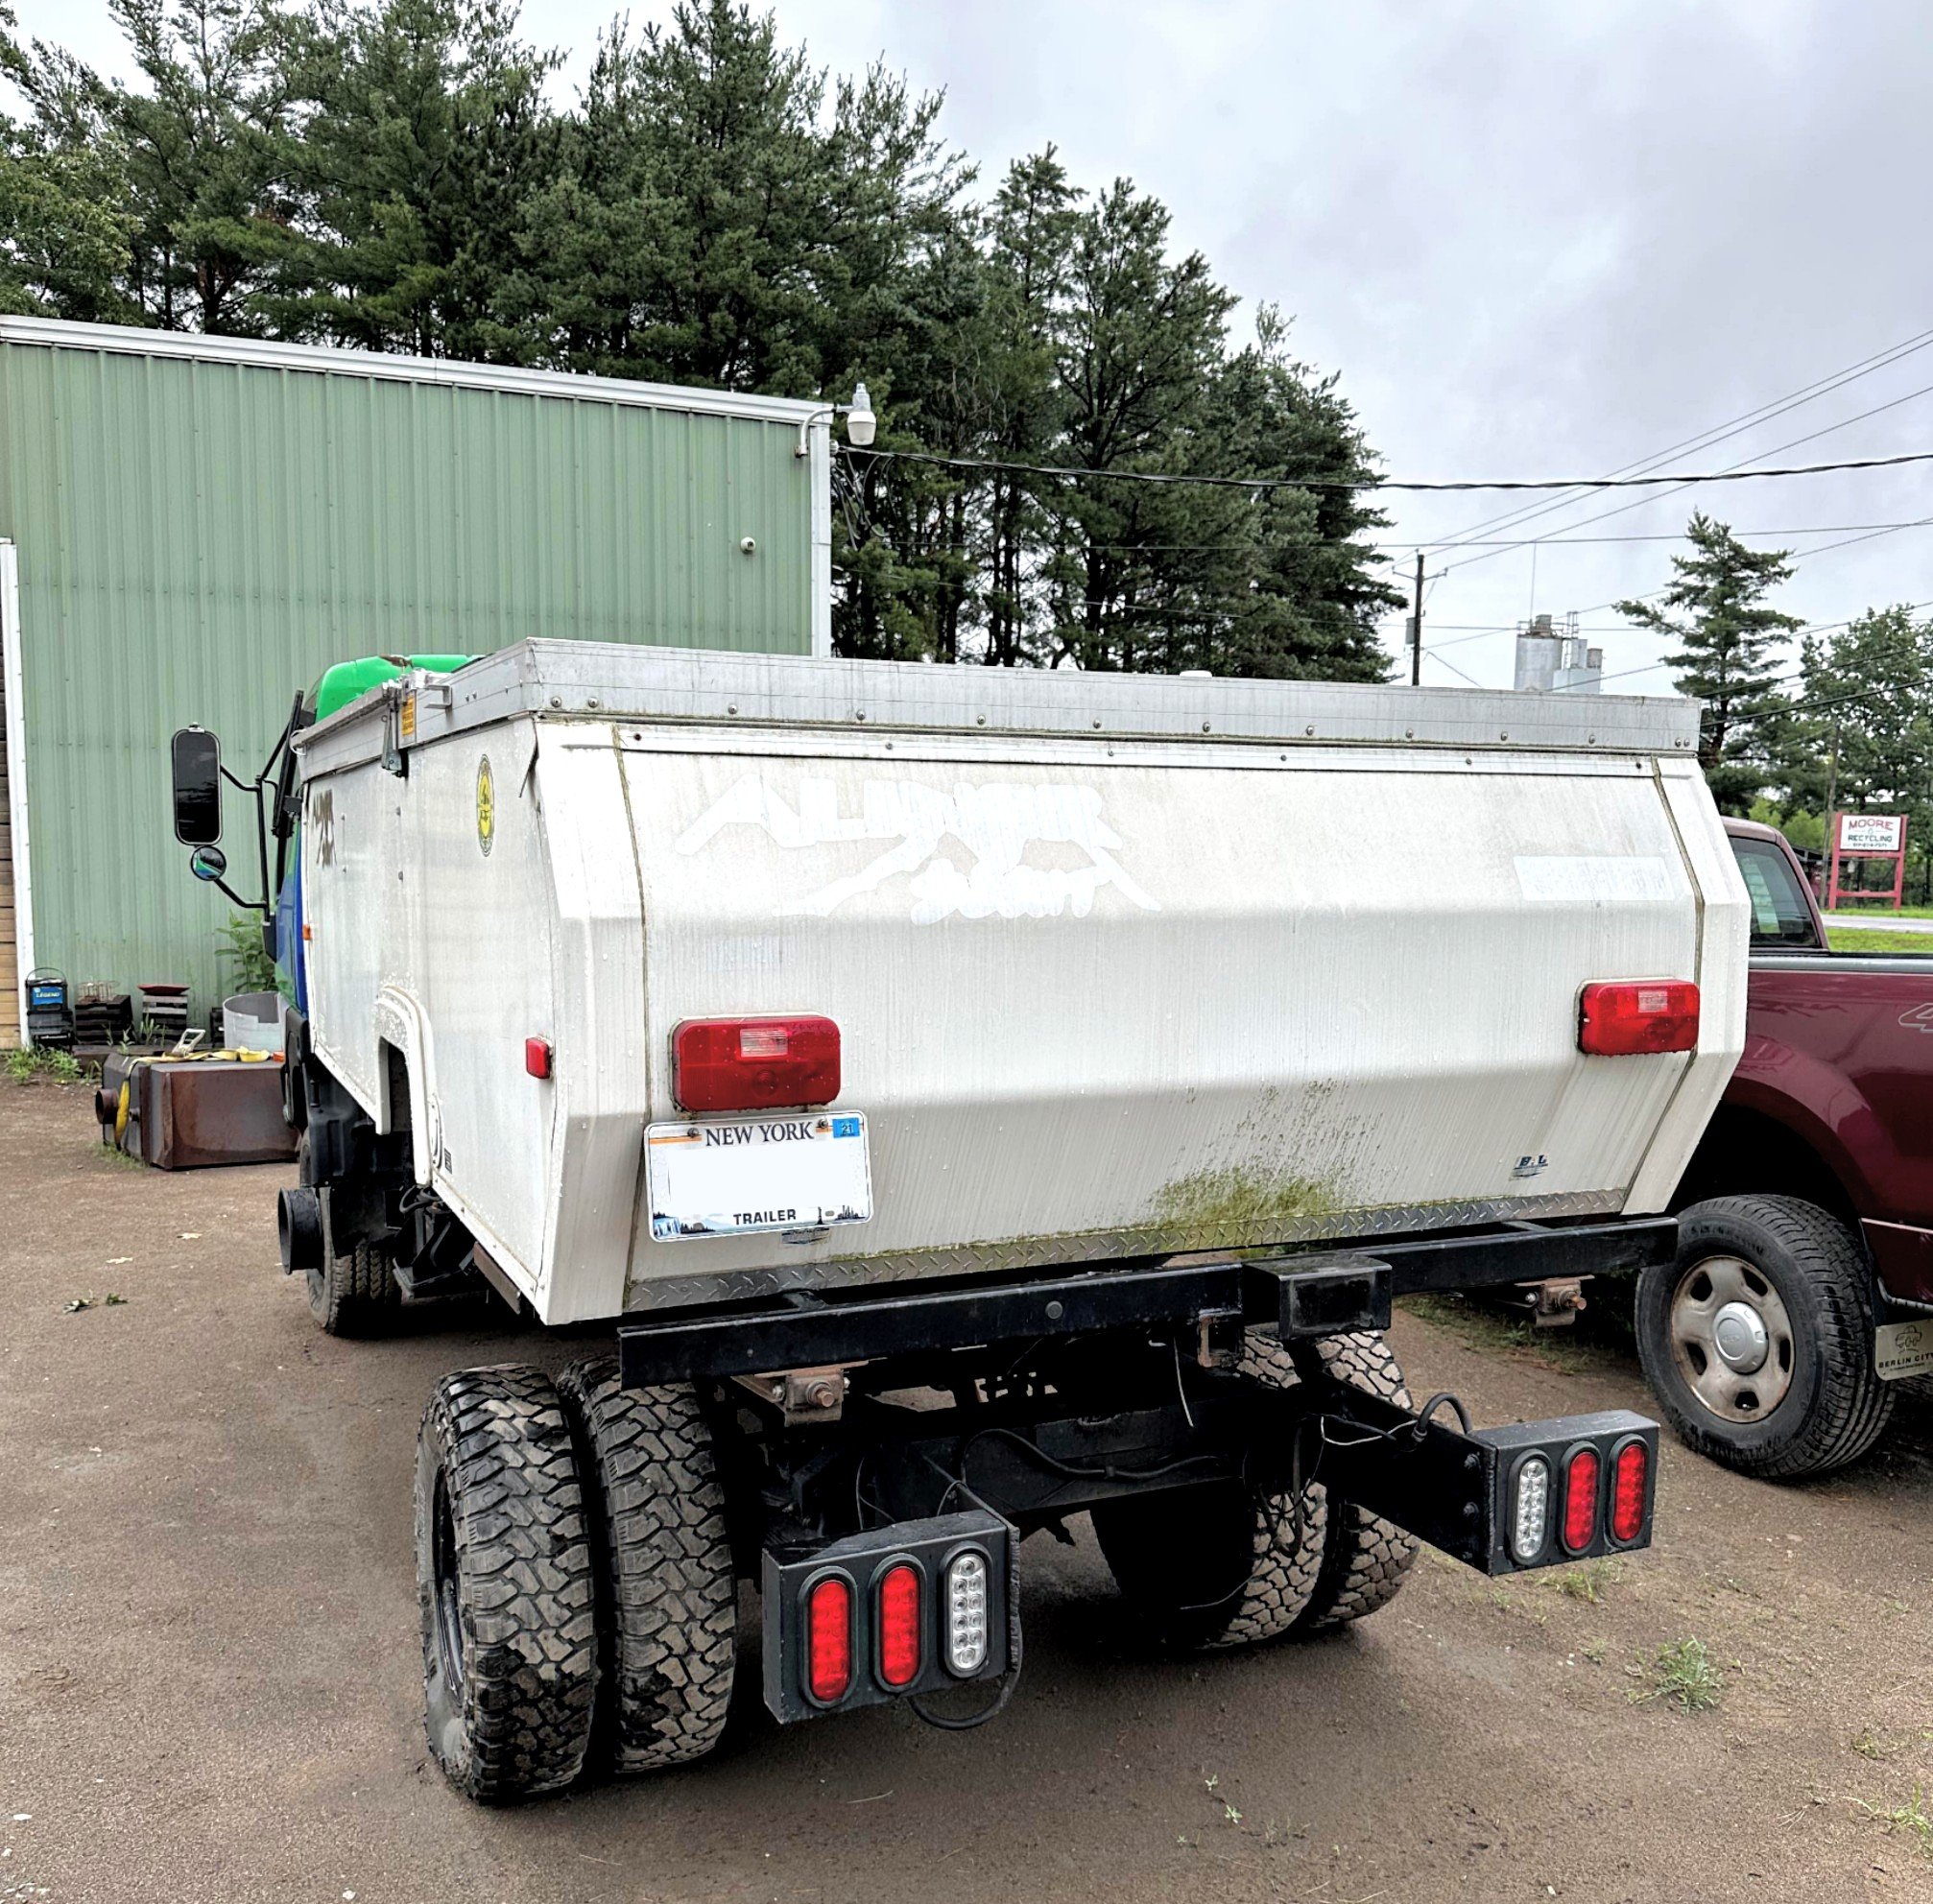
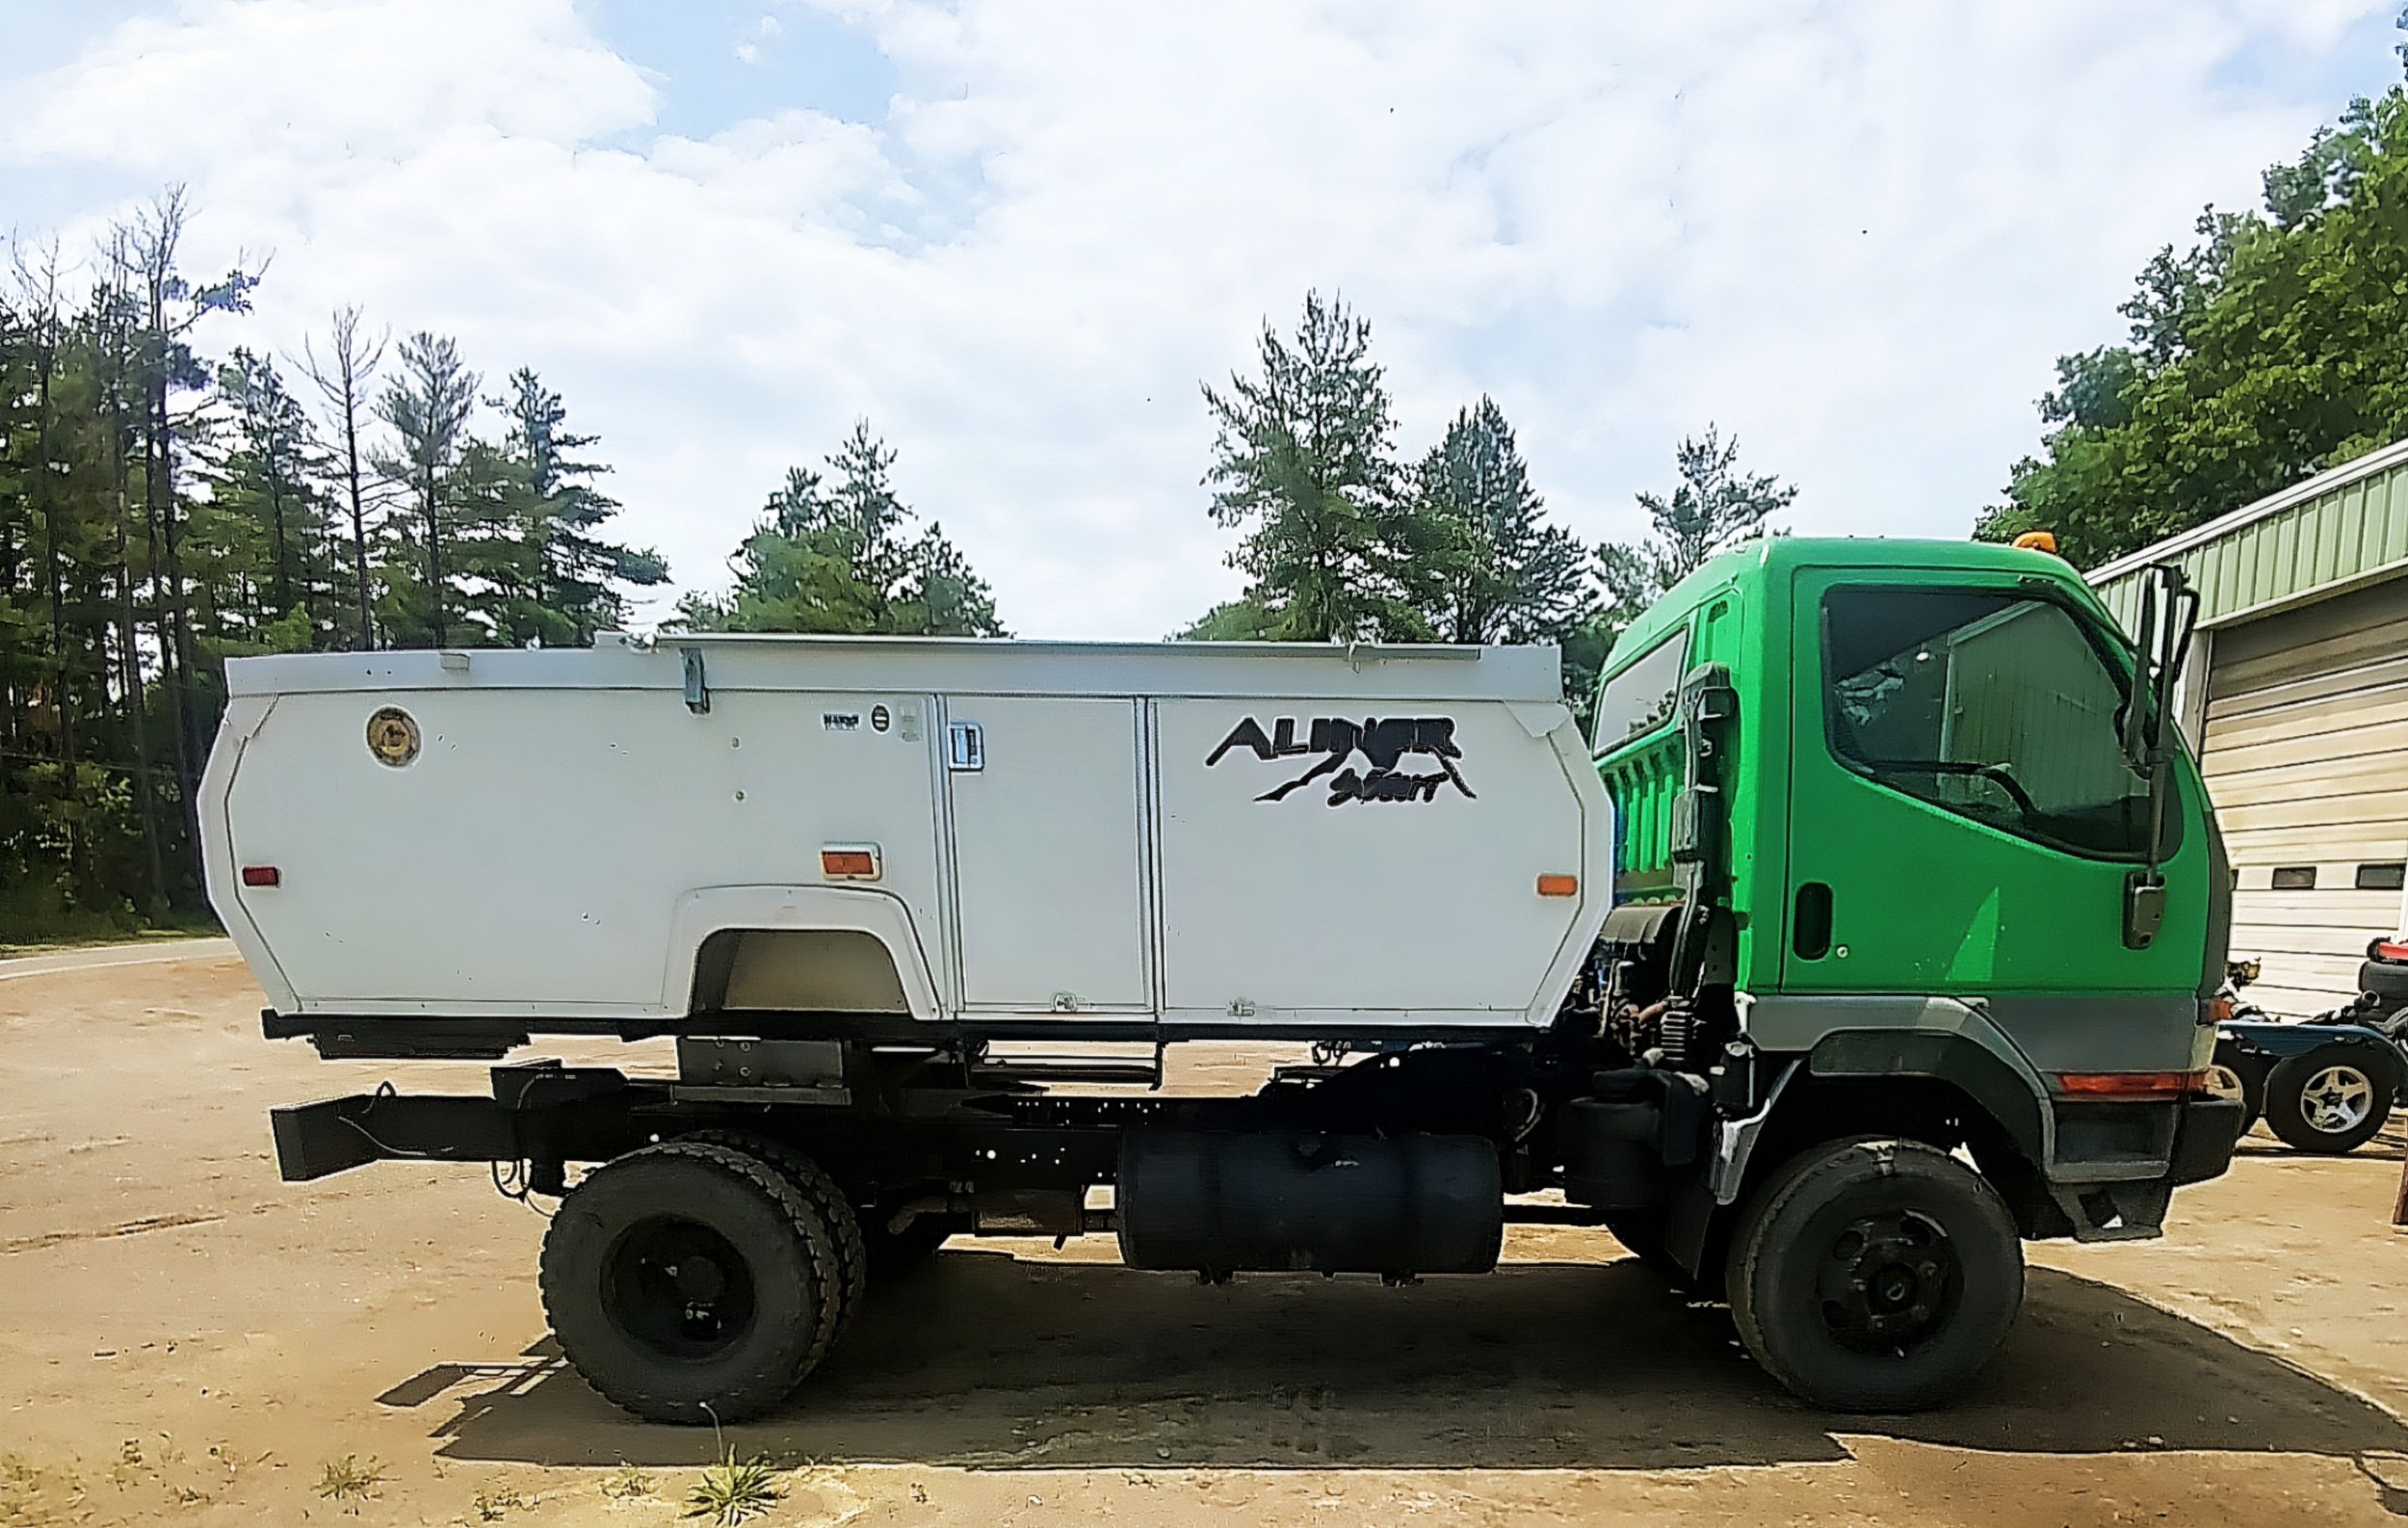
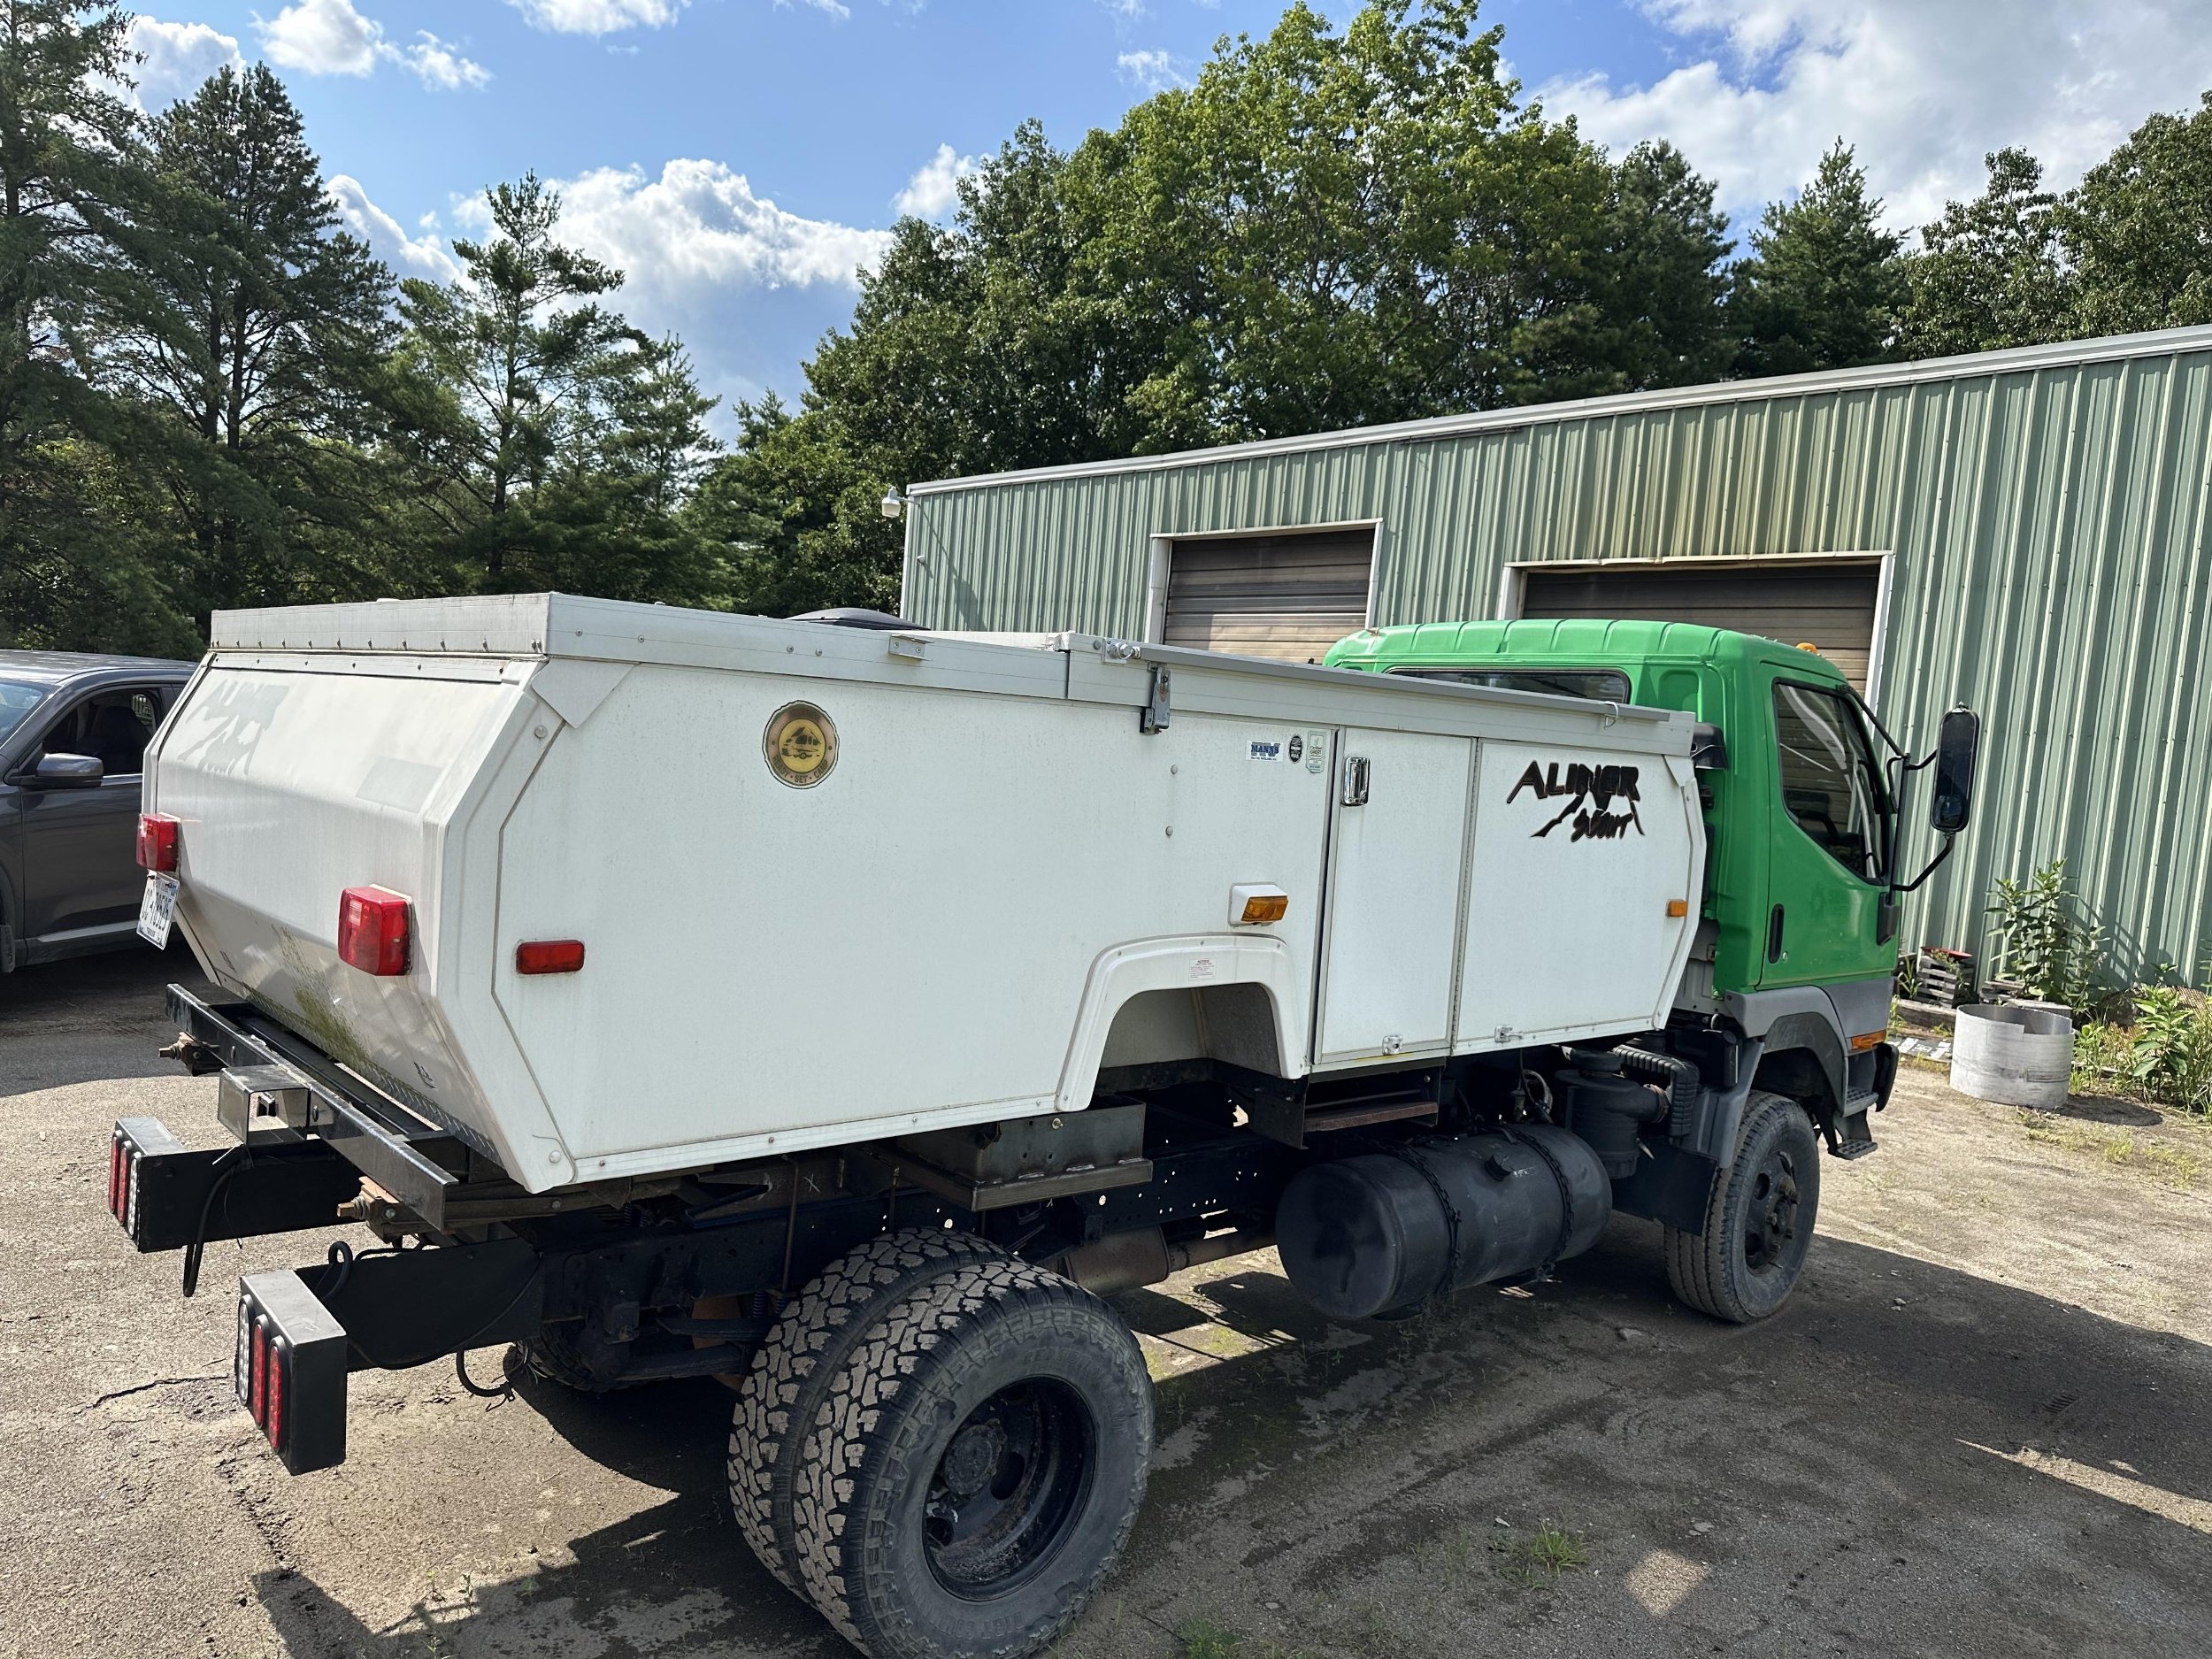
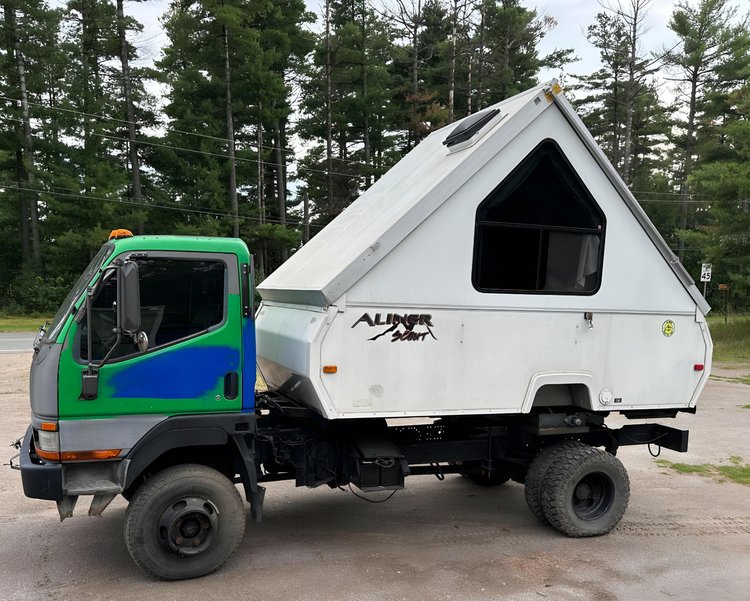
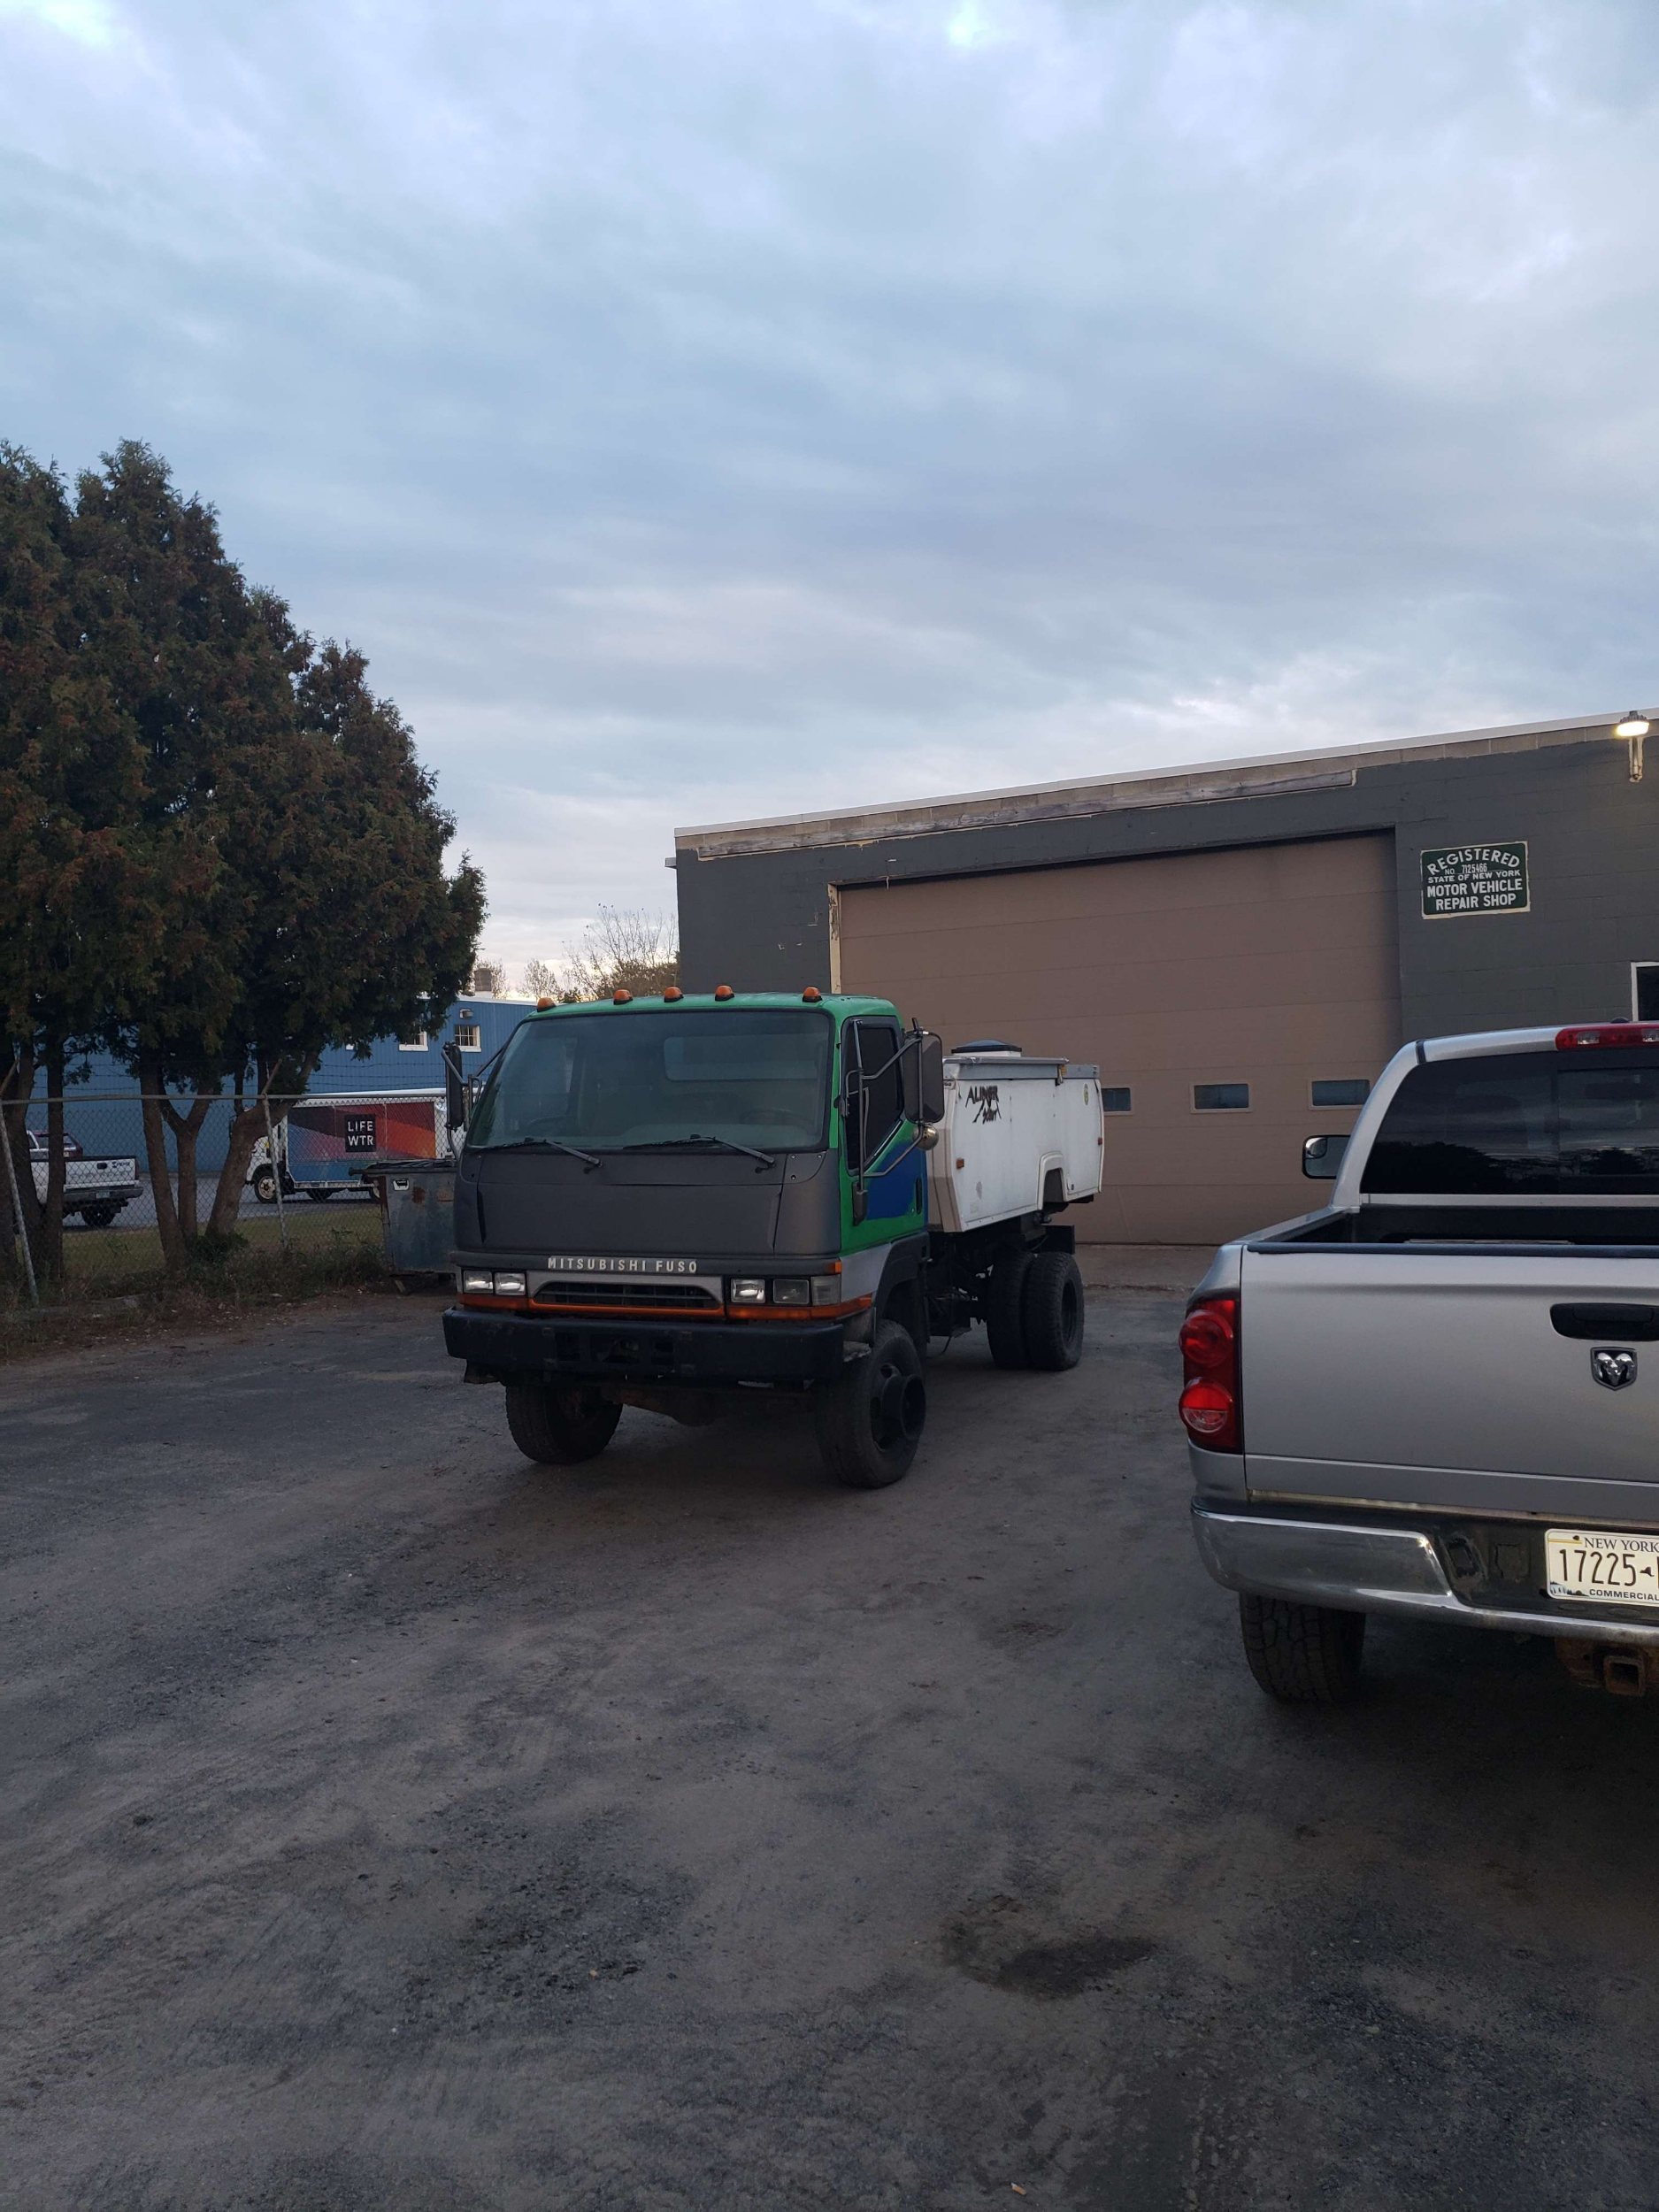
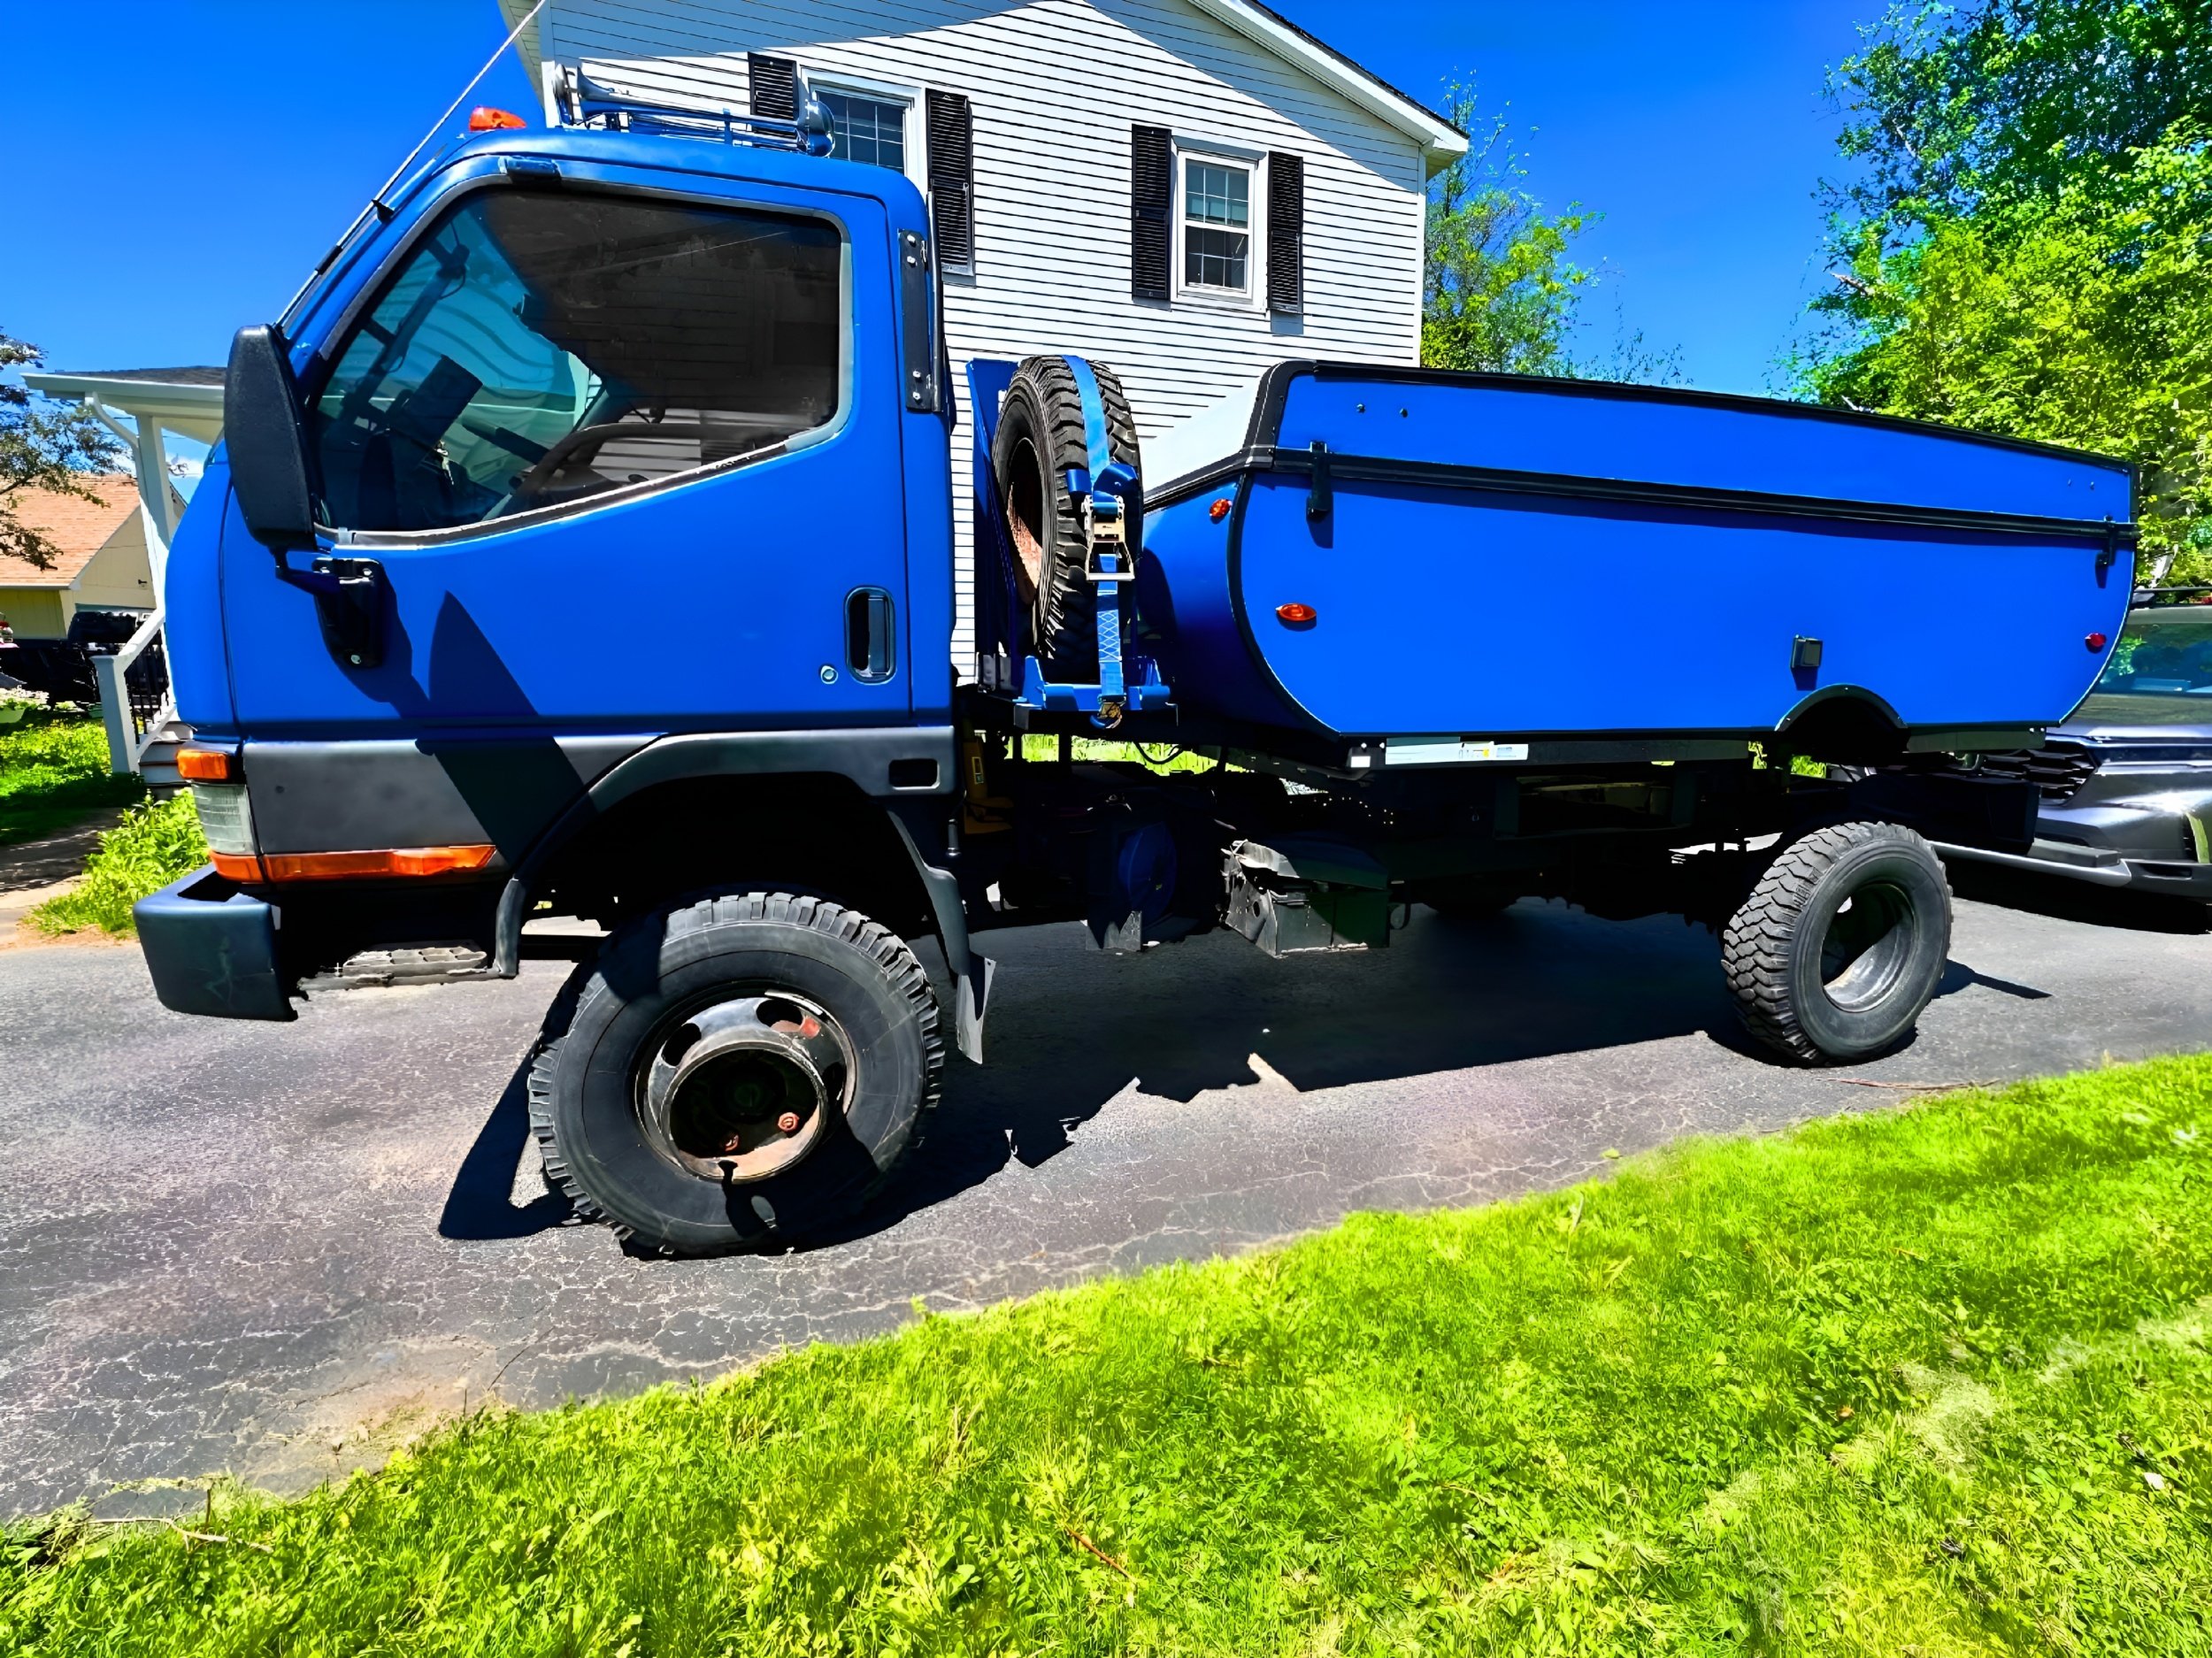
Here's a current picture of how Dackwagon looks now. The camper is mounted on the rear frame rails of the truck, but completely separated from both vibration and torsional stress of the truck's frame, (which twists to maintain axle articulation, which is what keeps the tires ON the trail).
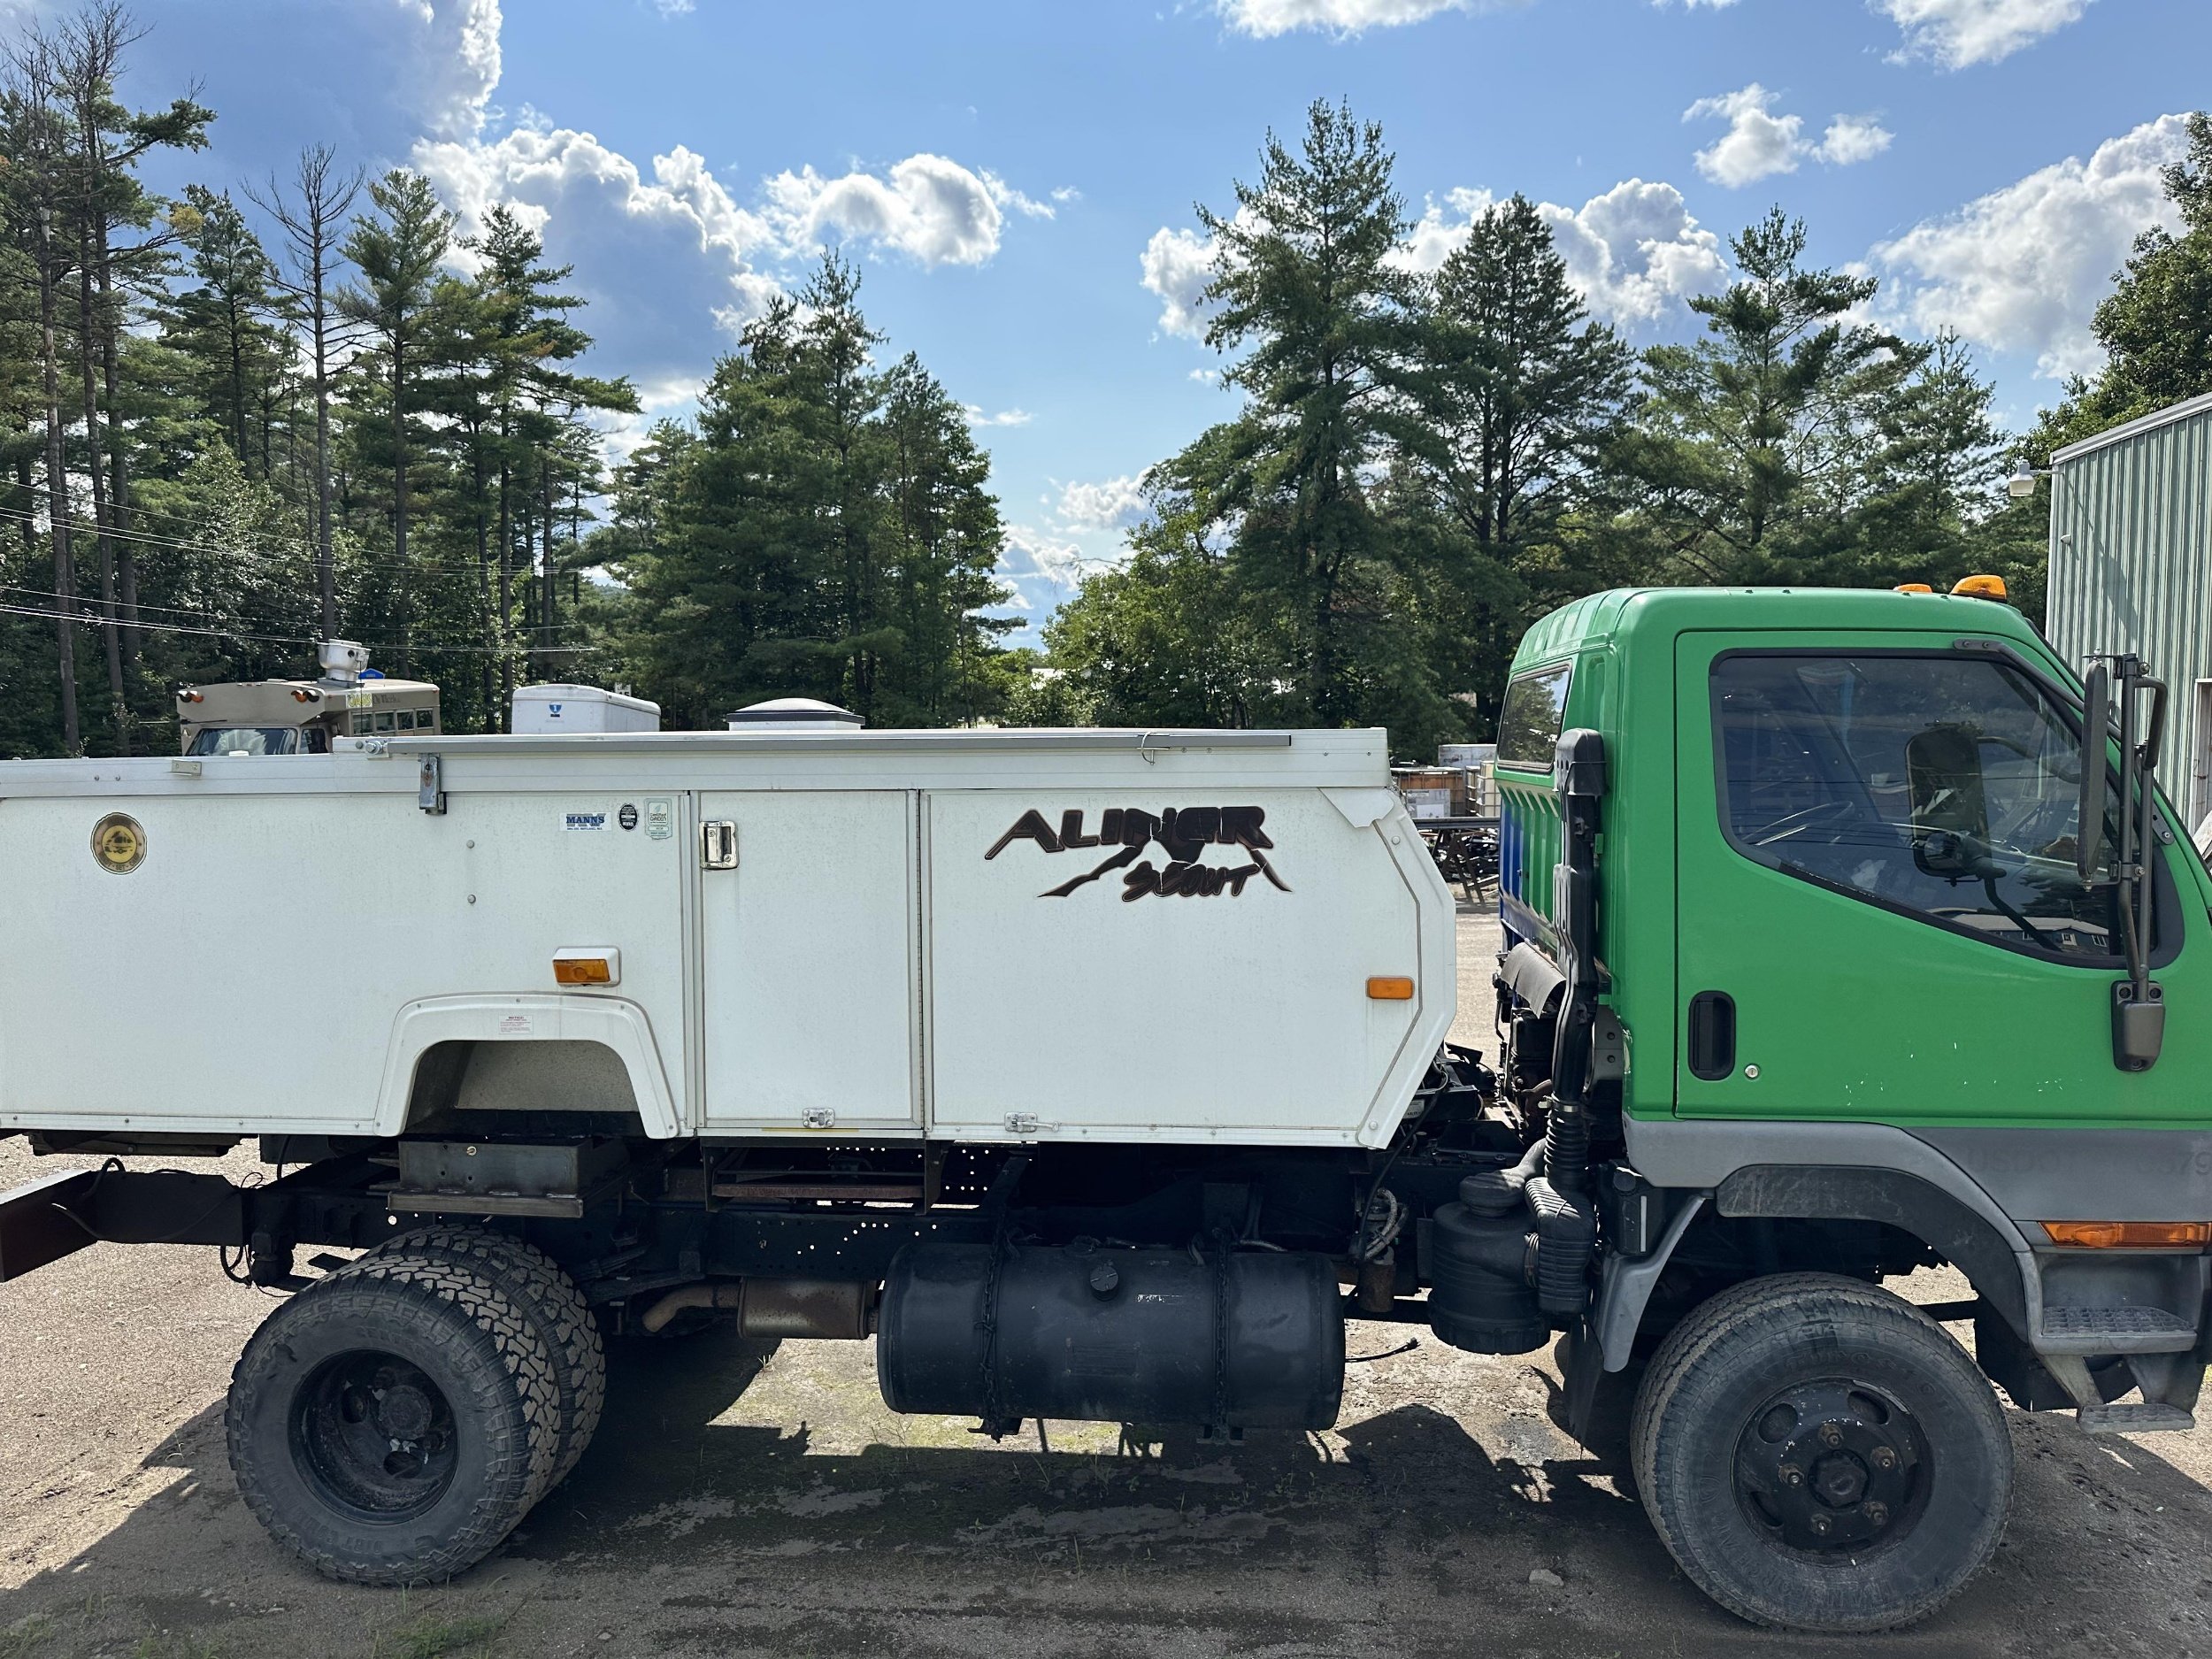
The camper.
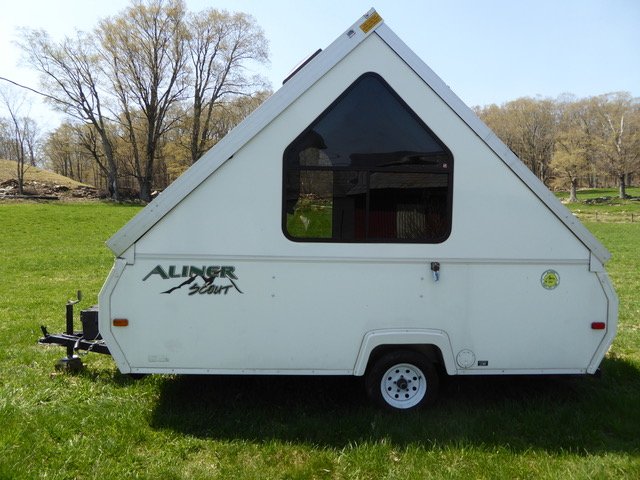
Here's some pictures of the camper. It's an Aliner Scout hard-side pop-up camper. I wanted hard walls for the Cape Cod National Seashore. In order to get an OSV permit, (oversand vehicle), you need to have certain items to get yourself unstuck. In order to camp overnight on the beach, you need to be self contained and have an enclosed camper. In other words, no tents. They also don't allow trailers overnight on the beach. Also, I didn't want the top of the camper sticking up above the truck's cab. It's already as aerodynamic as a brick, so why add to it? By traveling with the camper folded down, it also protects it from branches on the dirt roads of northern NY and New England.
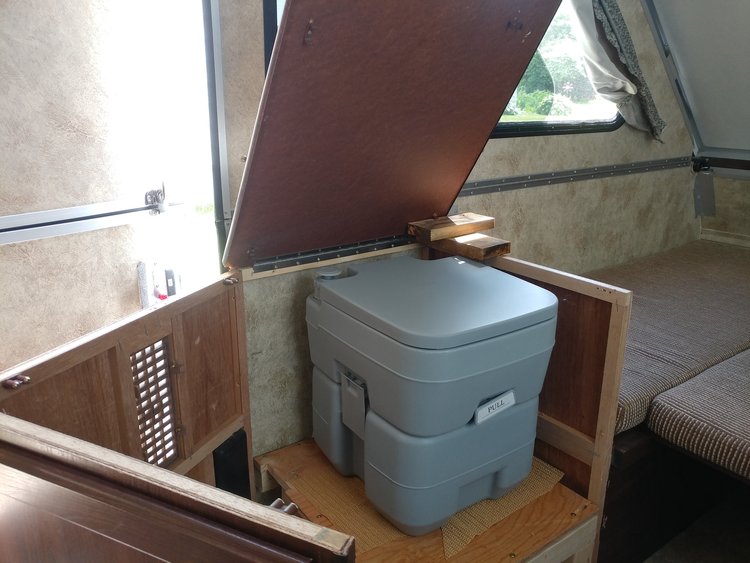
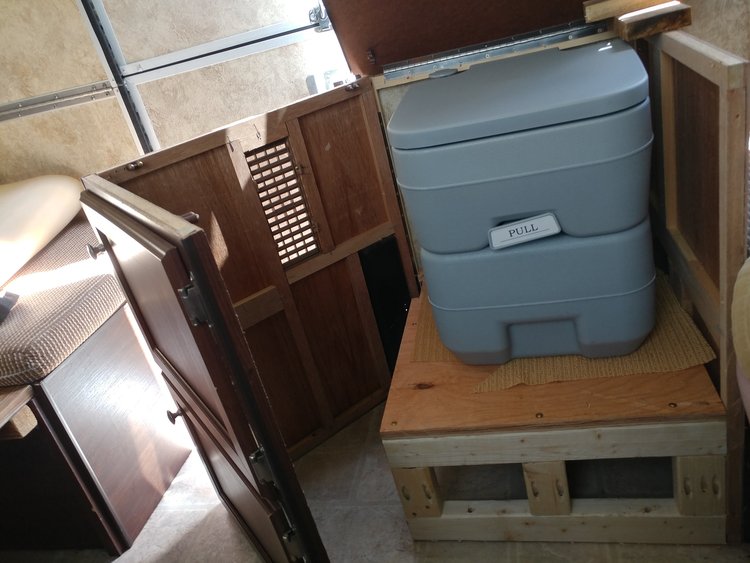
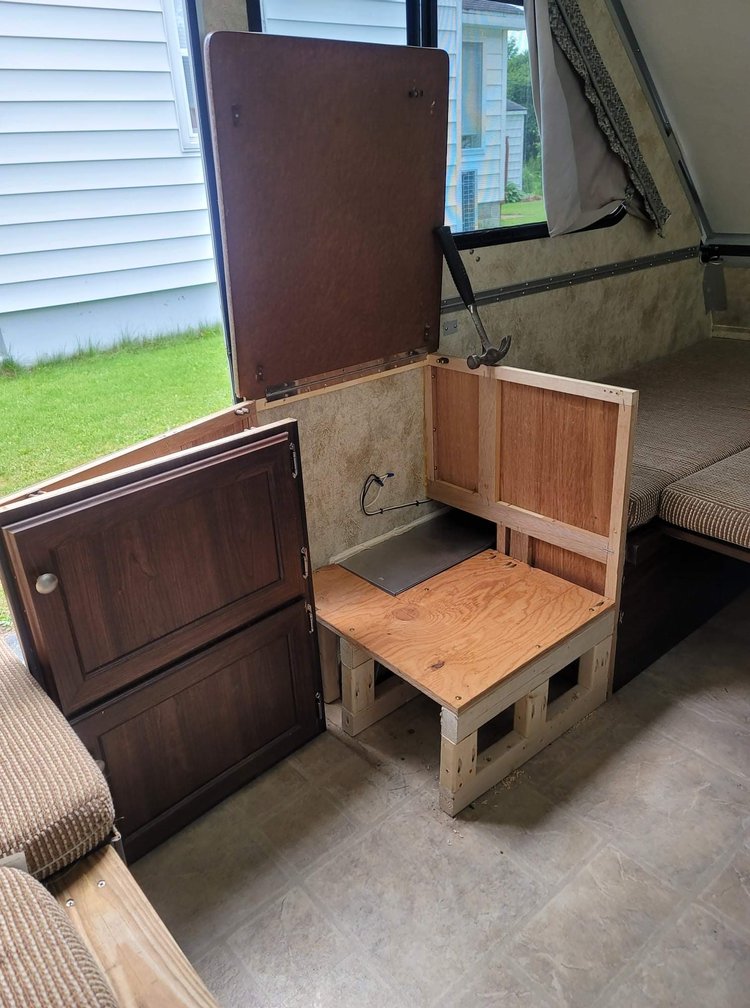
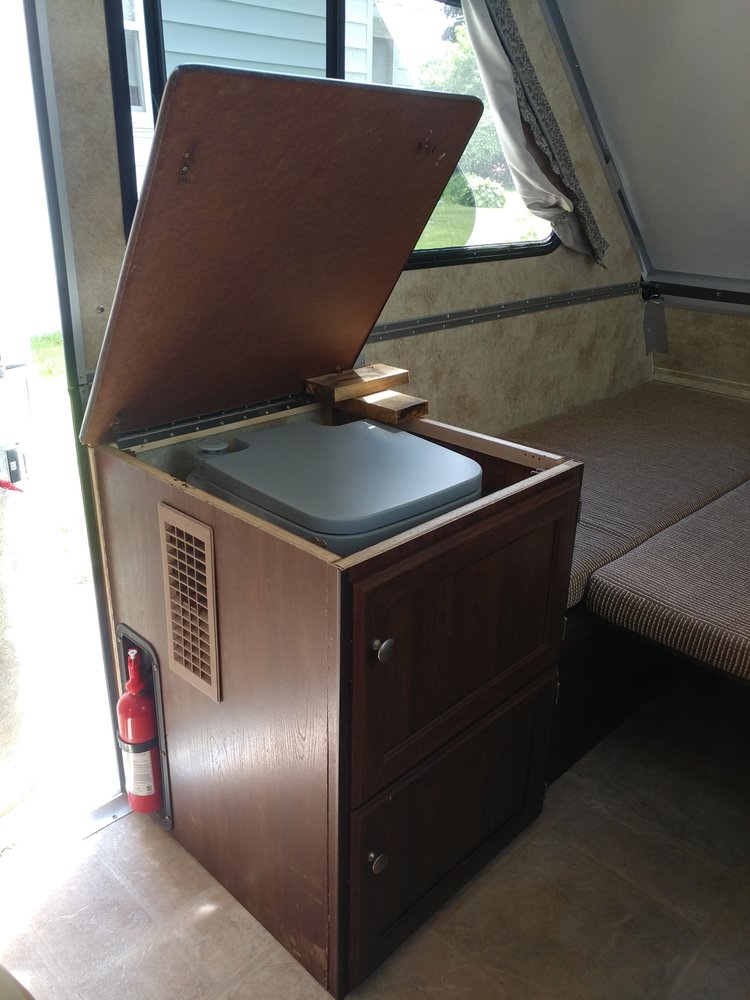
I found it in Vermont, and haggled the owner down to $2800, a bargain in the covid-driven vehicle prices these days. Below you'll find original pictures of the camper from the Craigslist add, pictures of the custom folding potty cabinet, and some pics of camping at Ausable Point State Park, (our favorite campground).
On to the pics!

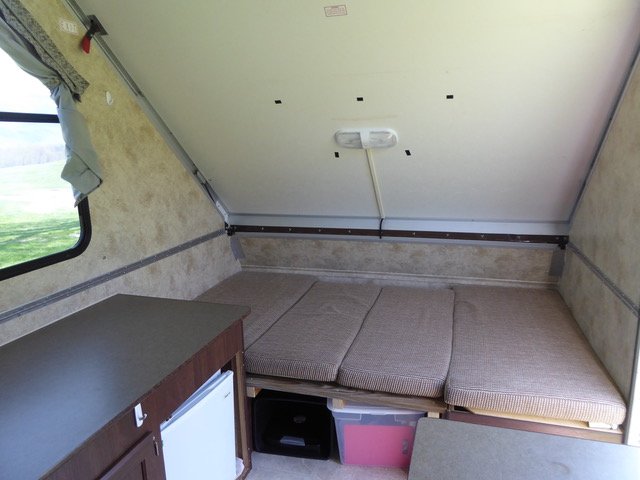


Here's a little gif I found online of how the Aliner raises and lowers. First, the two roof panels lift up to make the peak, then the A walls lift up.
Inside there are four little black flip-levers that lock it all in place. Really simple design. There are bungie cords that connect the two roof panels, and various shapes of open and closed cell foam strips at all the seams, all easily replaceable.

First glimpse.
I found a line drawing of a newer model of the Fuso 4x4 truck. The cab shape is a little different, but dimensions are the same.
I added a black and white pic of an Aliner using Picsart, then added the colored bits to hash out what I wanted. Shortened the trailer tongue, drew in the mounts, overlayed an aluminum ladder to represent the slide-out stairs we'll be using, and bingo! Dackwagon was conceived.

First Mock-up.
I was lucky to fine a good sideview pic of the same year truck, and a good pic of an Aliner. I didn't try to recreate any mounts in this one, just tried to get relative dimensions right so I'd know roughly what it was gonna look like.
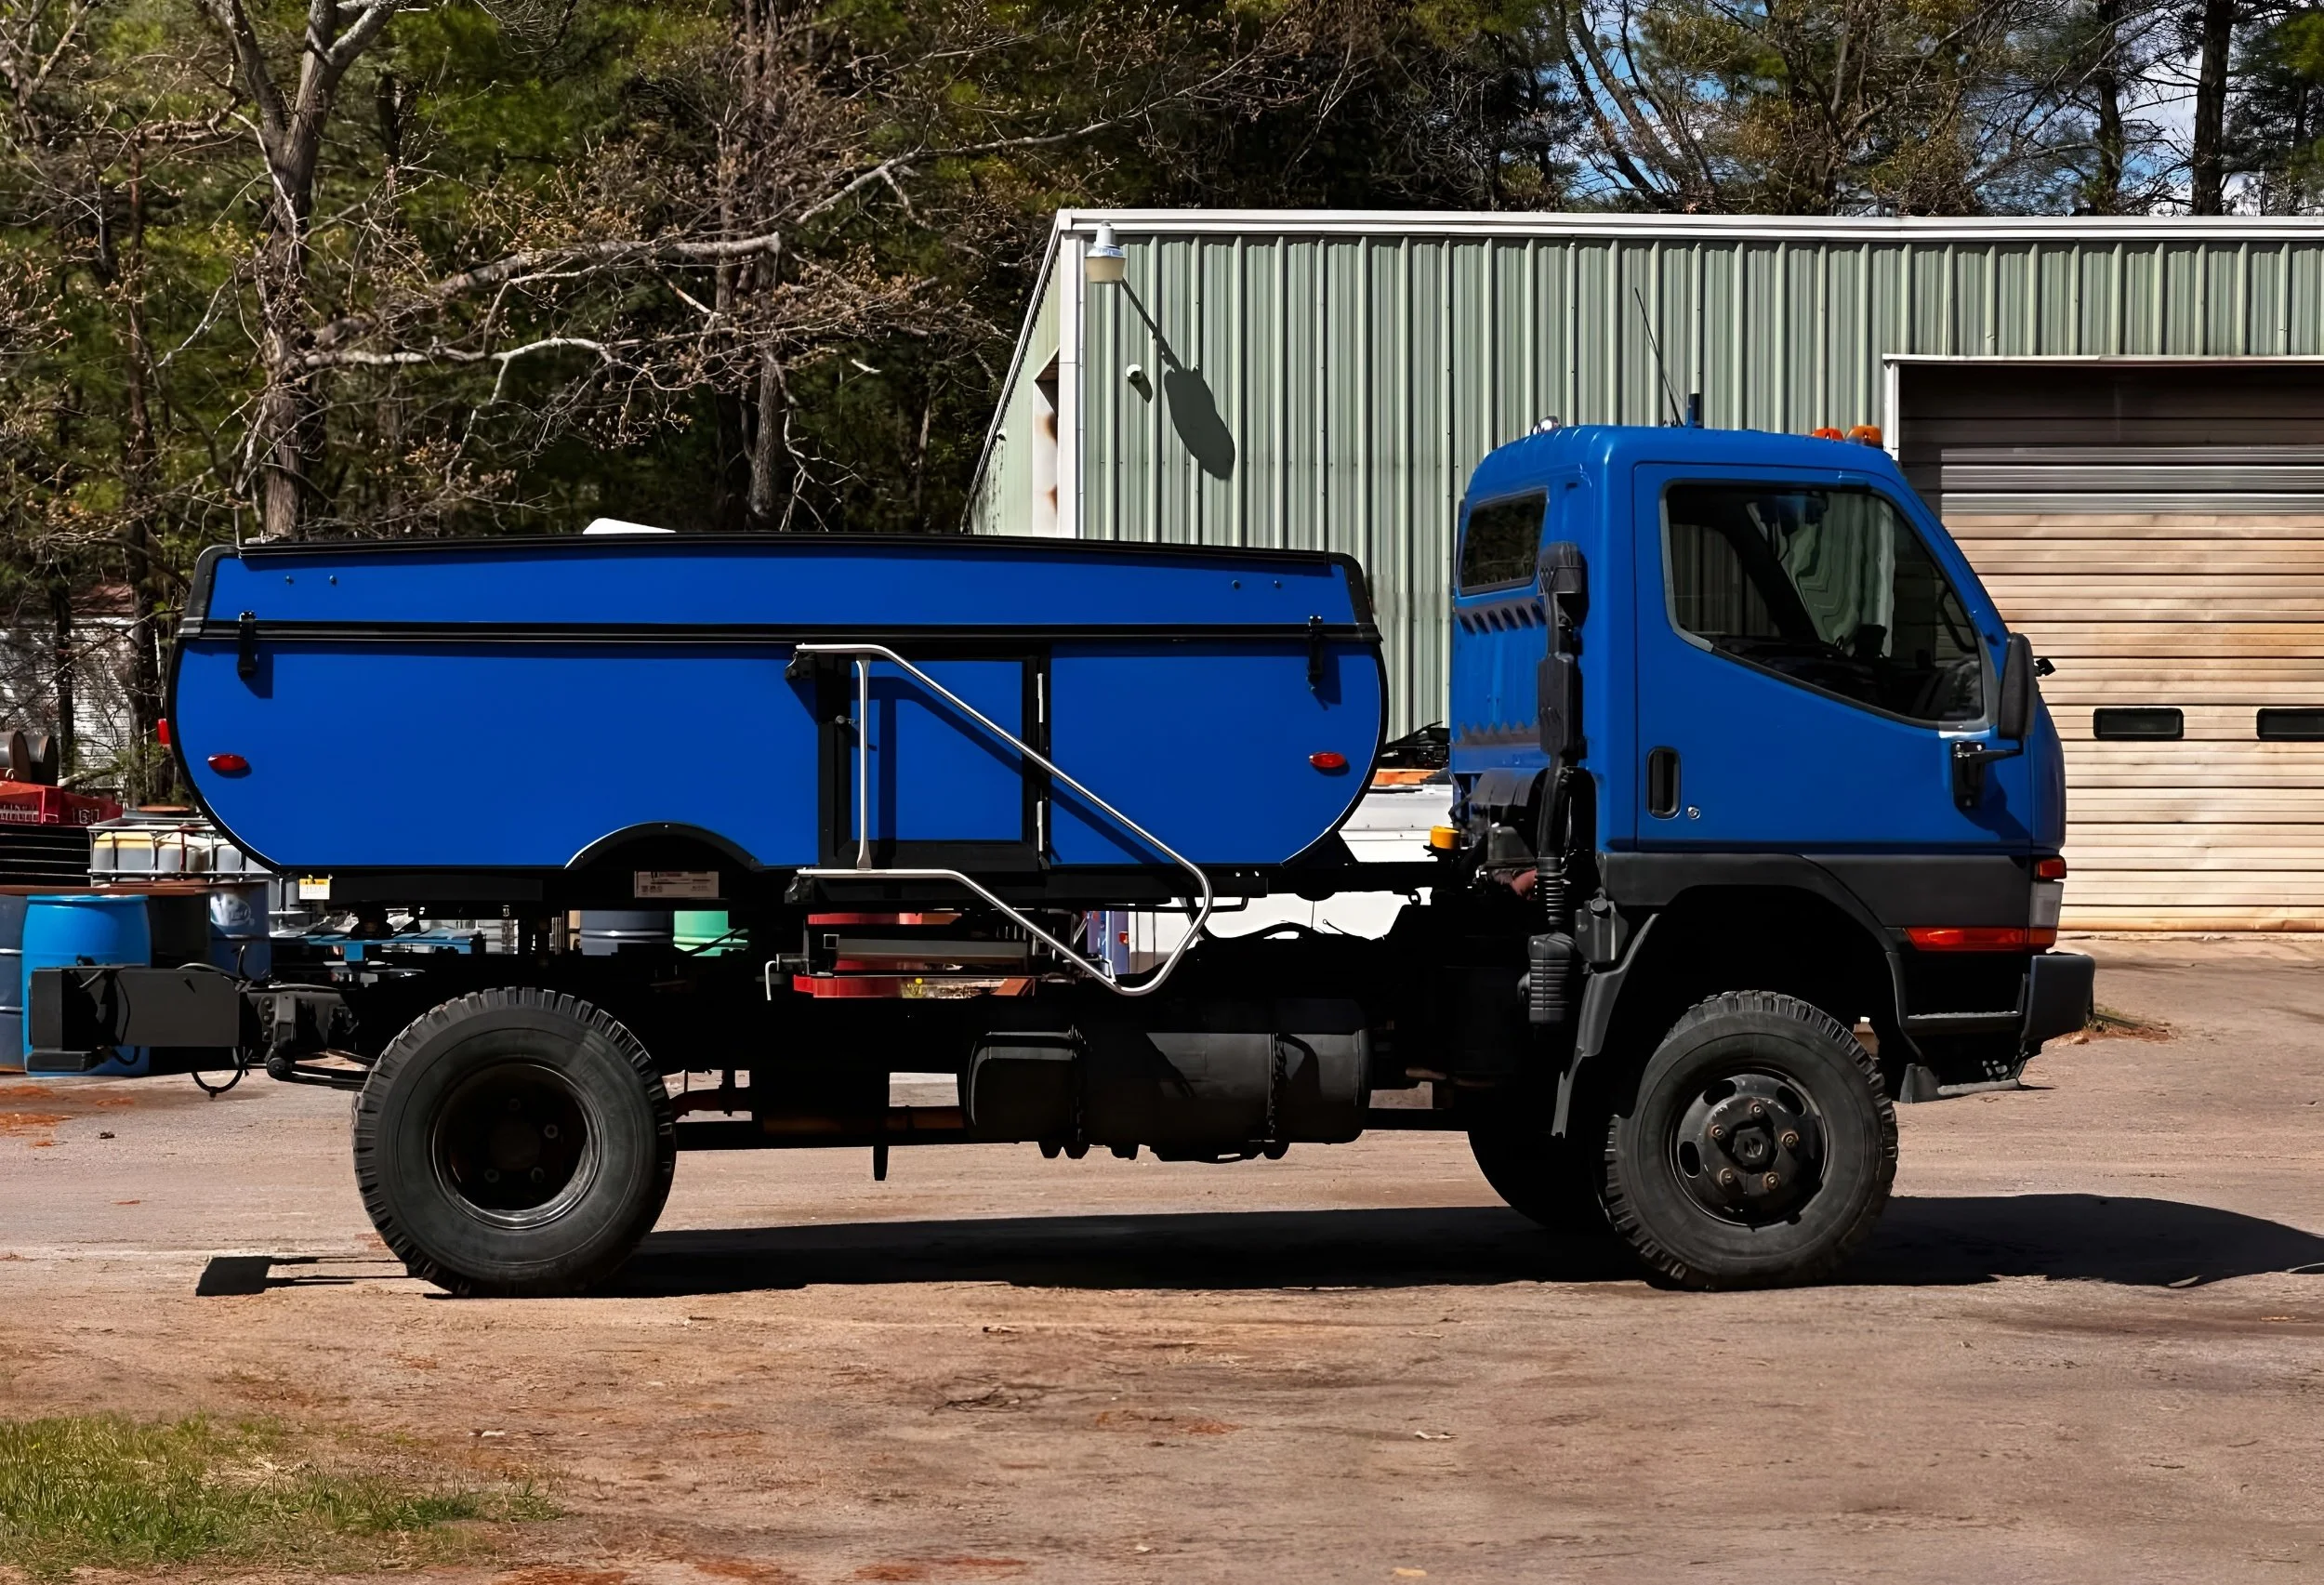
As you can see in the top pic, there's a drop in the Fuso frame just behind the cab. This must be accounted for when building any type of bed, (more on that below).
One of the things that always bugged me when crawling a truck through the woods on old dirt roads is having this long engine hood sticking out in front of the windshield. Always hated it. Bigger pick-ups are the worst! There's SO much wasted space sticking up right where you need to see for tire placement. In more technical rock work, you need a spotter to keep you on the right line. Madness! Not to mention it's wasted space on the truck frame itself. What IS it about the American obsession with long truck hoods!? If you're going fast in the desert, it's not as much of a hindrance. But in the woods? It's in the way.
Having driven cabover Jimmie's, (GMC), in the military, and cabover MH model Macks for UPS, I am decidedly a cabover kinda guy. NO LONG HOODS FOR ME! (Big red pillars in the bottom pic are just ideas for a roof rack that attaches to the frame, rather than adding weight to the roof panels).
Found this image on Expedition Portal. It's a website and forum dedicated to overland travel. VERY informative forum. If you're thinking of building something custom for traveling the backcountry, spent some time searching there.
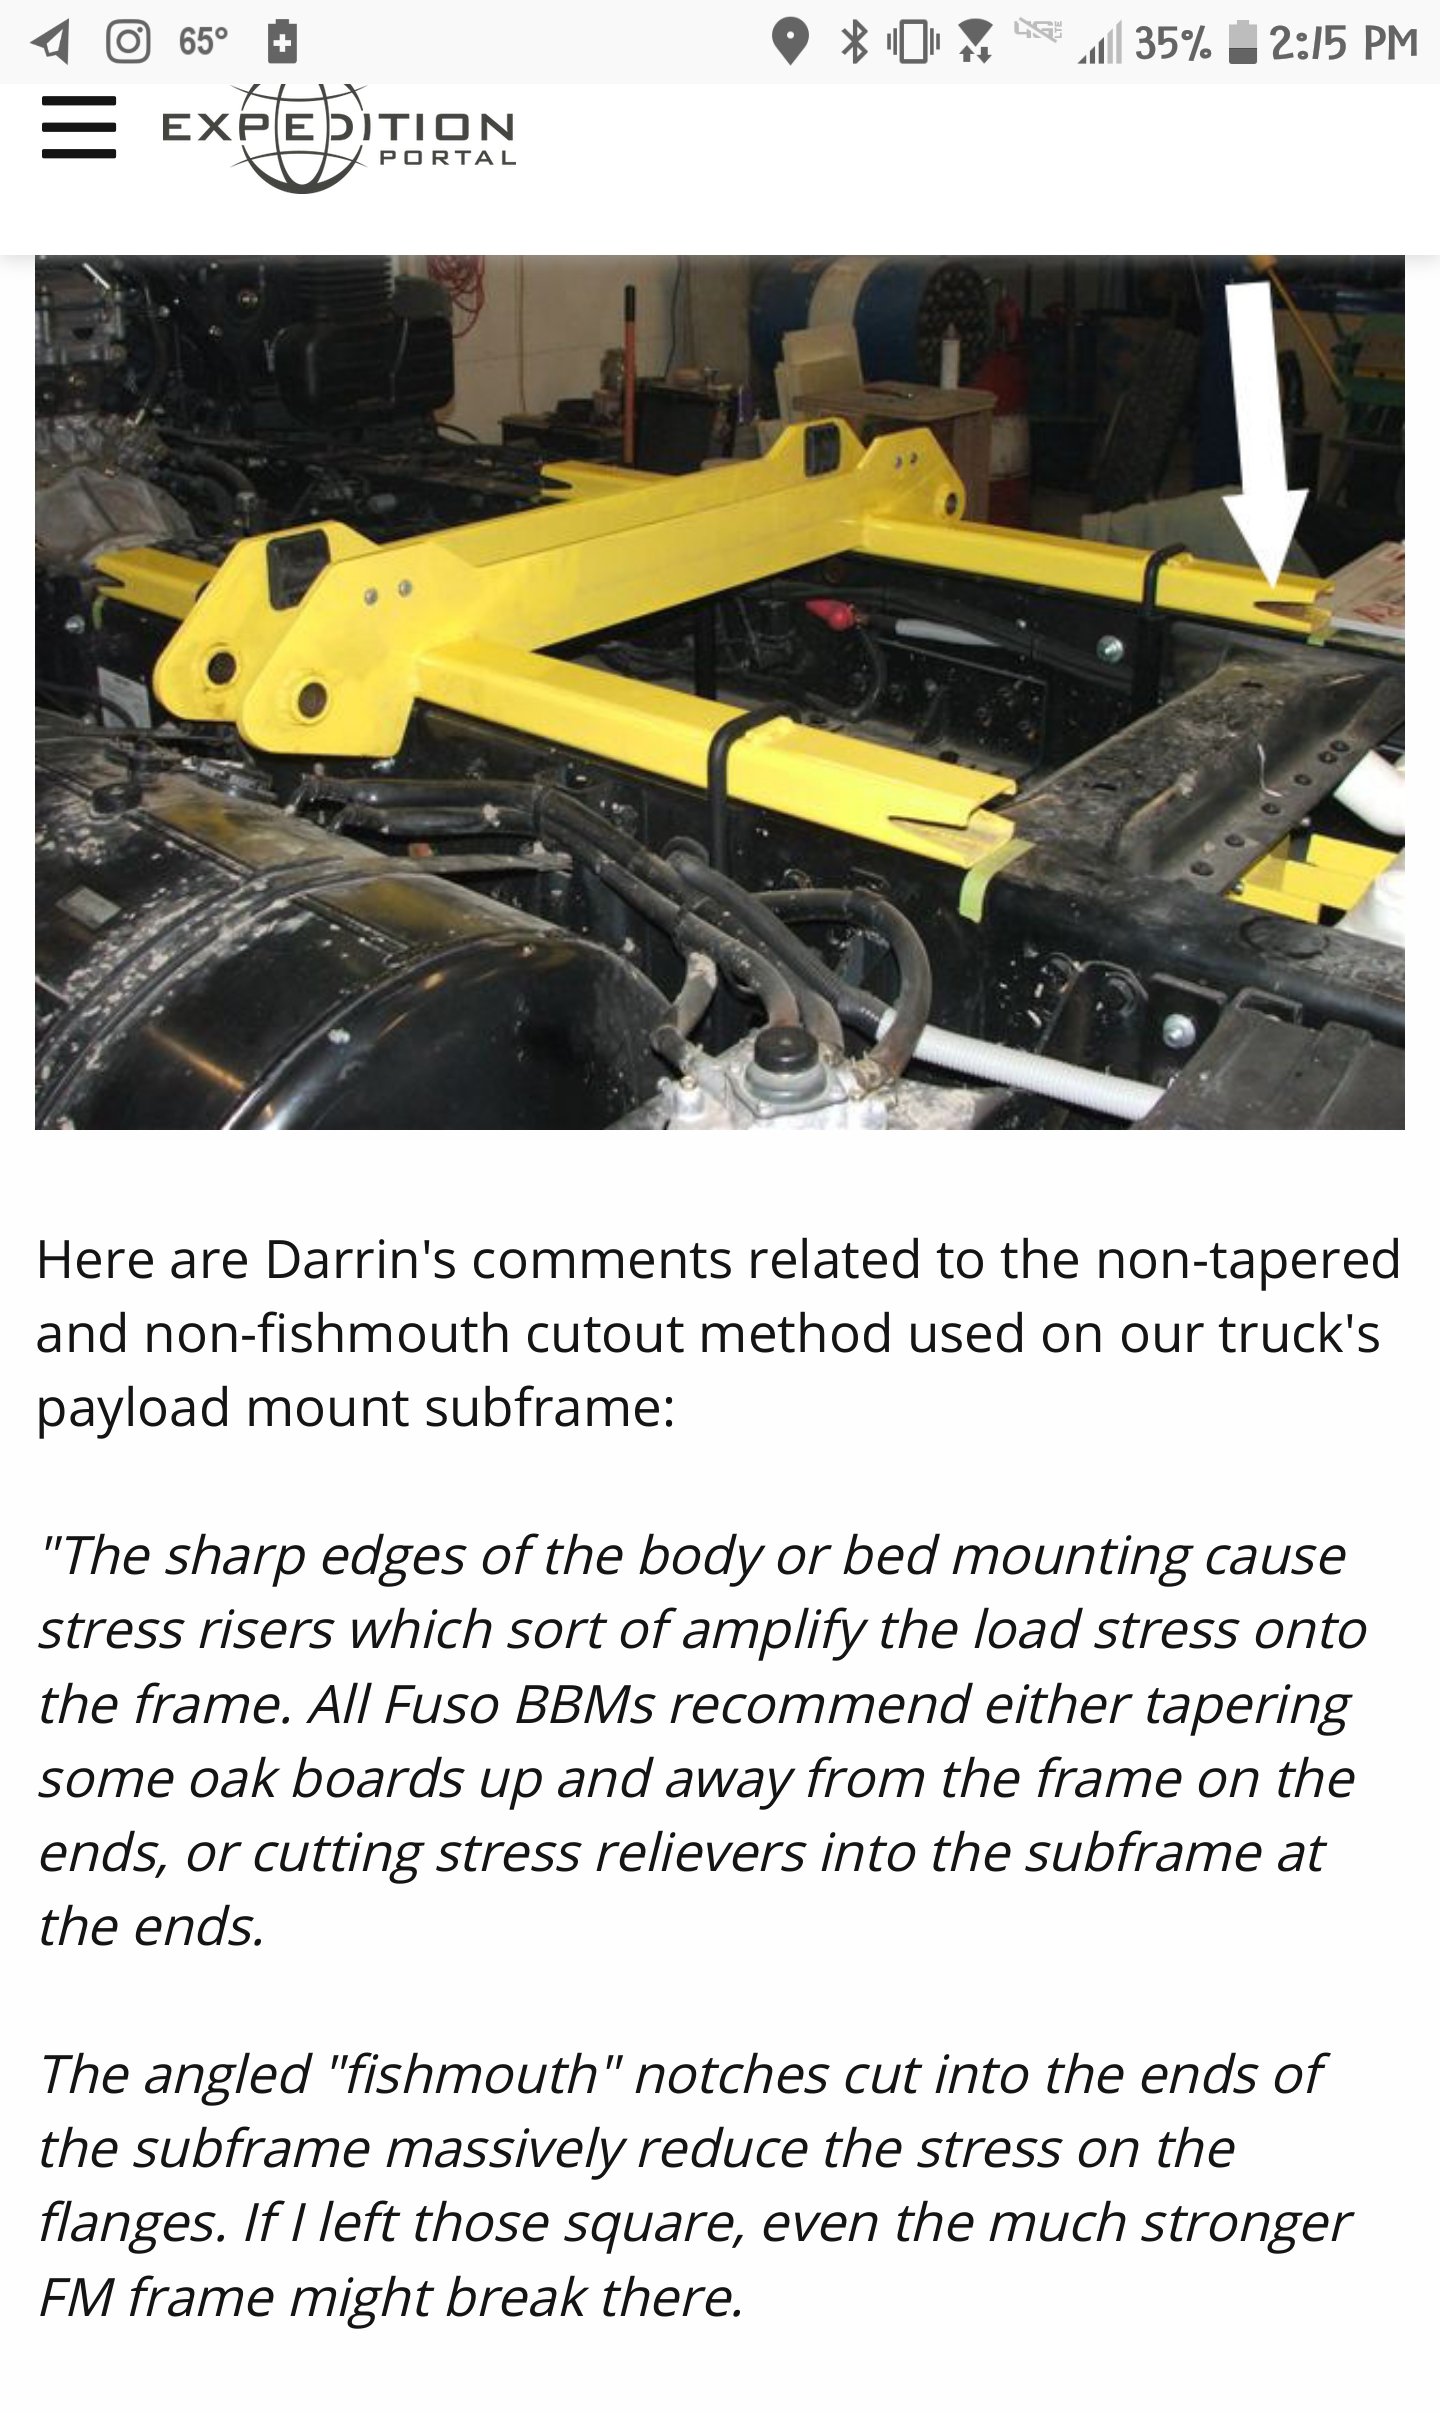
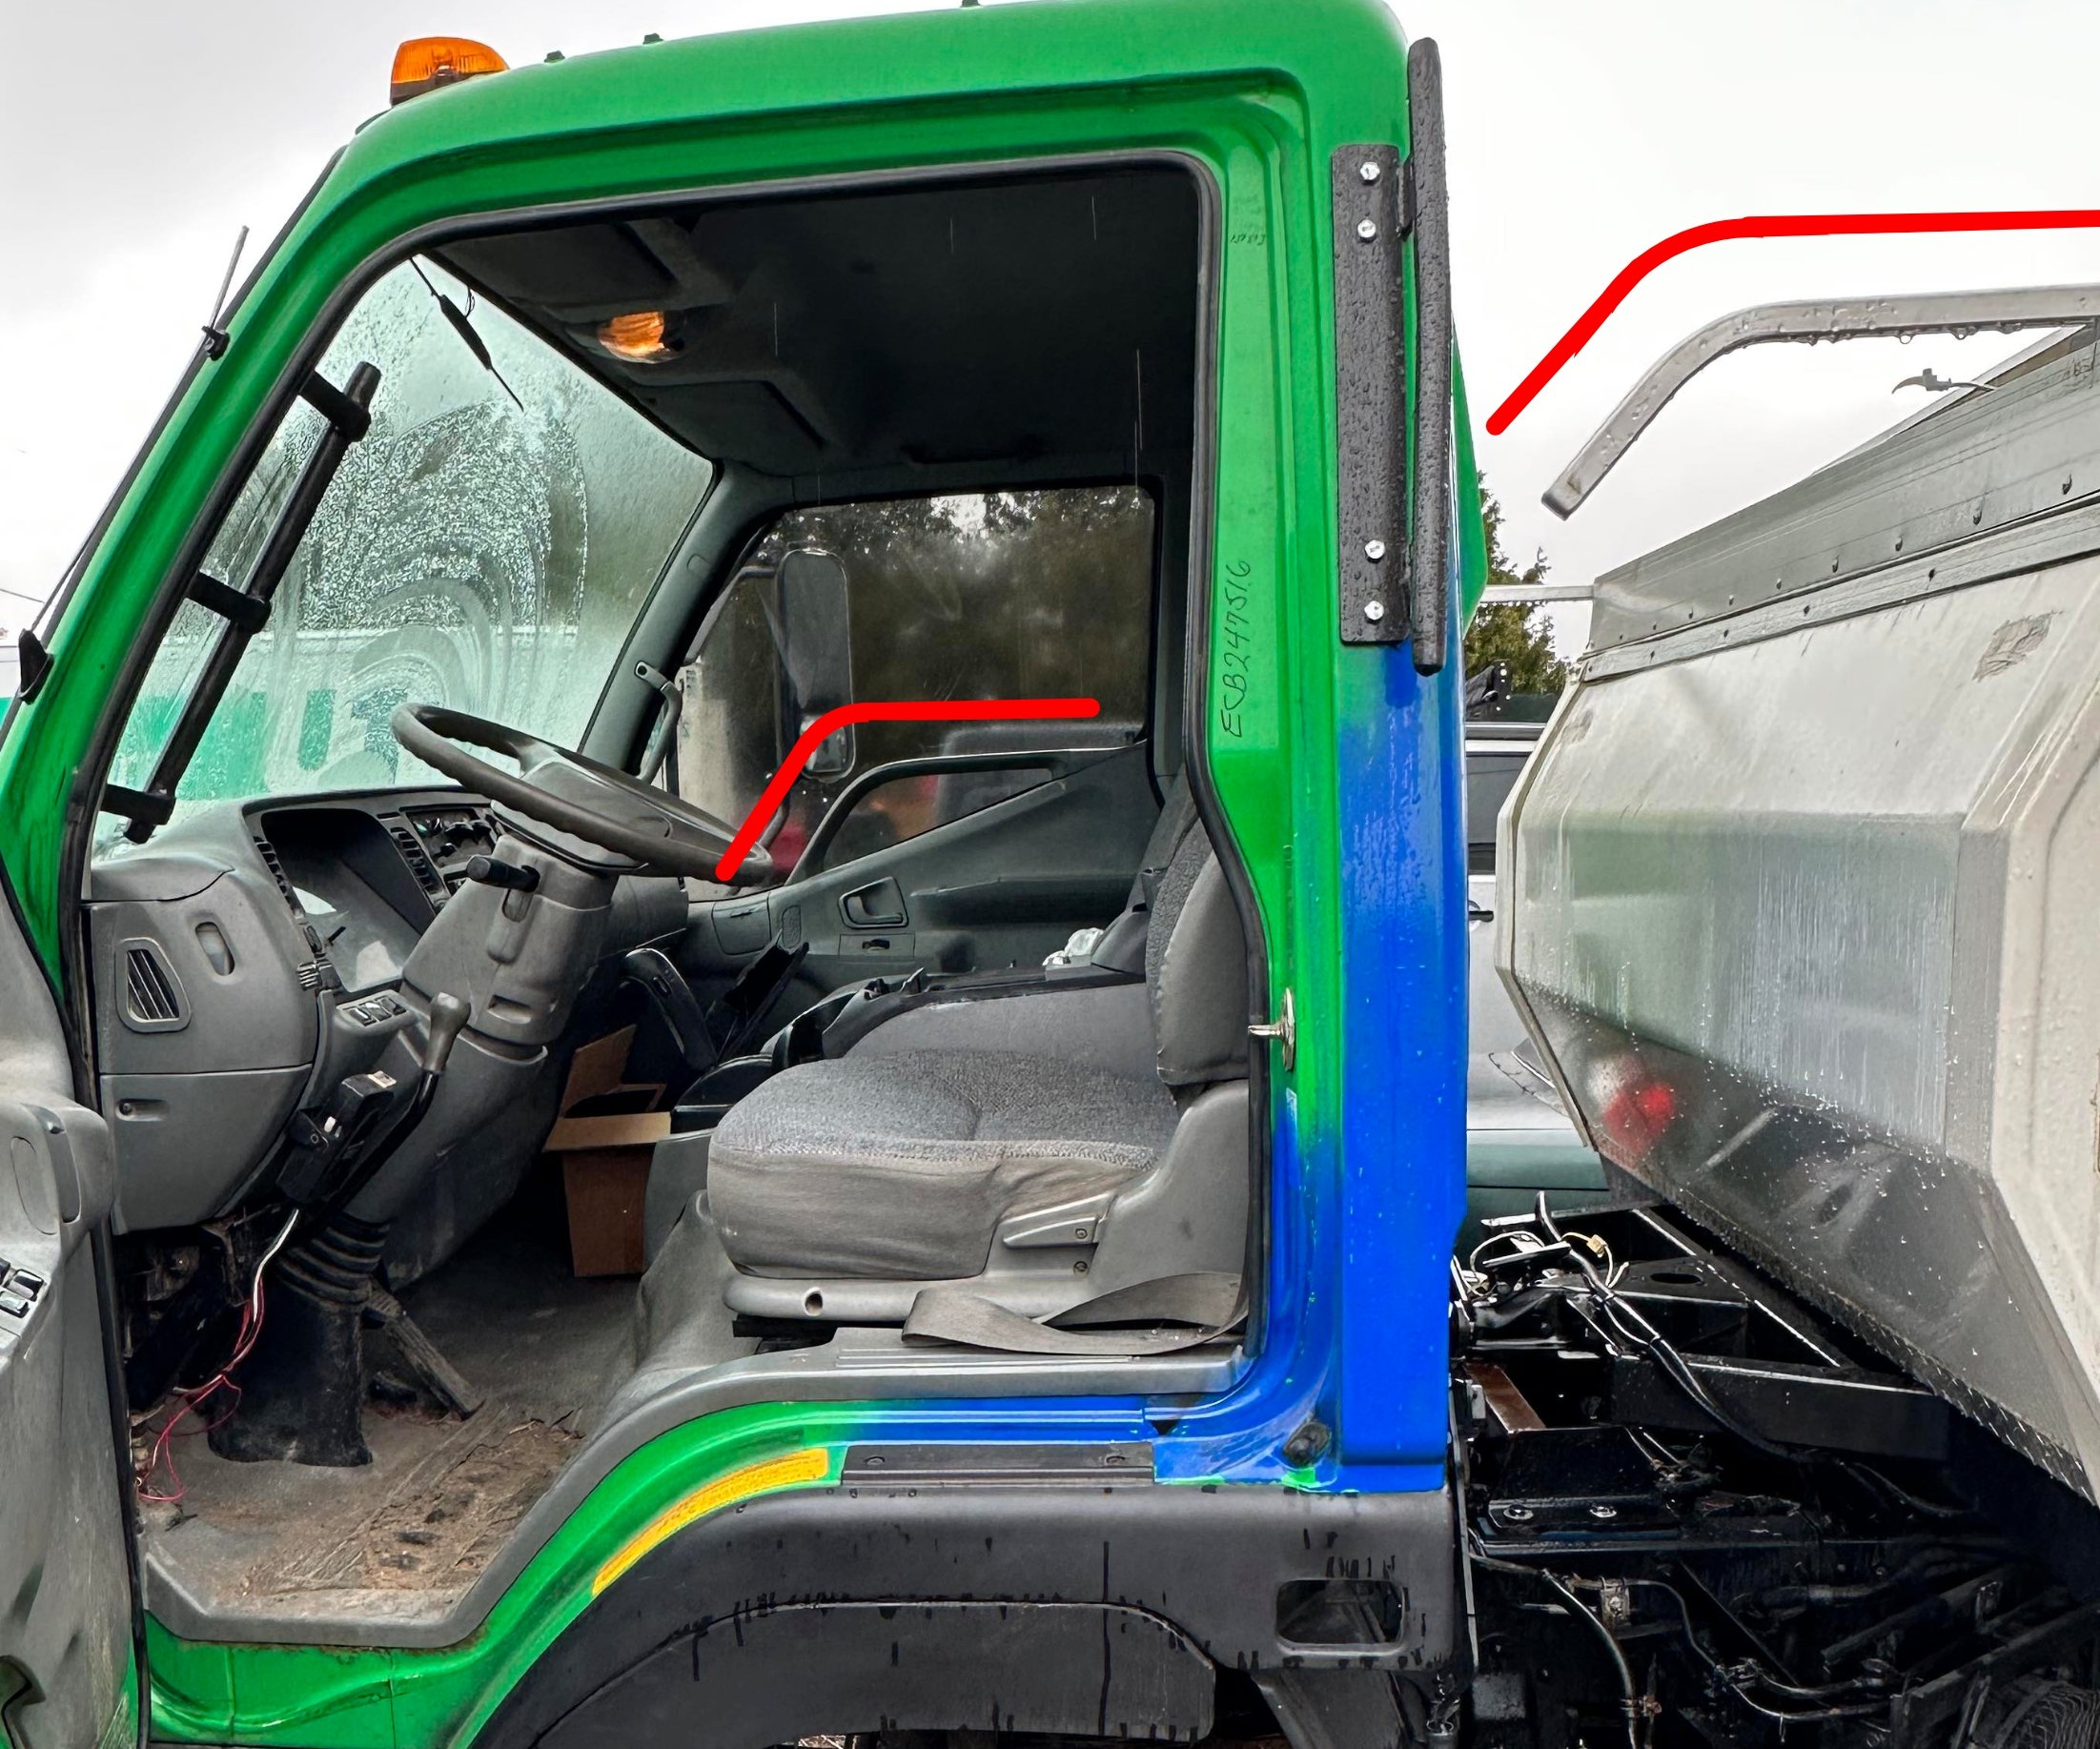
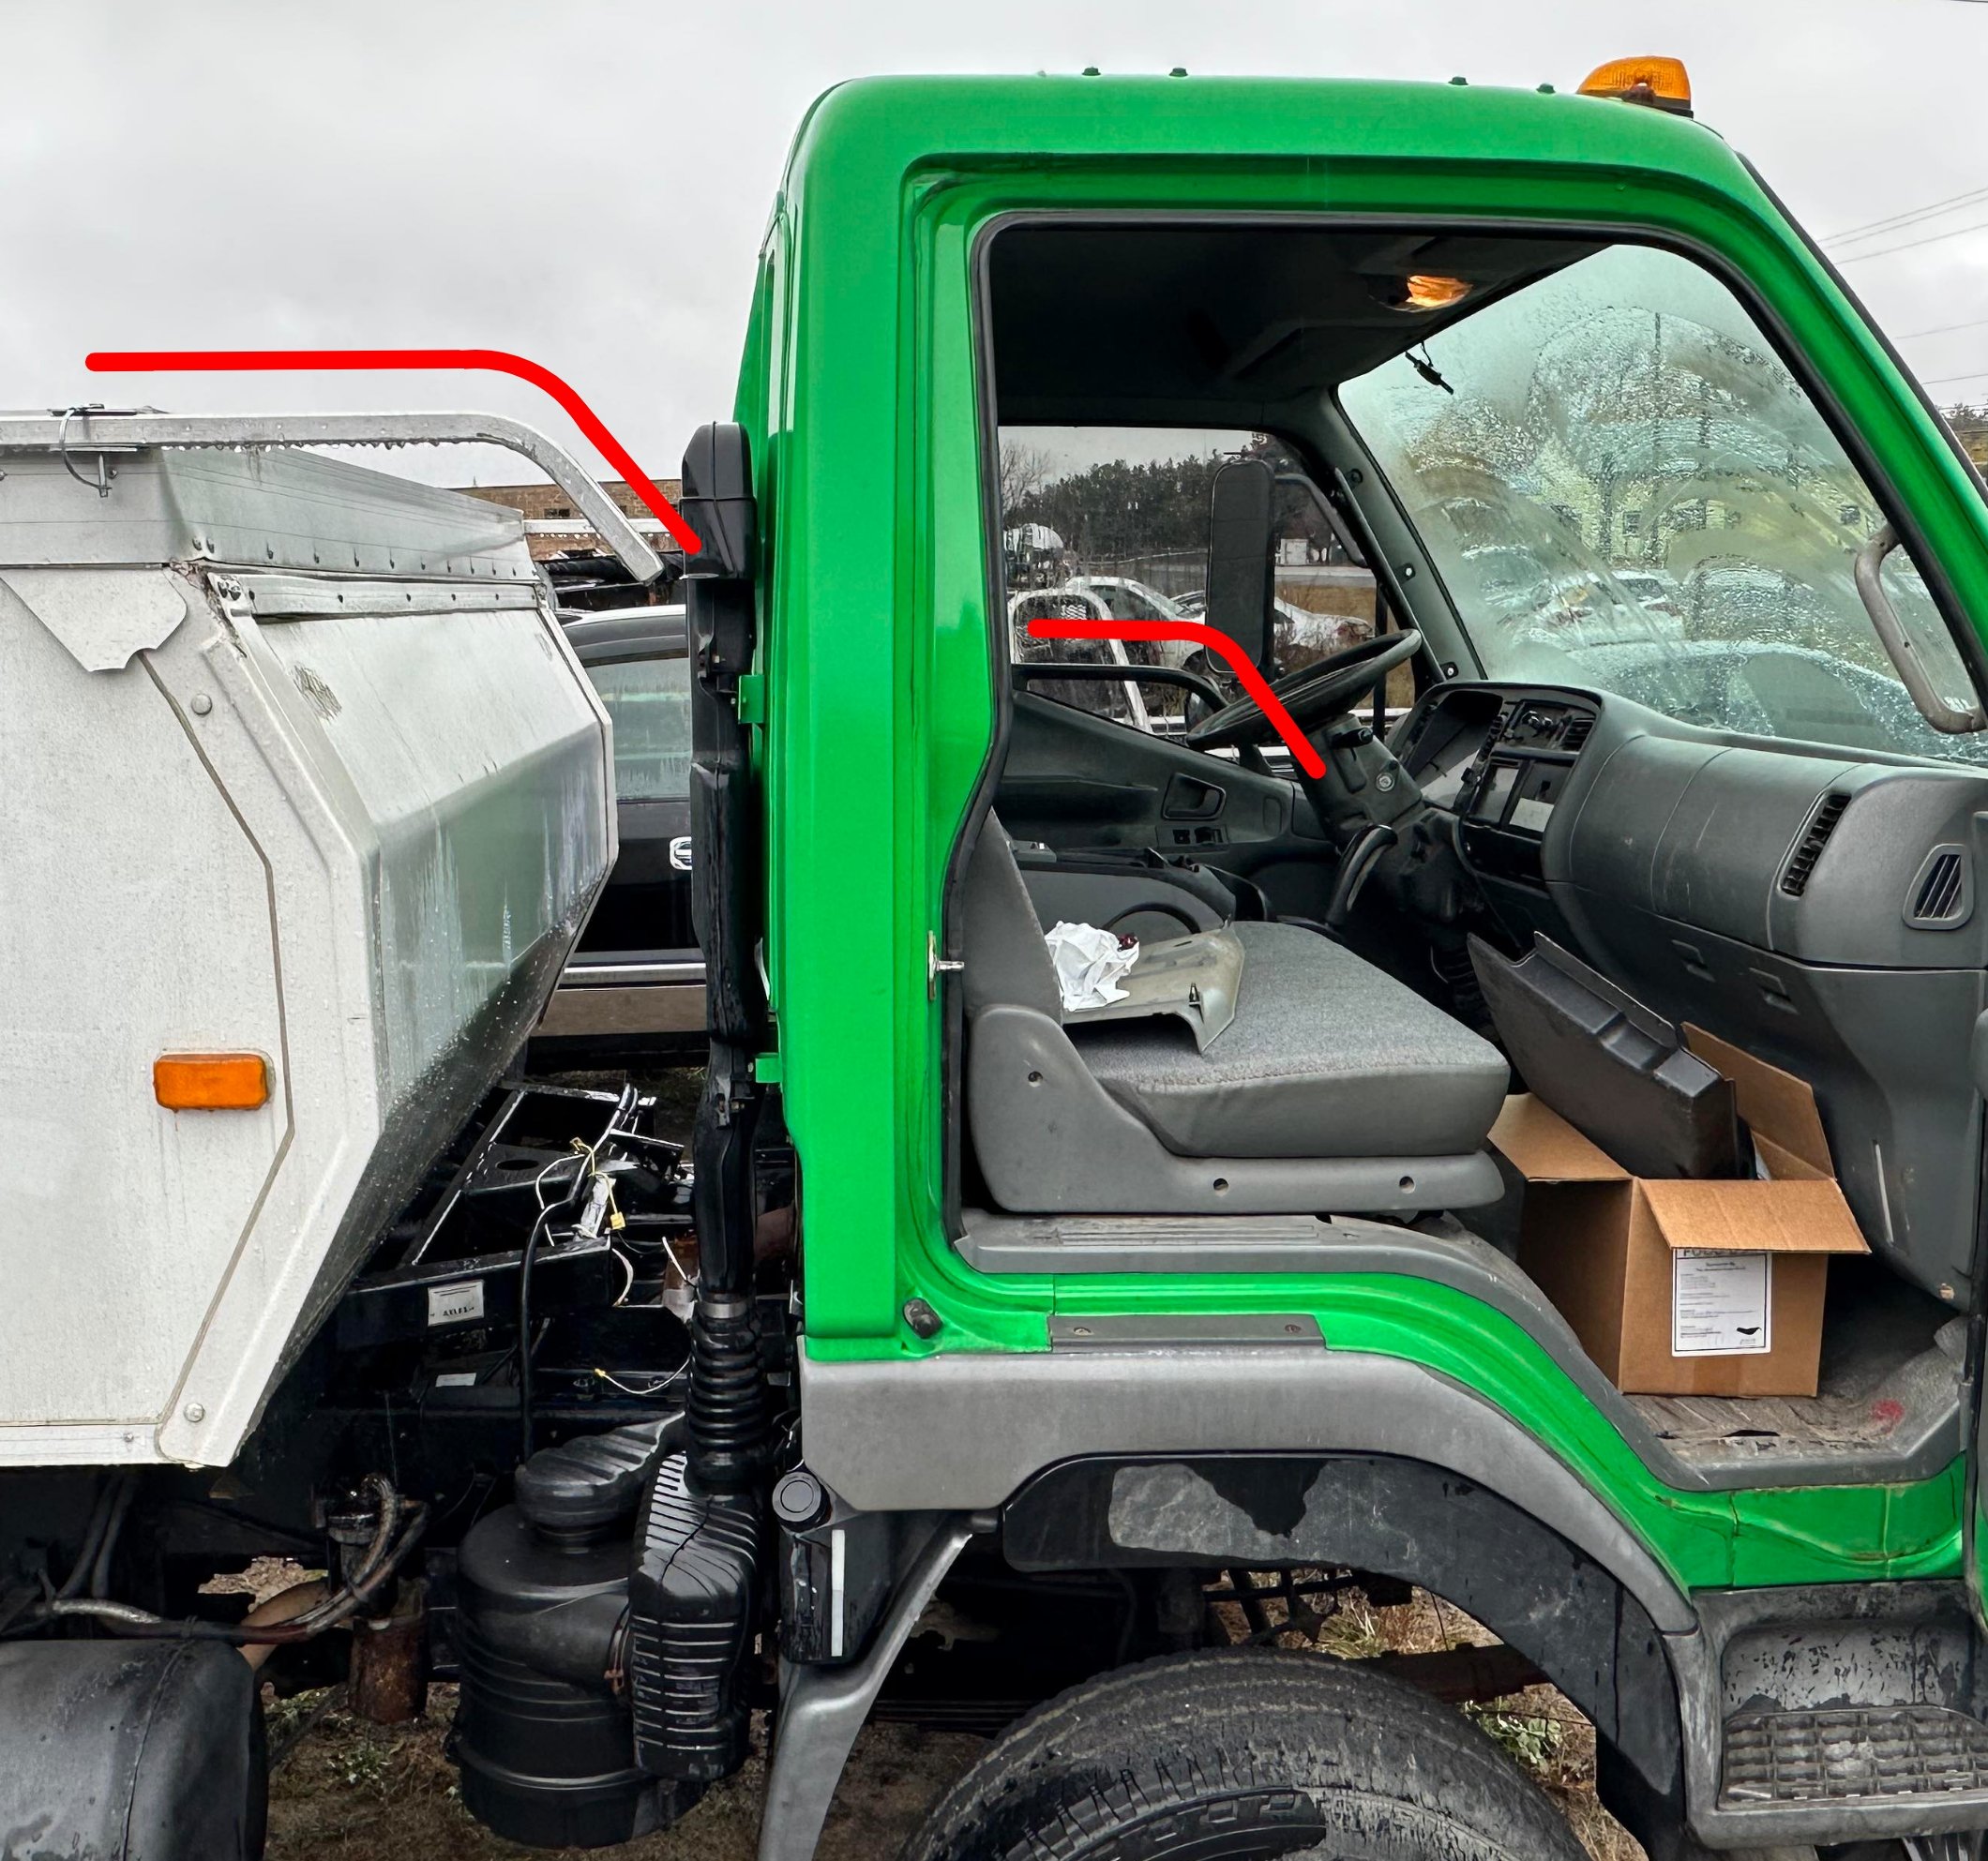
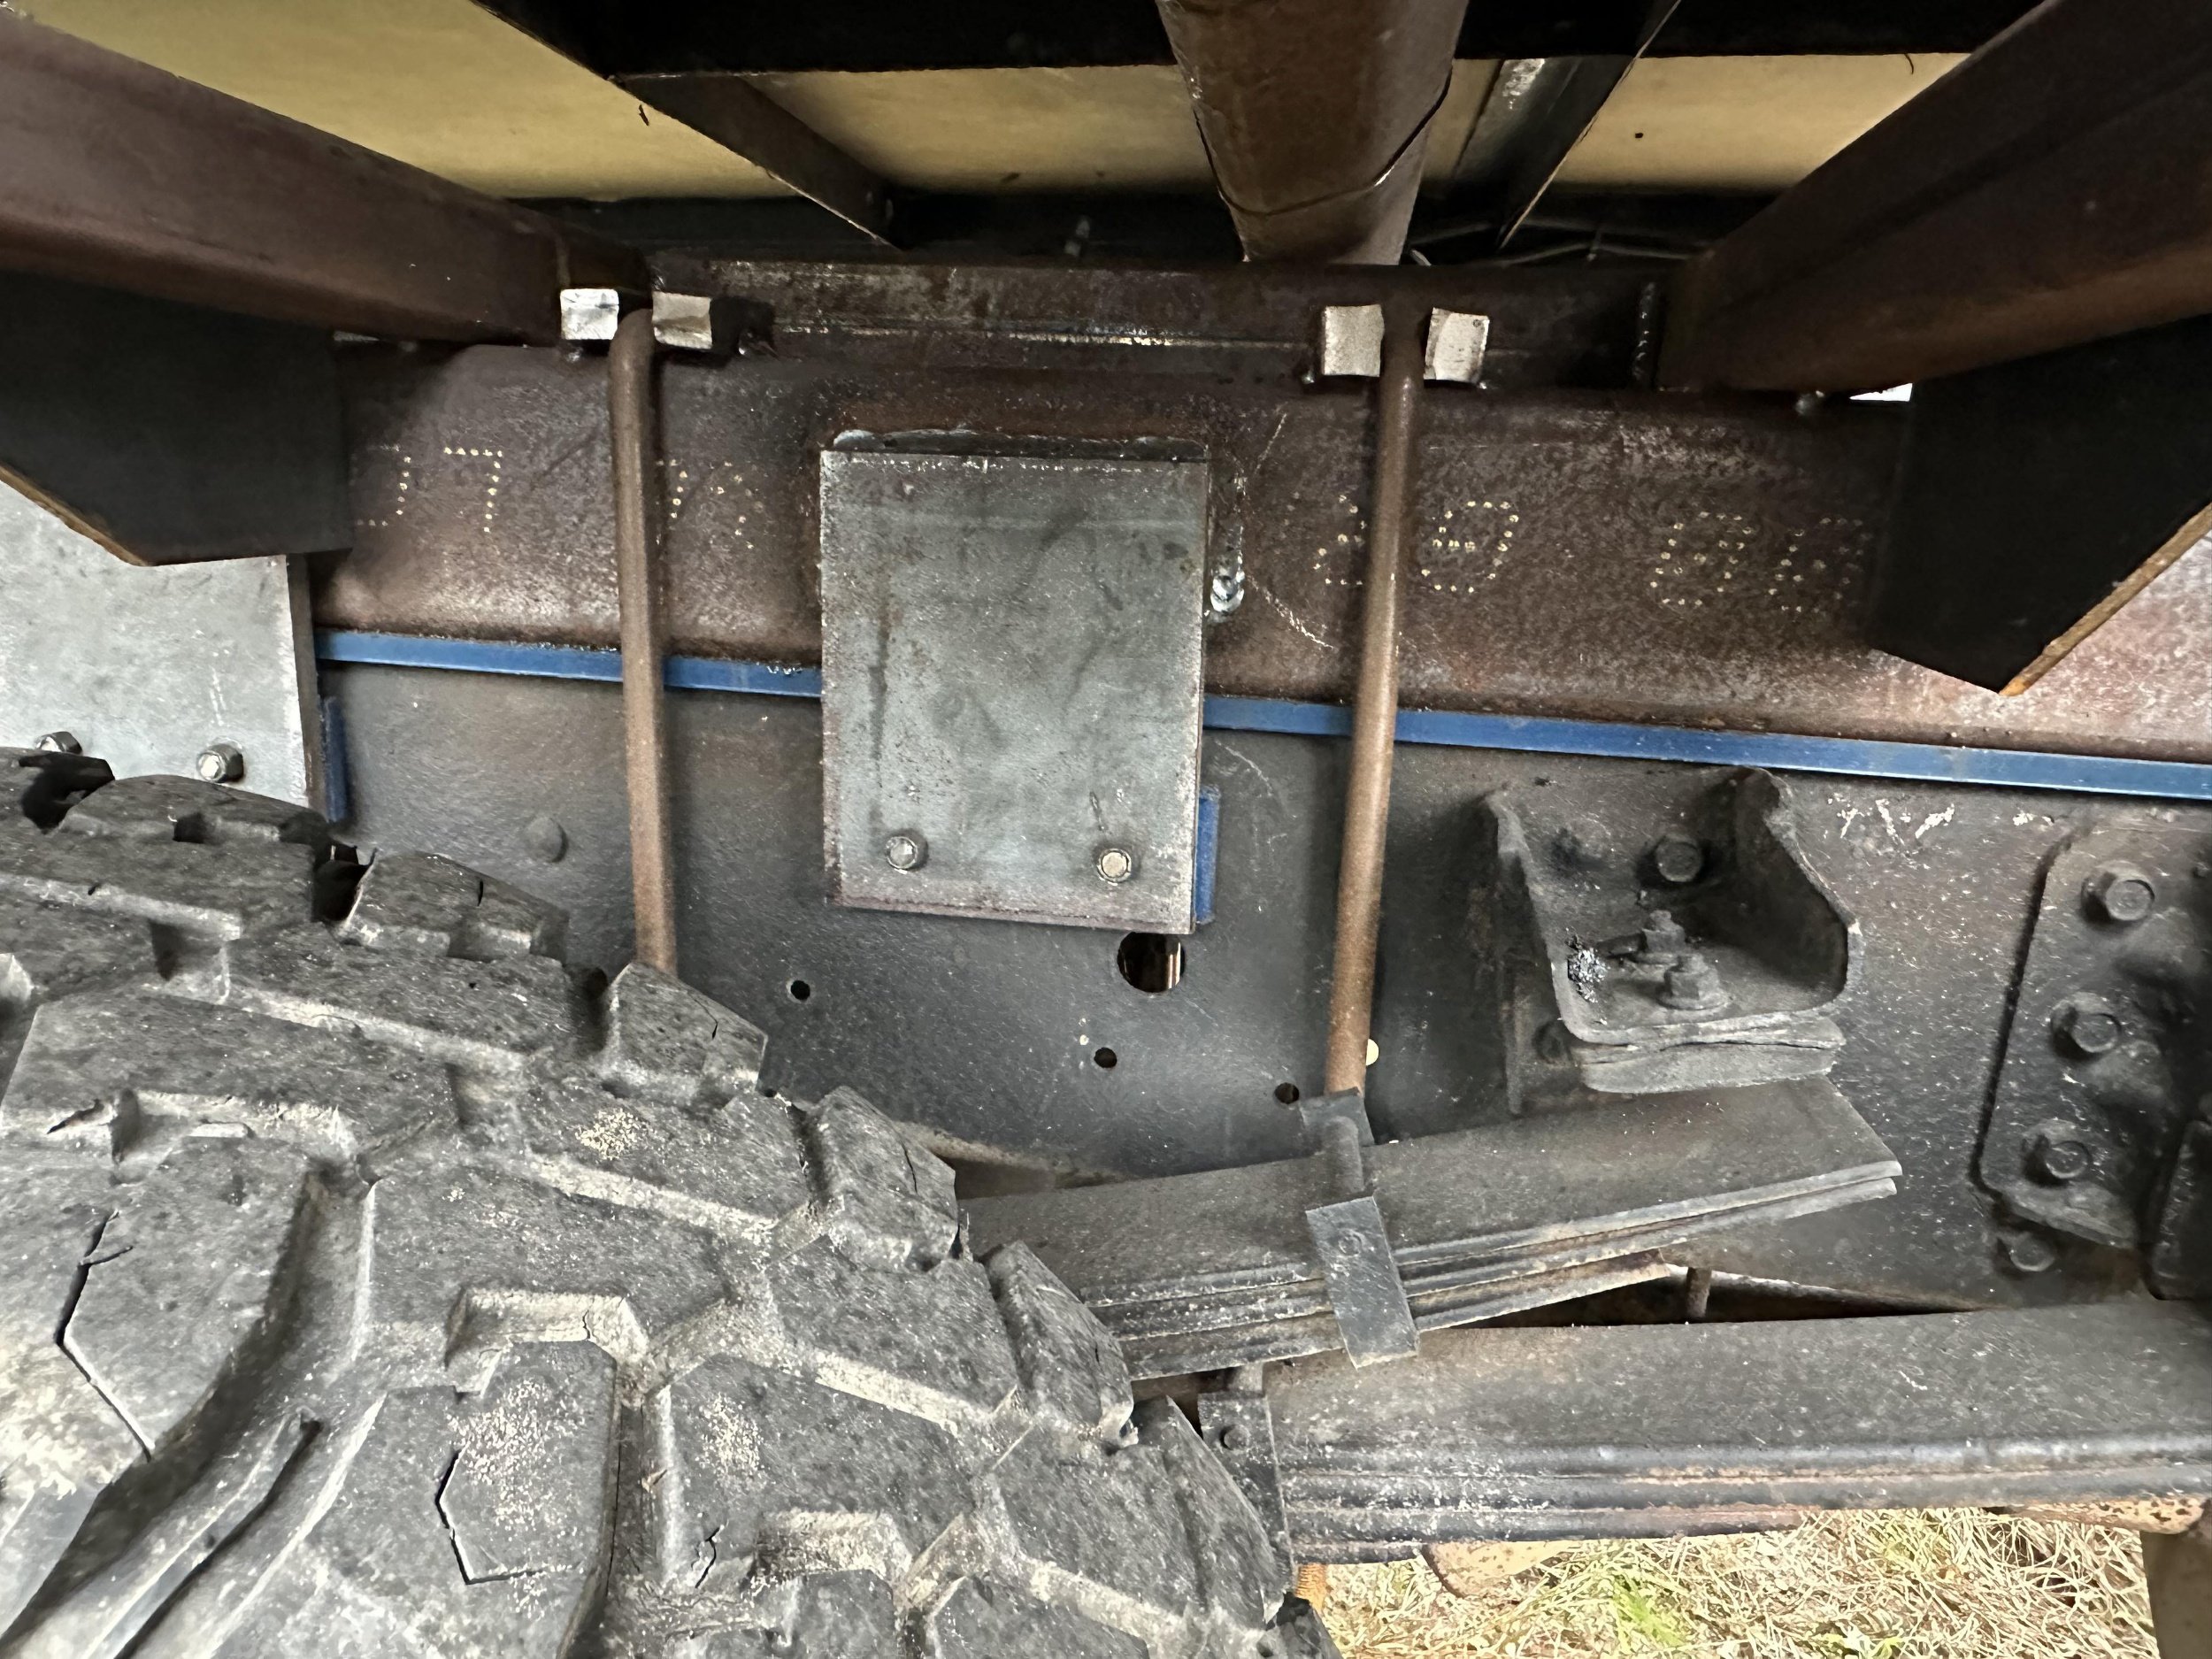
The pic to the left depicts a typical partial subframe. Commercial 4WD vehicles are different from passenger vehicles. Their springs must be stiff enough to carry more weight than your typical 4x4, sometimes many tons more, (our Fuso is capable of carrying 14,000lbs, or 7 tons). Stiff springs don't flex very well off road, so they need to be designed differently.
To achieve axle articulation, they employ frame twist. This allows the truck to keep all 4 wheels on the ground. If I hard-mounted the relatively flimsy Aliner camper to the Fuso frame, first trip down a dirt road would tear the camper frame apart.
Imagine a sheet of plywood with a sheet of glass sandwiched on top of it. Now grab the plywood by the corners and twist. Alone, the plywood flexes slightly. Bond the glass to it, and it would shatter immediately.

Here's a great pic demonstrating frame twist on a medium-duty commercial truck frame. This is an Isuzu. 4WD Isuzu’s aren't available in the US, or I would have bought one of them because of the better parts support.
As you can see, by twisting it allows both axles to remain on the ground. You need that to maintain traction. We've all seen pics of jeeps and trucks with one wheel up in the air. Great for a photo shoot, but not so great for traction.
Imagine what would happen if you simply bolted a flimsy camper to the back. It would twist it apart on the first uneven surface!
This twist MUST be allowed for in a custom build like this.

Constructing the subframe.
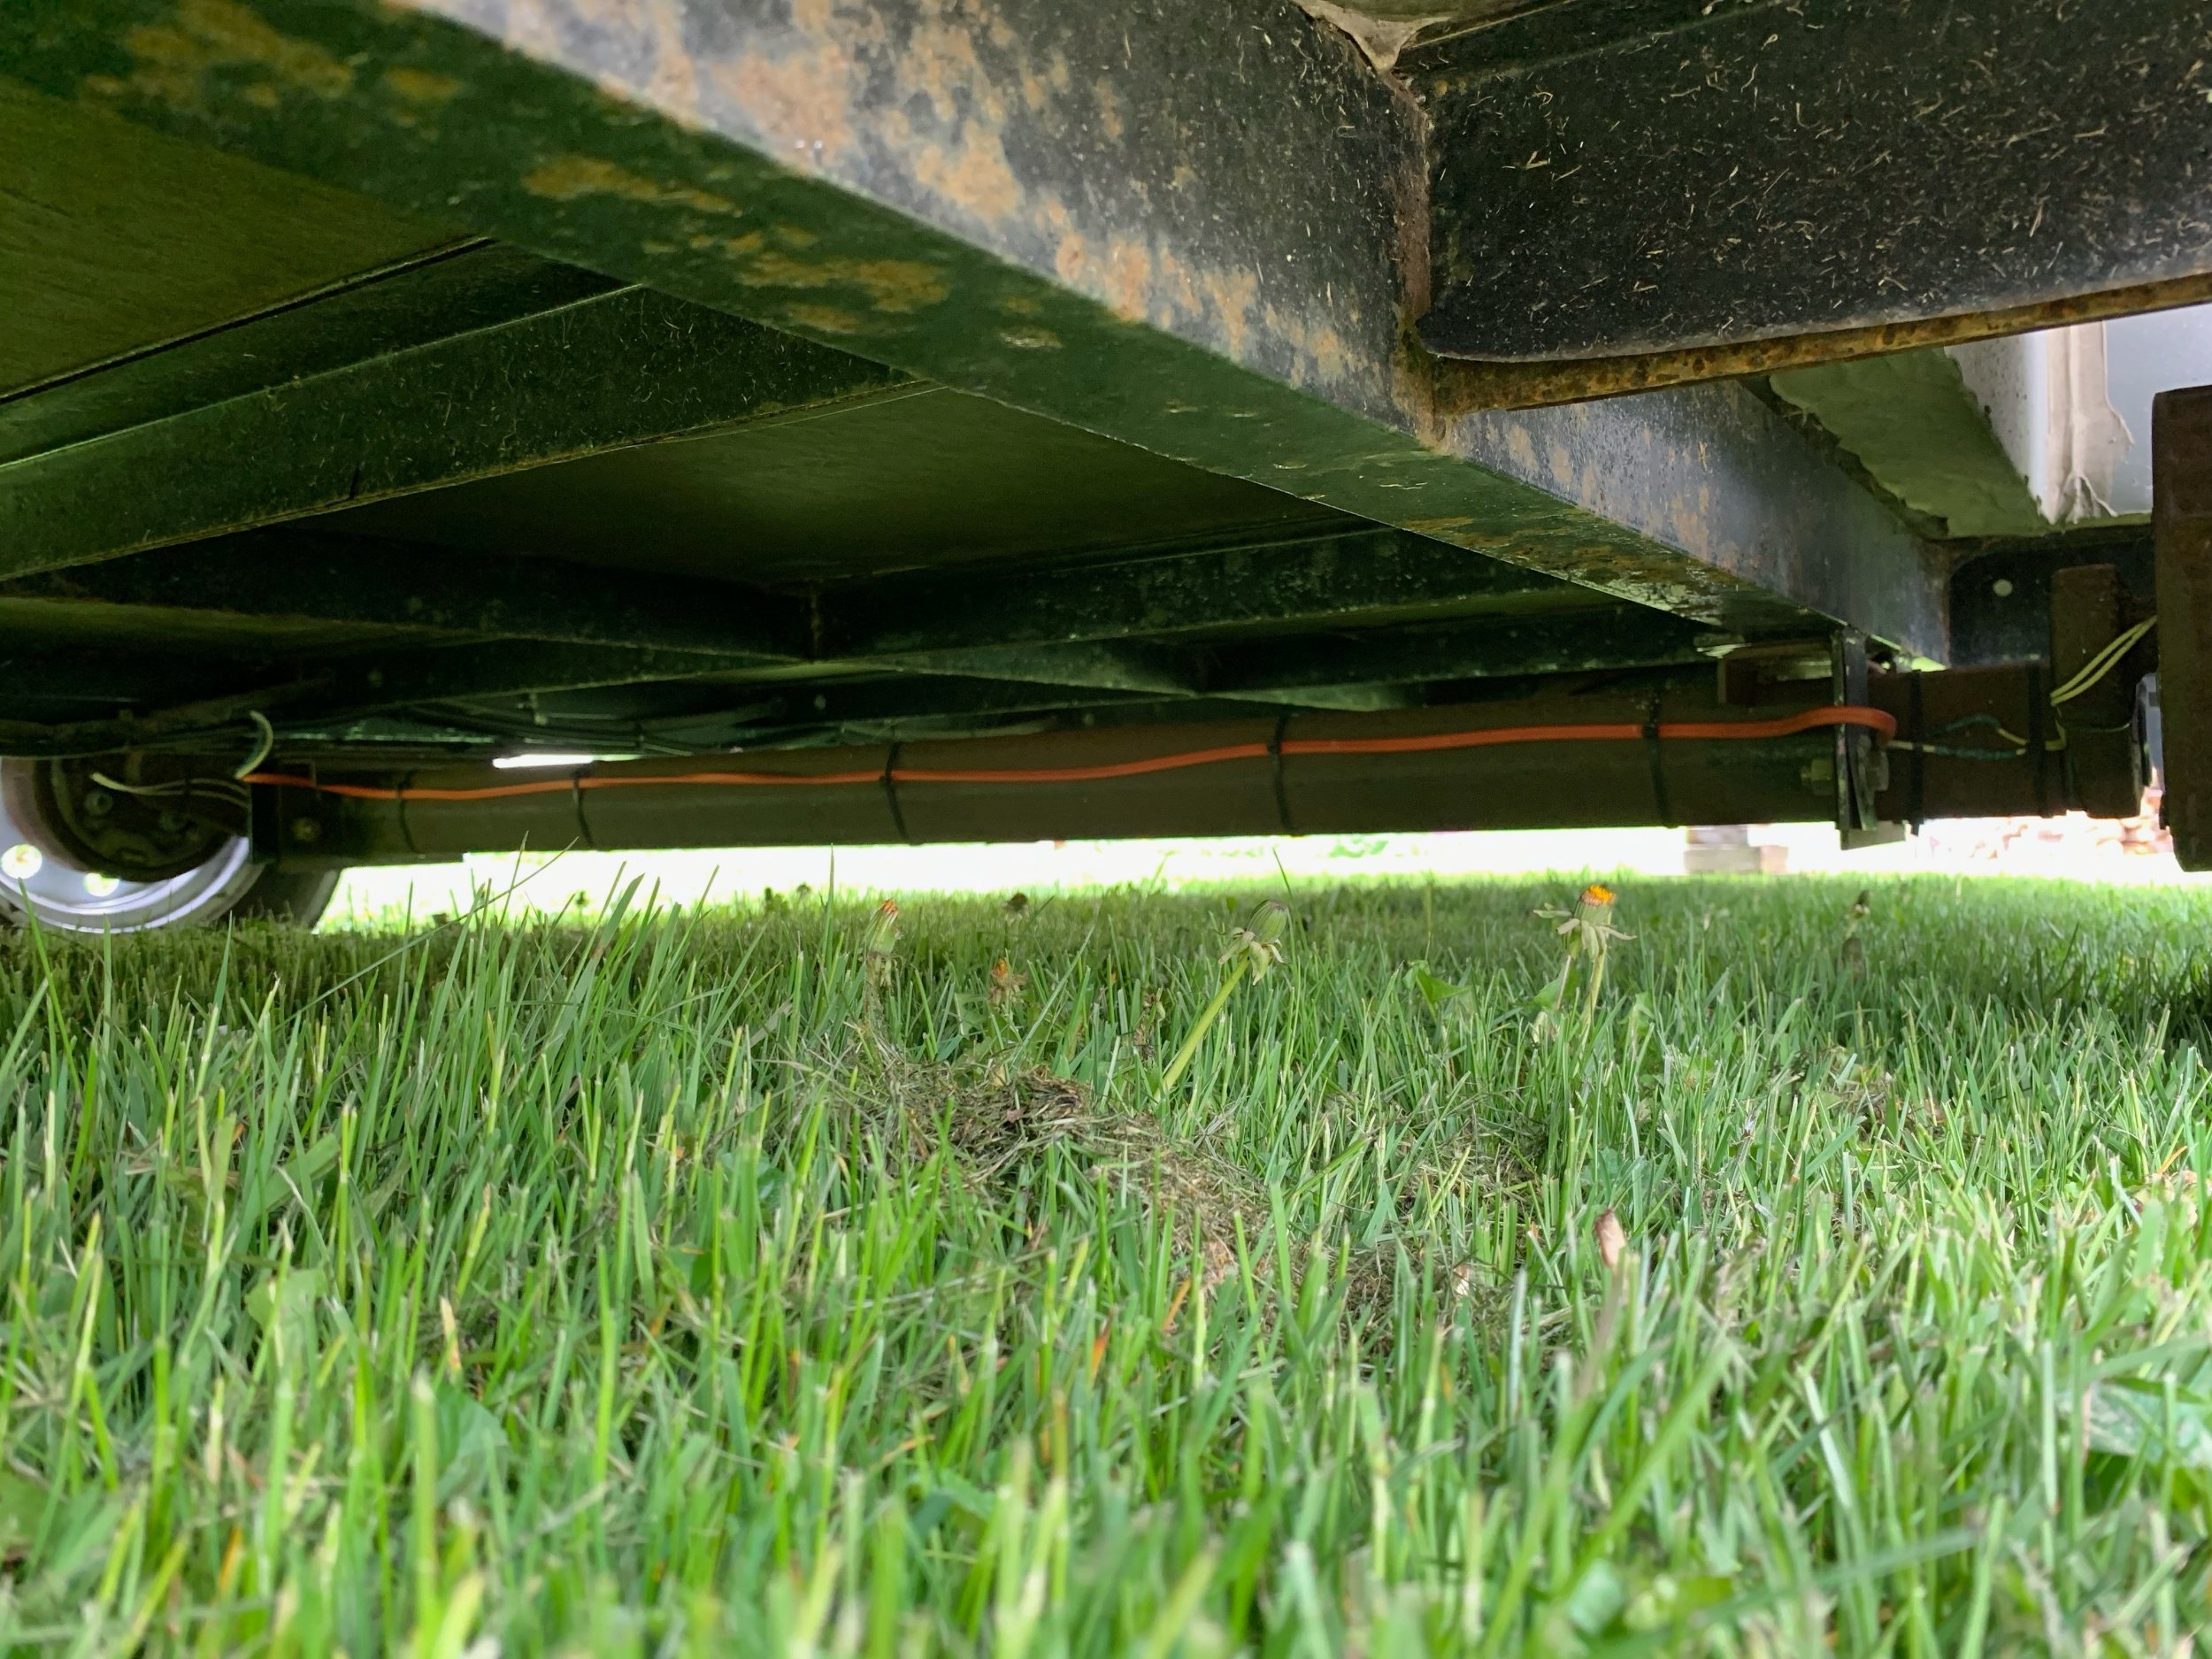
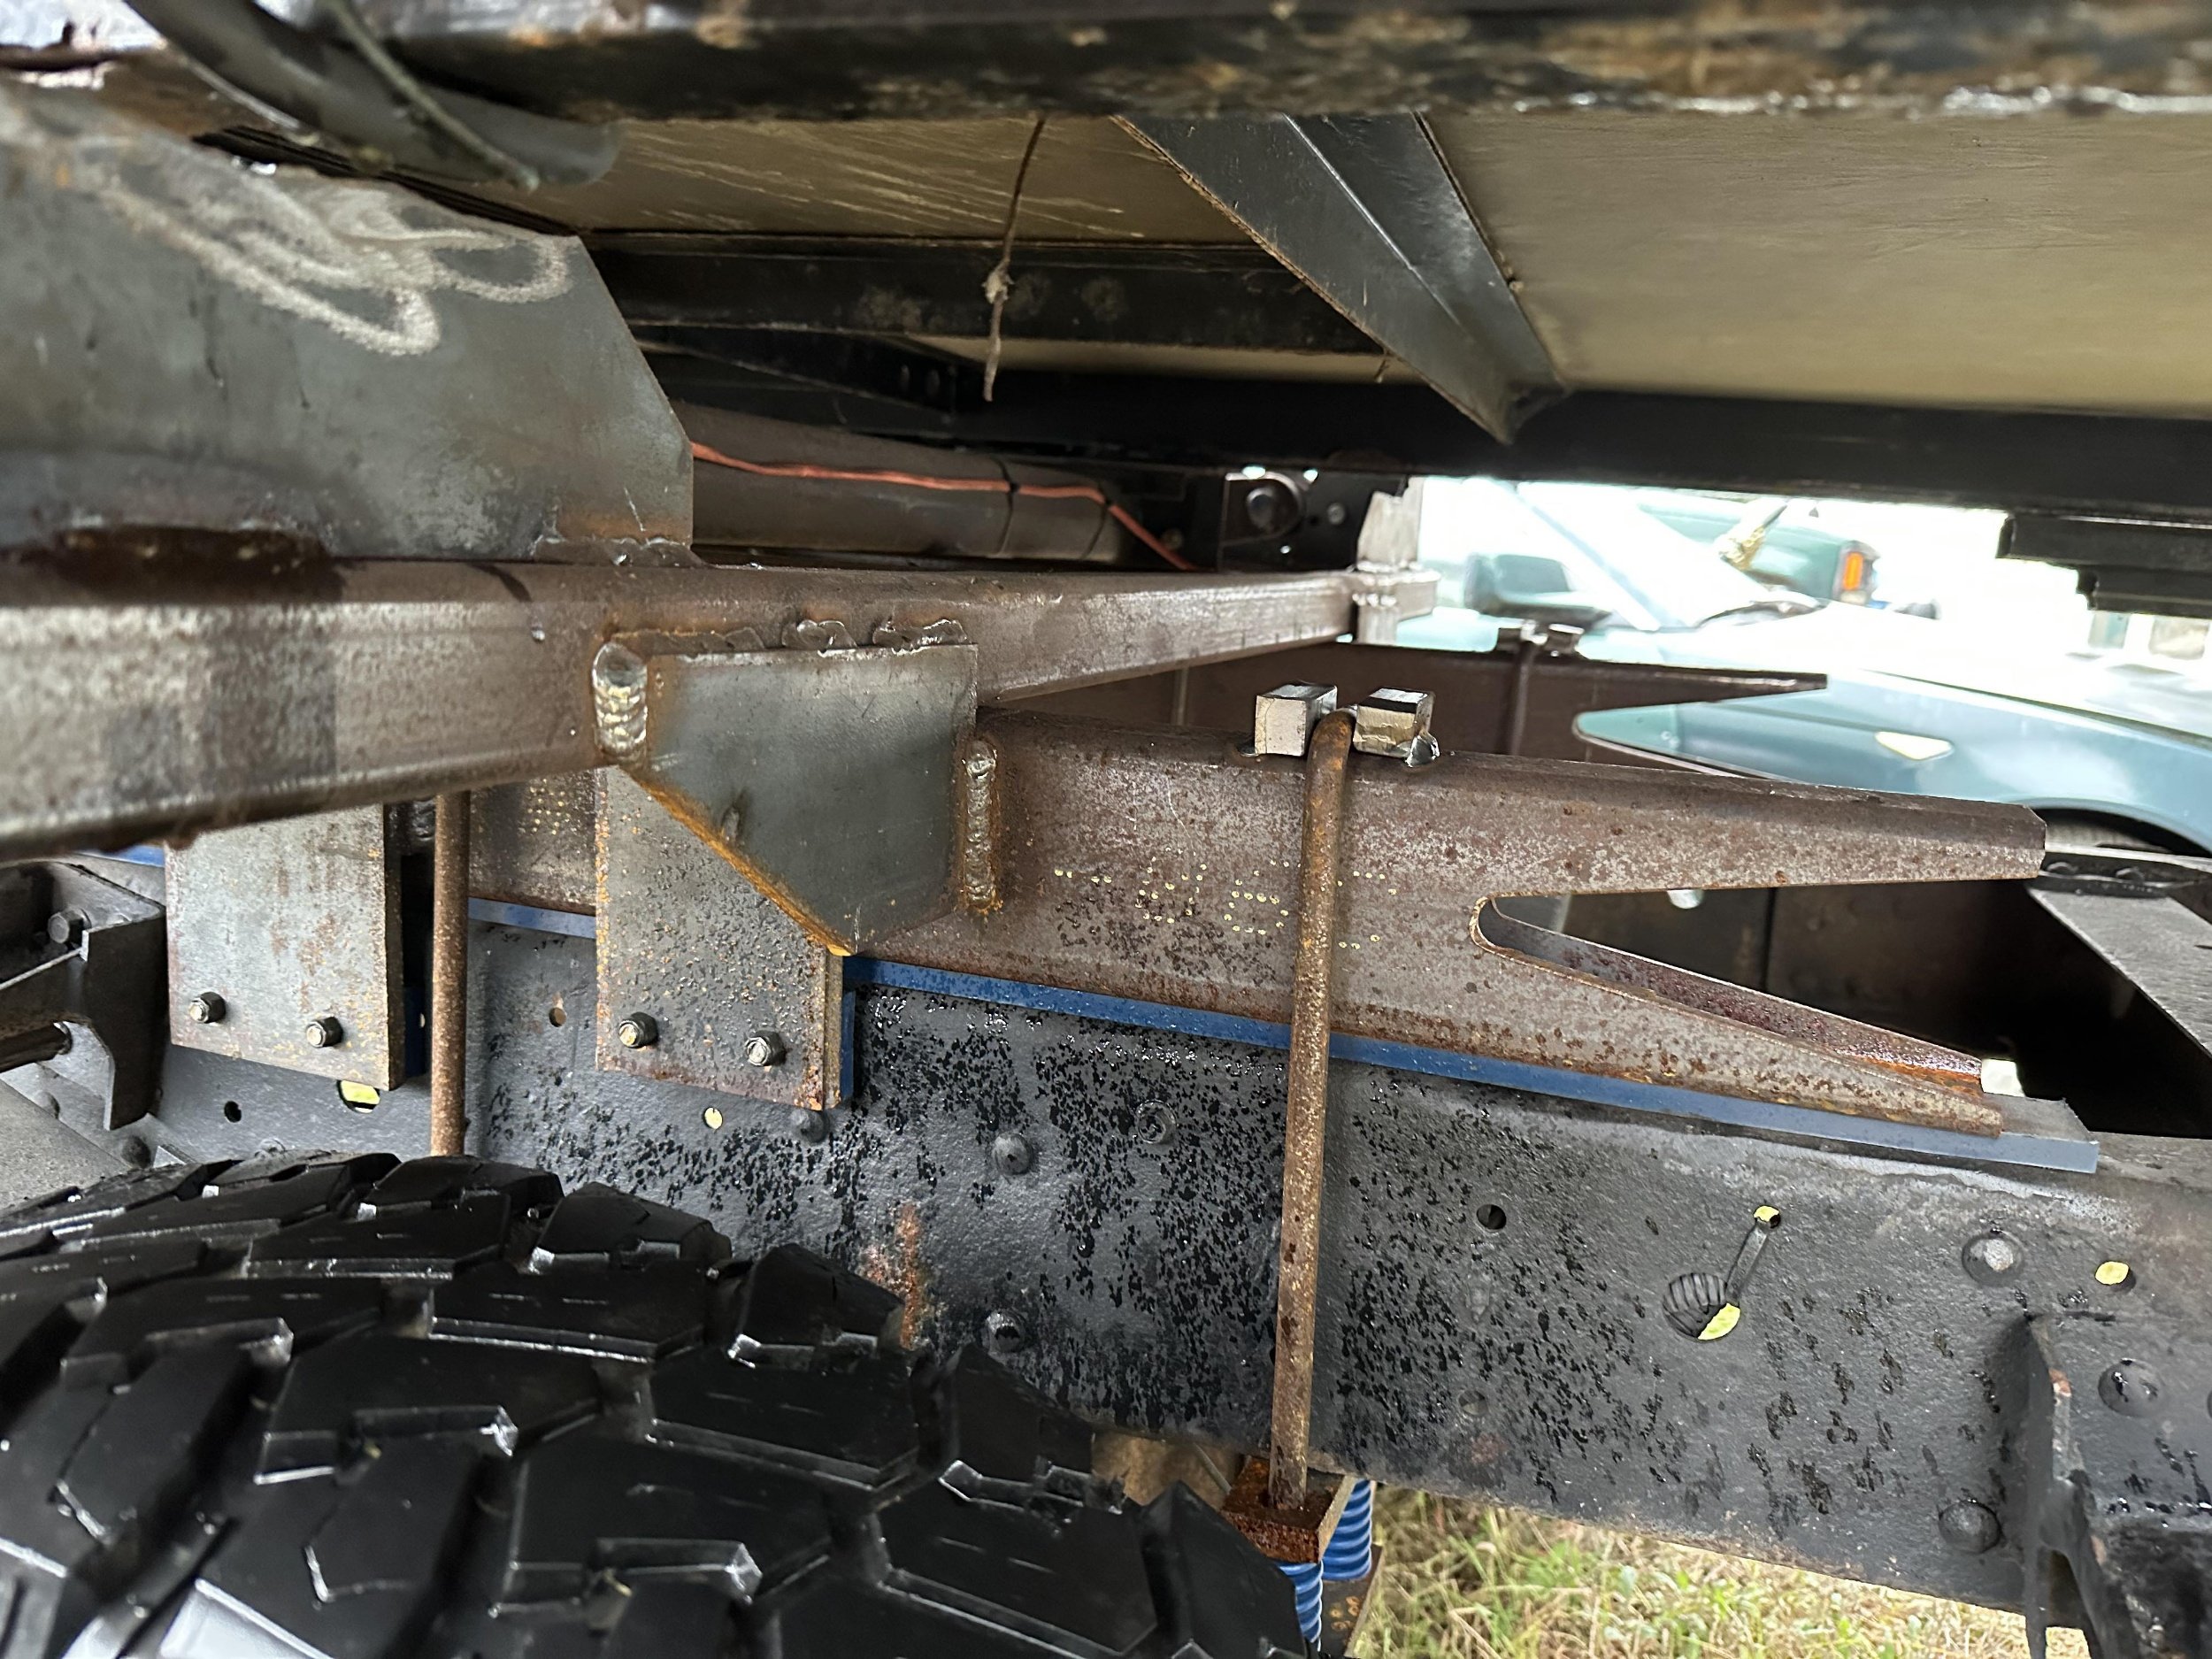
Here's my solution to the ‘frame twist’ issue. As you can see, it incorporates the ‘fishmouth’ feature from the yellow mount above. The Fuso builders guide suggests oak planks for padding, but I went with urethane strips. These were cut from a larger sheet I found on ebay. The U bolts have die springs sandwiched between the frame and bottom plate. This will allow the frame to flex as needed, without transferring the torsion to the subframe, which is coming up next.

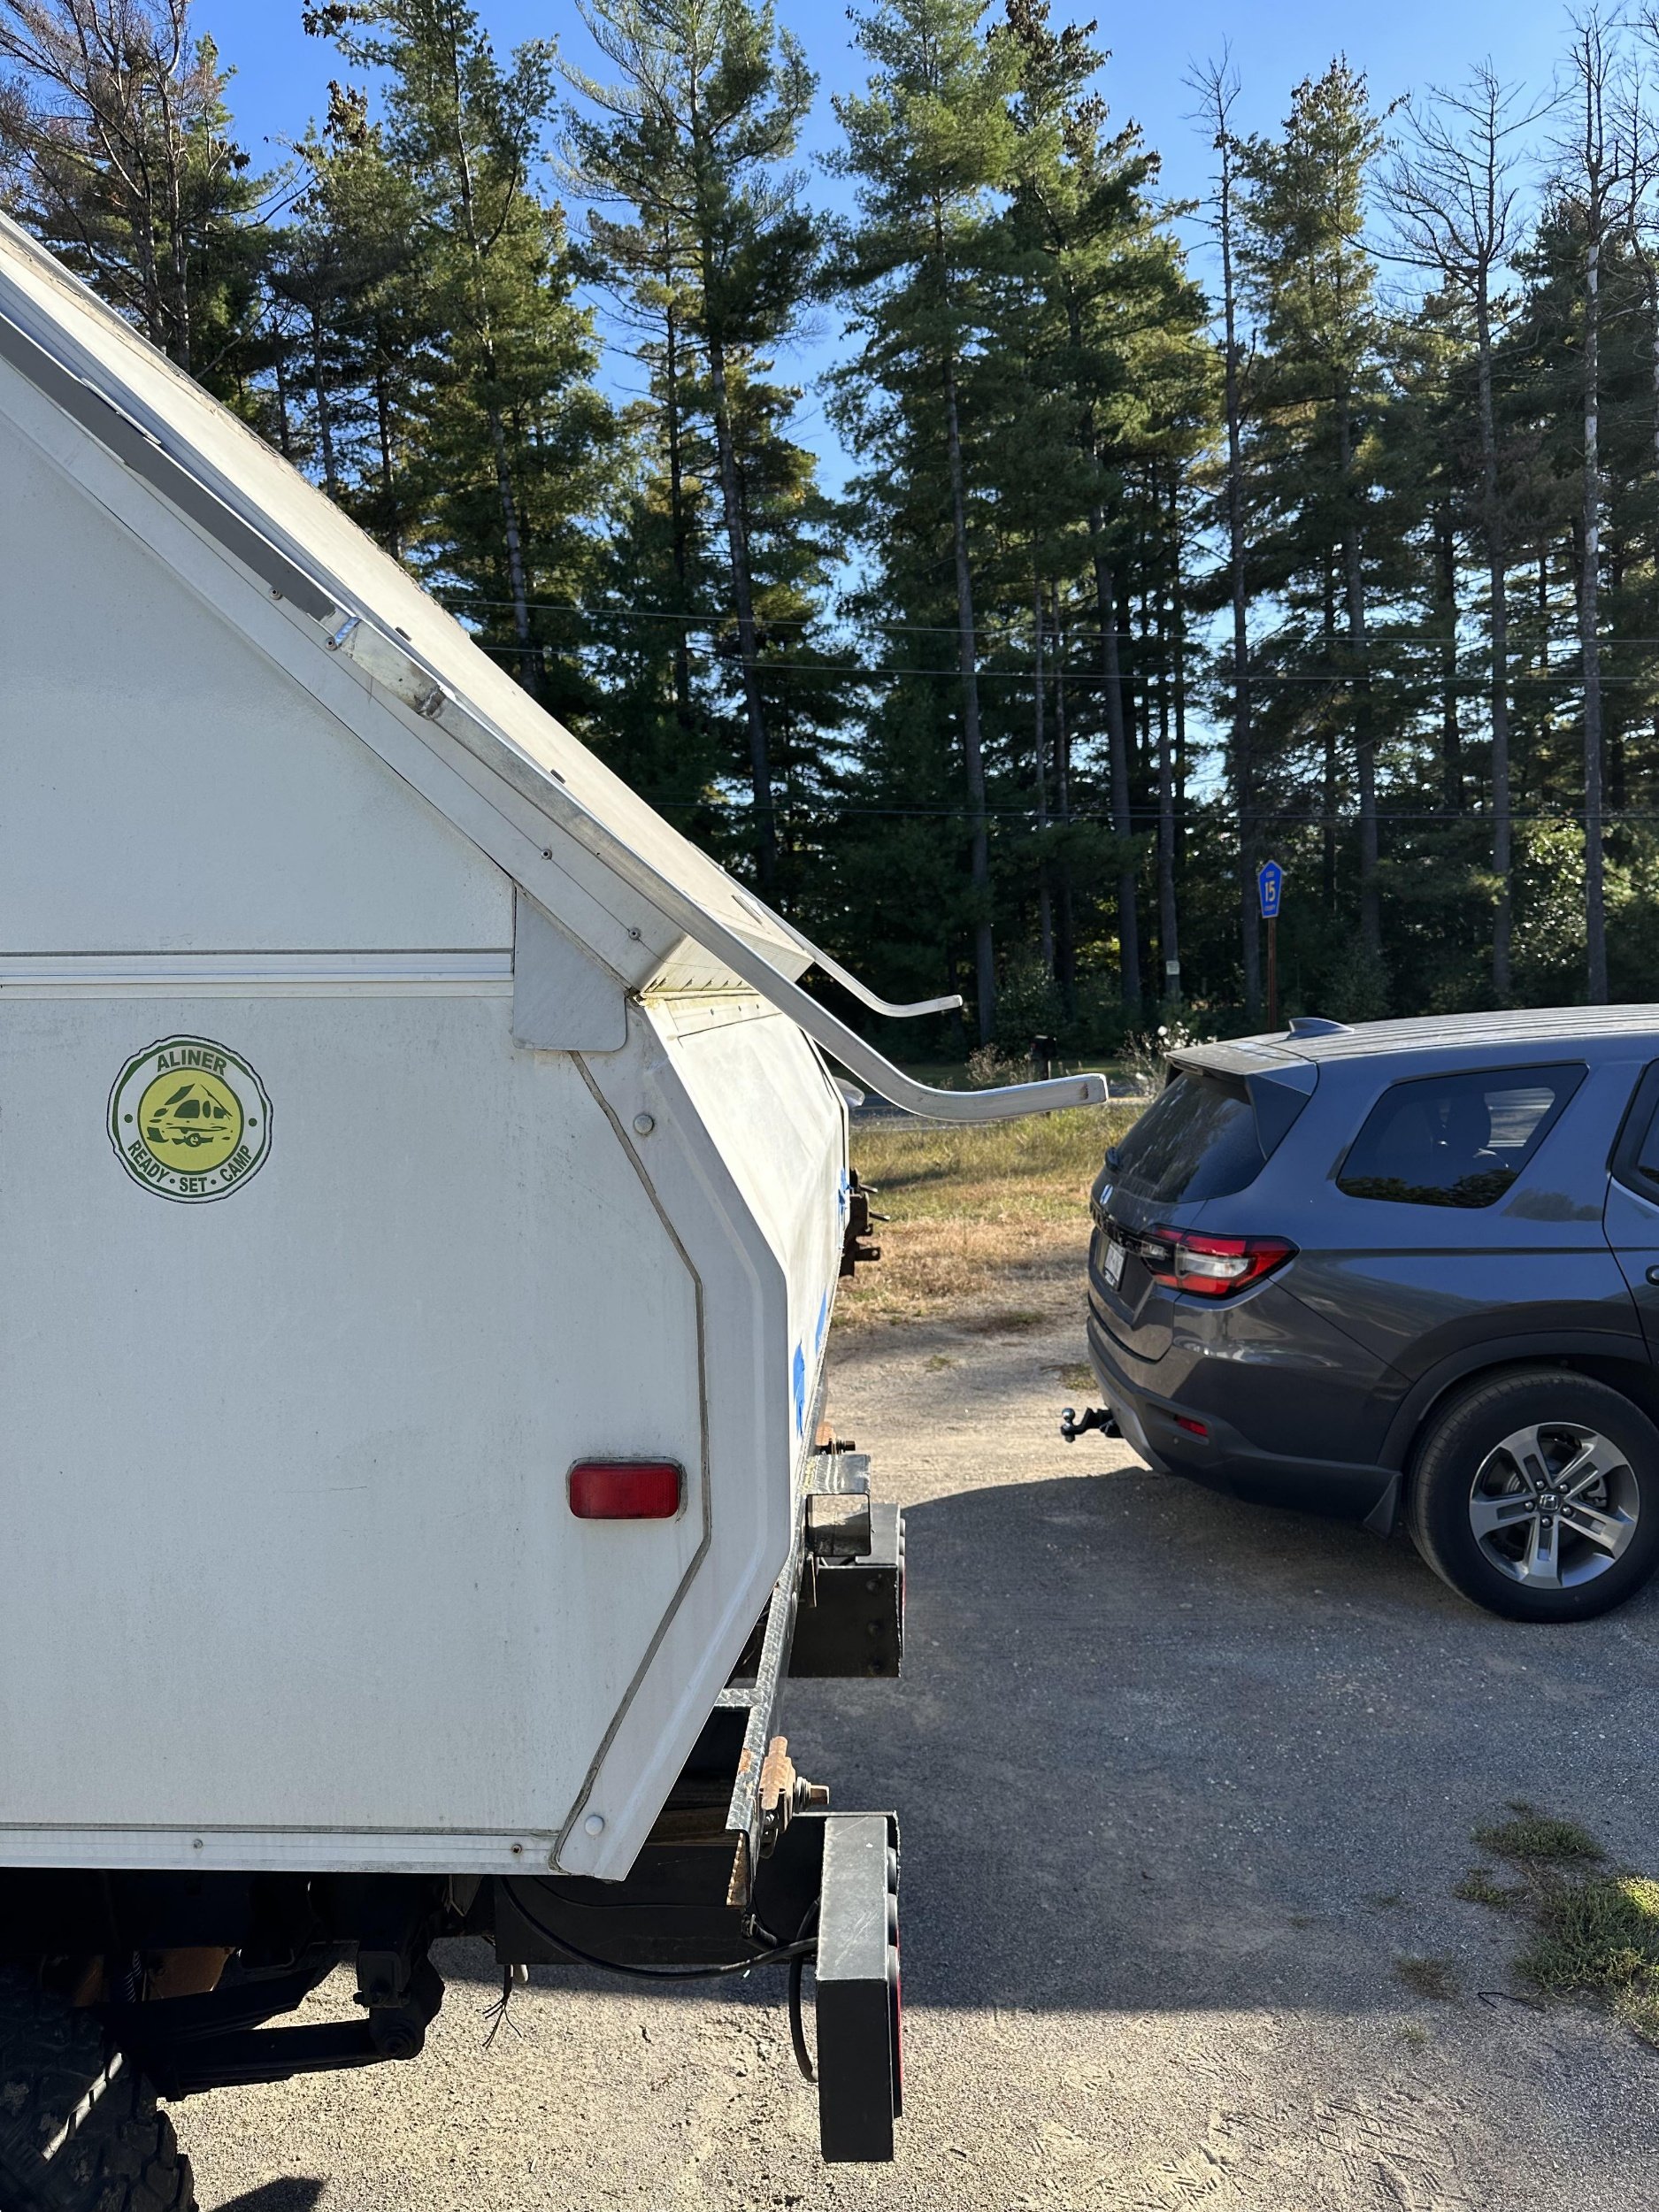
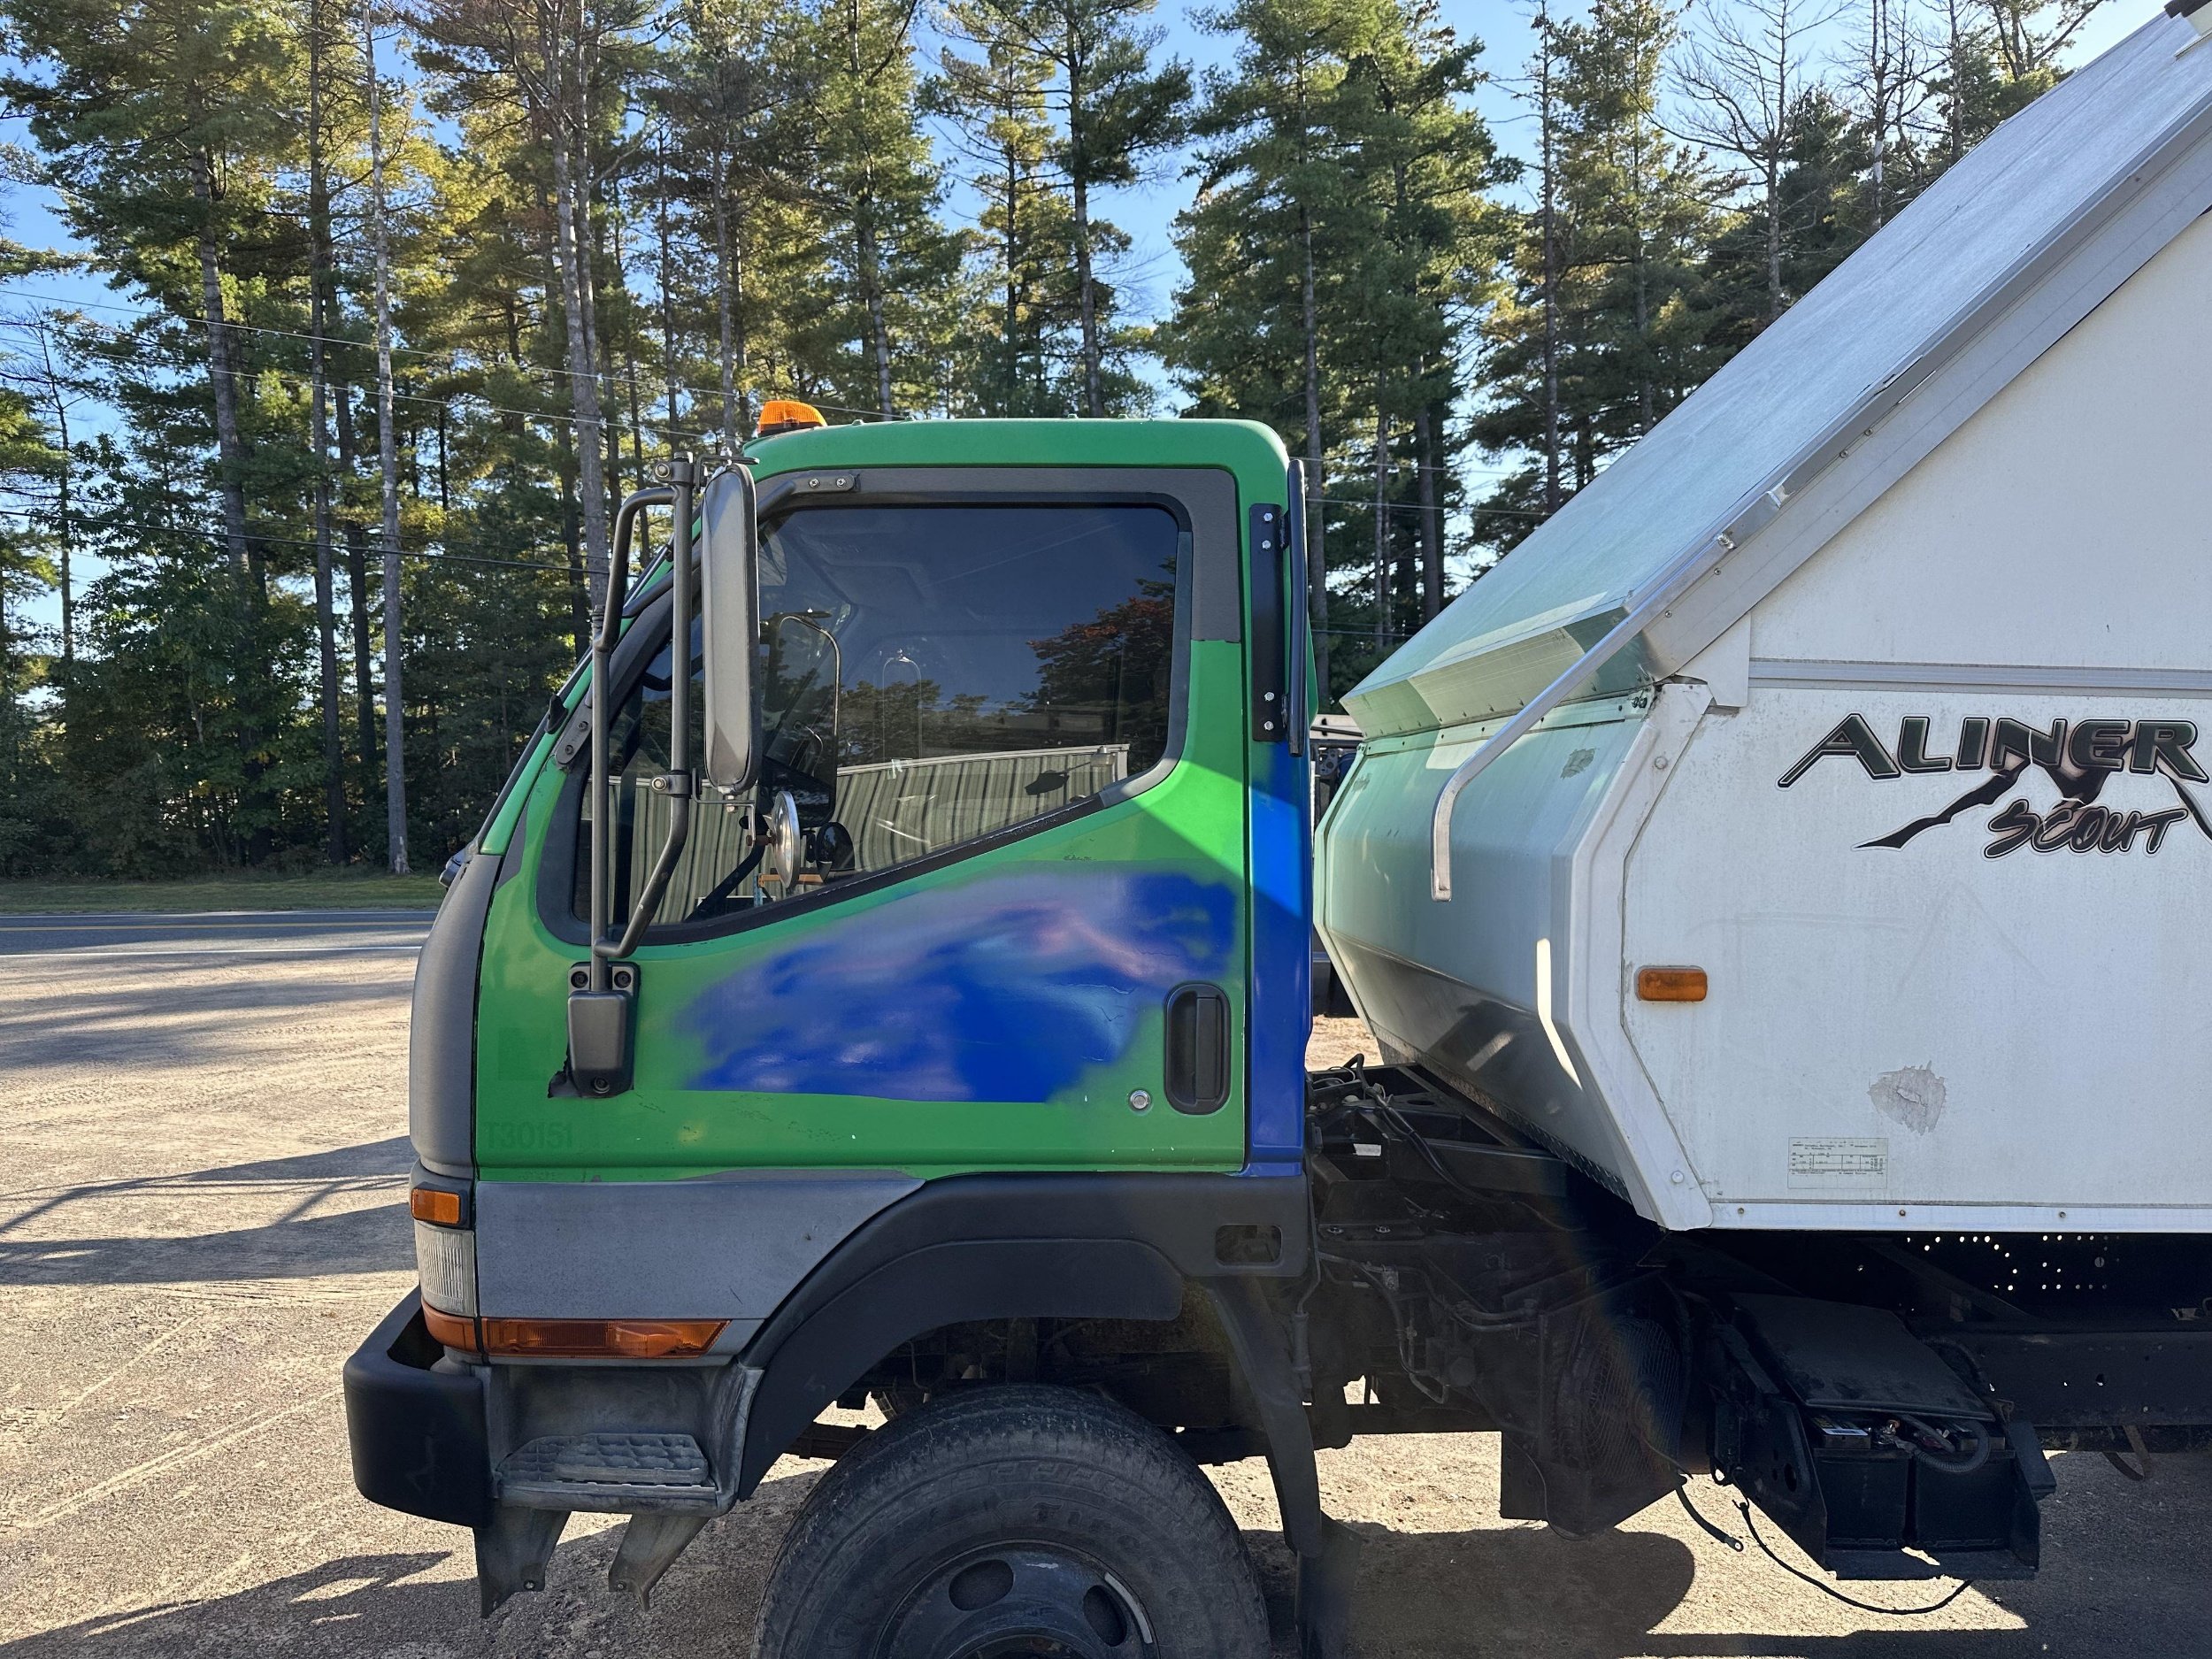
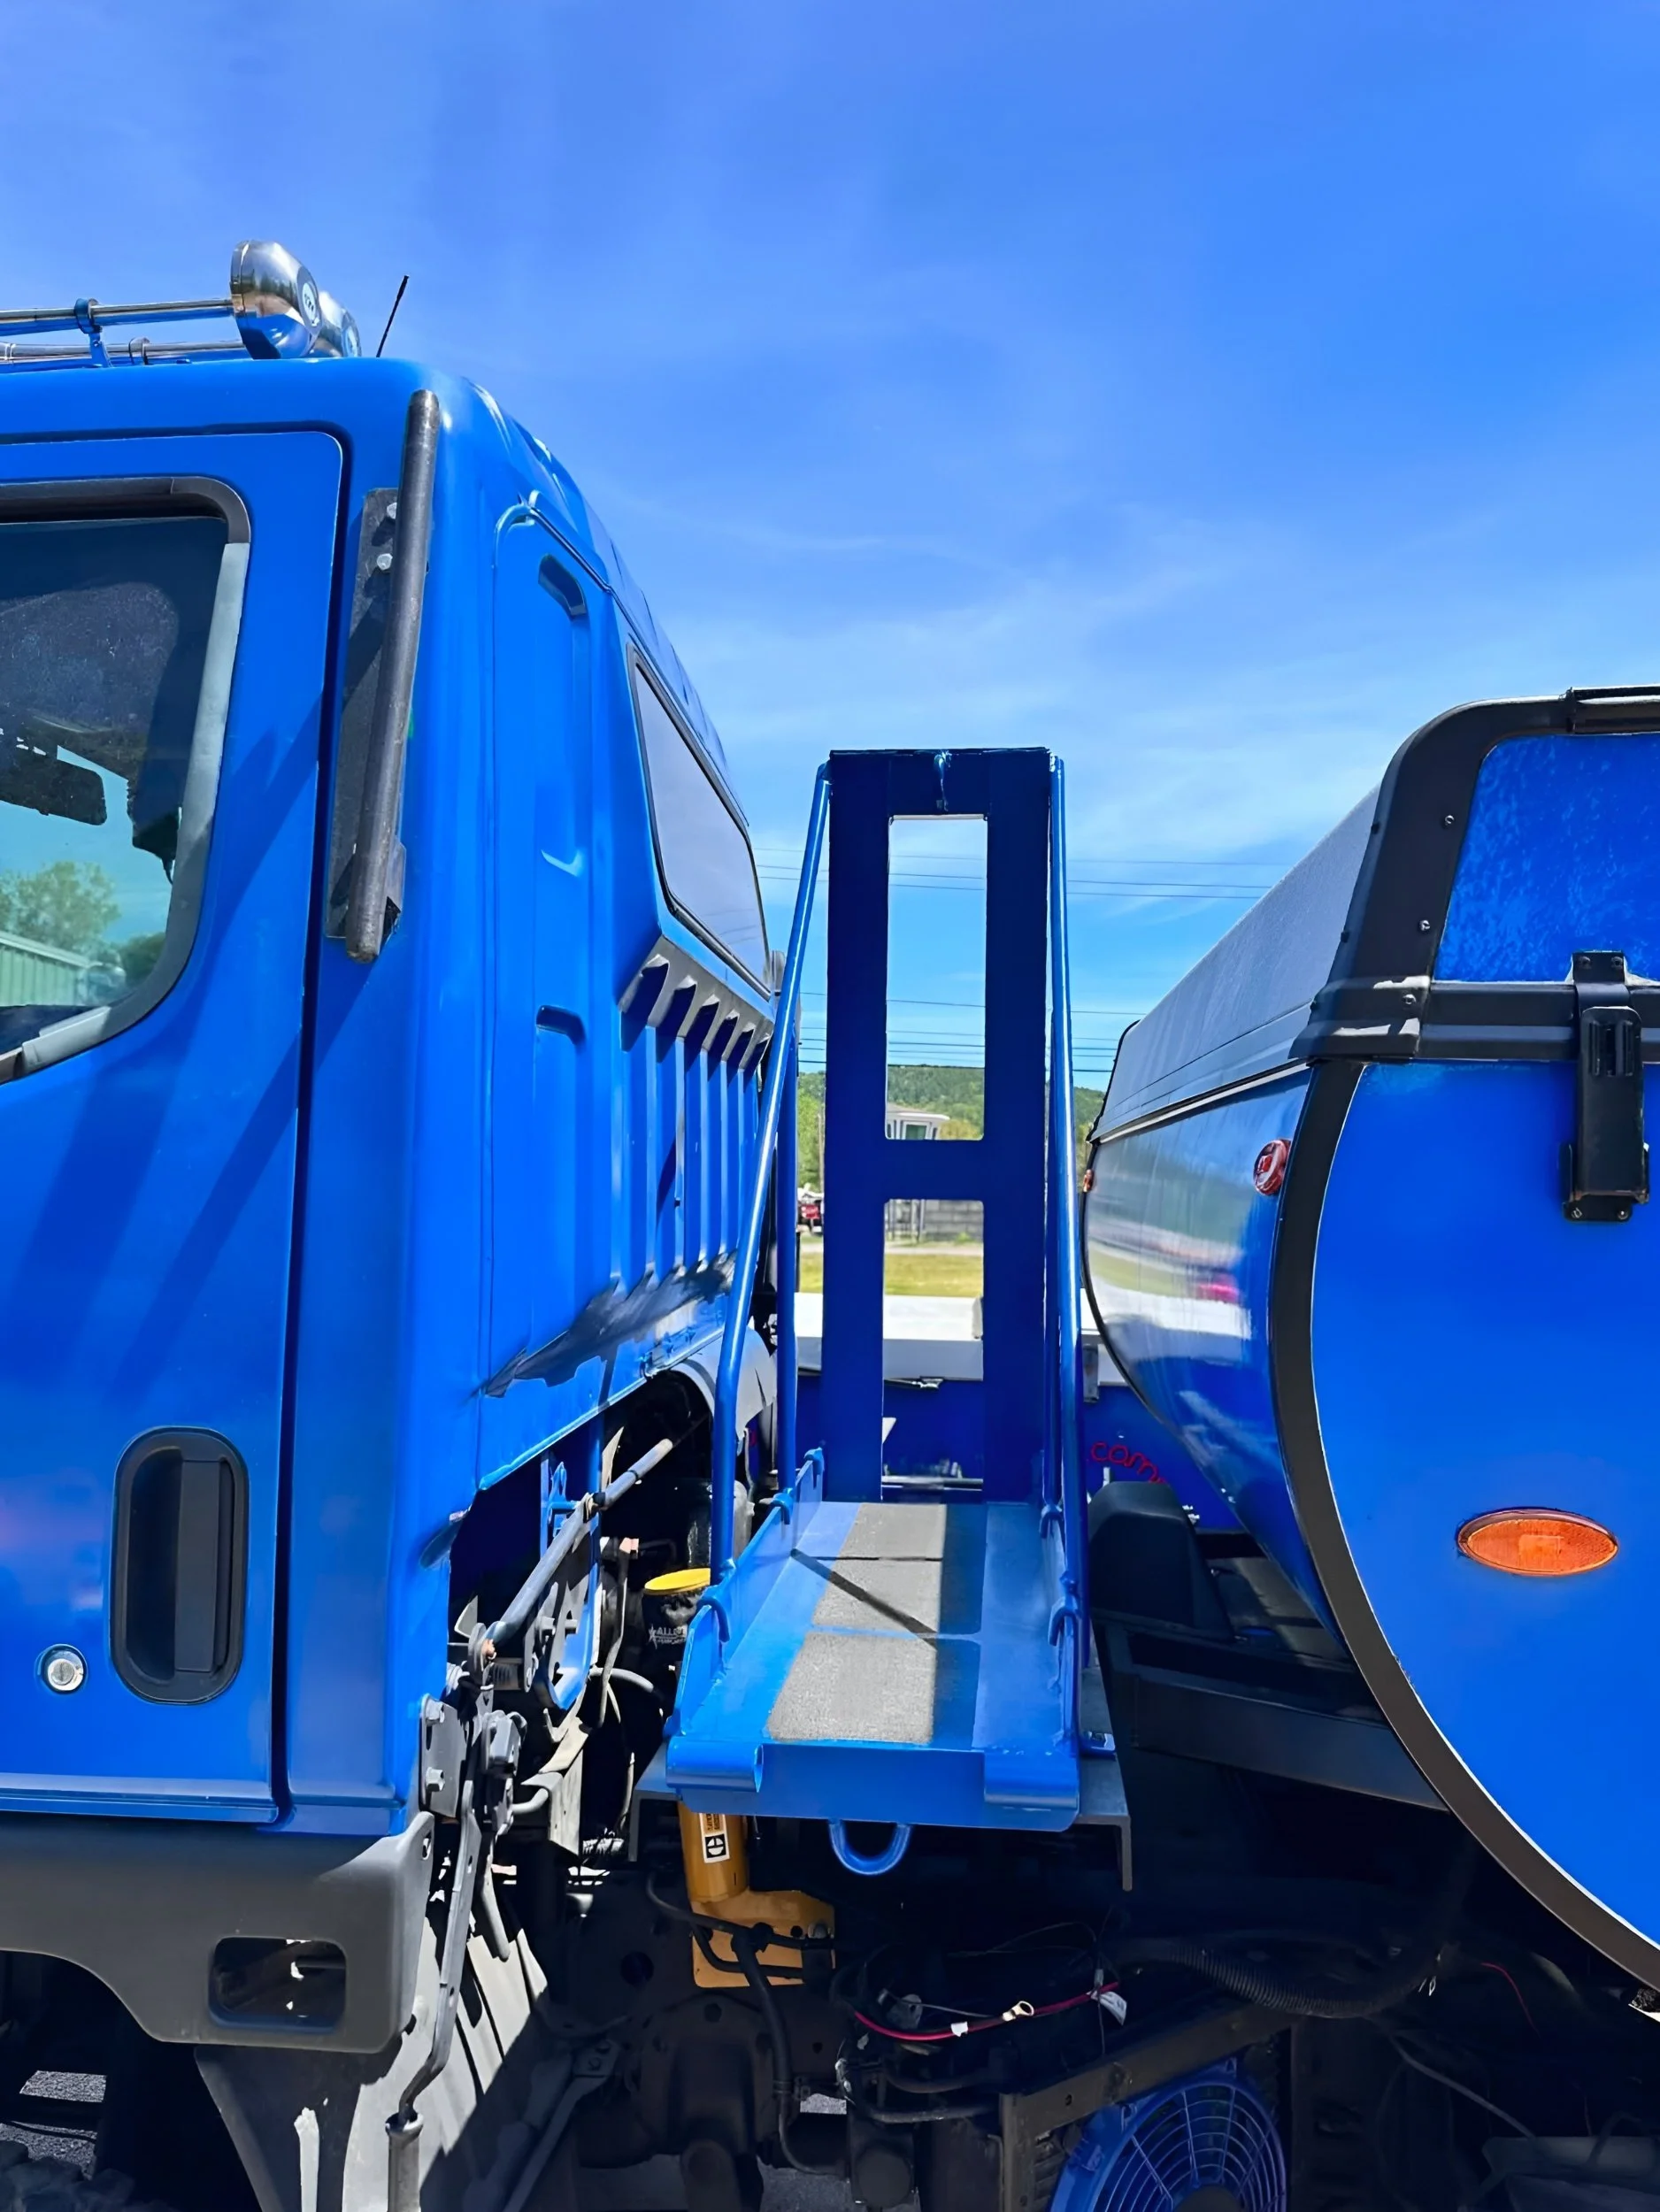
Here's the front camper mount. Remember, as the rear of the truck frame twists to keep the tires on the dirt, the camper will have to rock side-to-side in order to follow it. What better way to do that than a hitch ball. Which it already has, right?
We shortened the trailer's tongue to get it as far forward as possible. This will also help with departure angle, as well. (I left a little extra space between the front of the camper and the rear of the cab for future upgrades).
Standard receiver hitch from the scrap pile fit perfectly, padded with urethane as well. Hopefully this will limit most of the vibrations from truck to trailer.
So, everything that touches the truck is padded and flexible to eliminate transfer of torsional twist and road vibration from reaching the relatively delicate camper frame.
On to the ‘cradle’.

What better way to support or suspend a camper? It's own suspension, of course!
Rather than trying to reinvent a way to let the camper bounce as it needed, I decided to let the welder doing all the work decide how best to support the camper over the fishmouth rails. He came up with a gusseted cradle that surrounds the entire torsion axle. Pretty ingenious! It's completely welded to the fishmouth rails, supported by heavy wall tubing, has gussets to support it, and has box-like brackets that hold the panel bearings, which hold the ends of the torsion swingarm.
So, the front of the camper rides on a hitchball, (just like it was designed to do). The back of the camper rides on it's own factory suspension, (just like it's designed to do).
That camper will go down the road like it always has, not even knowing it's not on wheels anymore!

Locator plates. Marked A and B in the pic, these are welded to the subframe, but NOT the truck frame. On the inside of the plates, against the frame, are more urethane panels held on with countersunk machine bolts from the inside. You can see the bolts sticking out. Their purpose is to keep the back of the camper centered side-to-side. The urethane will allow the fishmouth to slip up/down along the side of the frame as needed, as the truck frame twists. We're talking about minimal movement in this area because it's directly above the truck axle, but I wanted to allow for it.
You are now up to date on the build! Below I'll post more pics of how in looks right now. Coming up, longer wind poles to help with raising it, and slide out stairs!
Like these - - - - - - - >
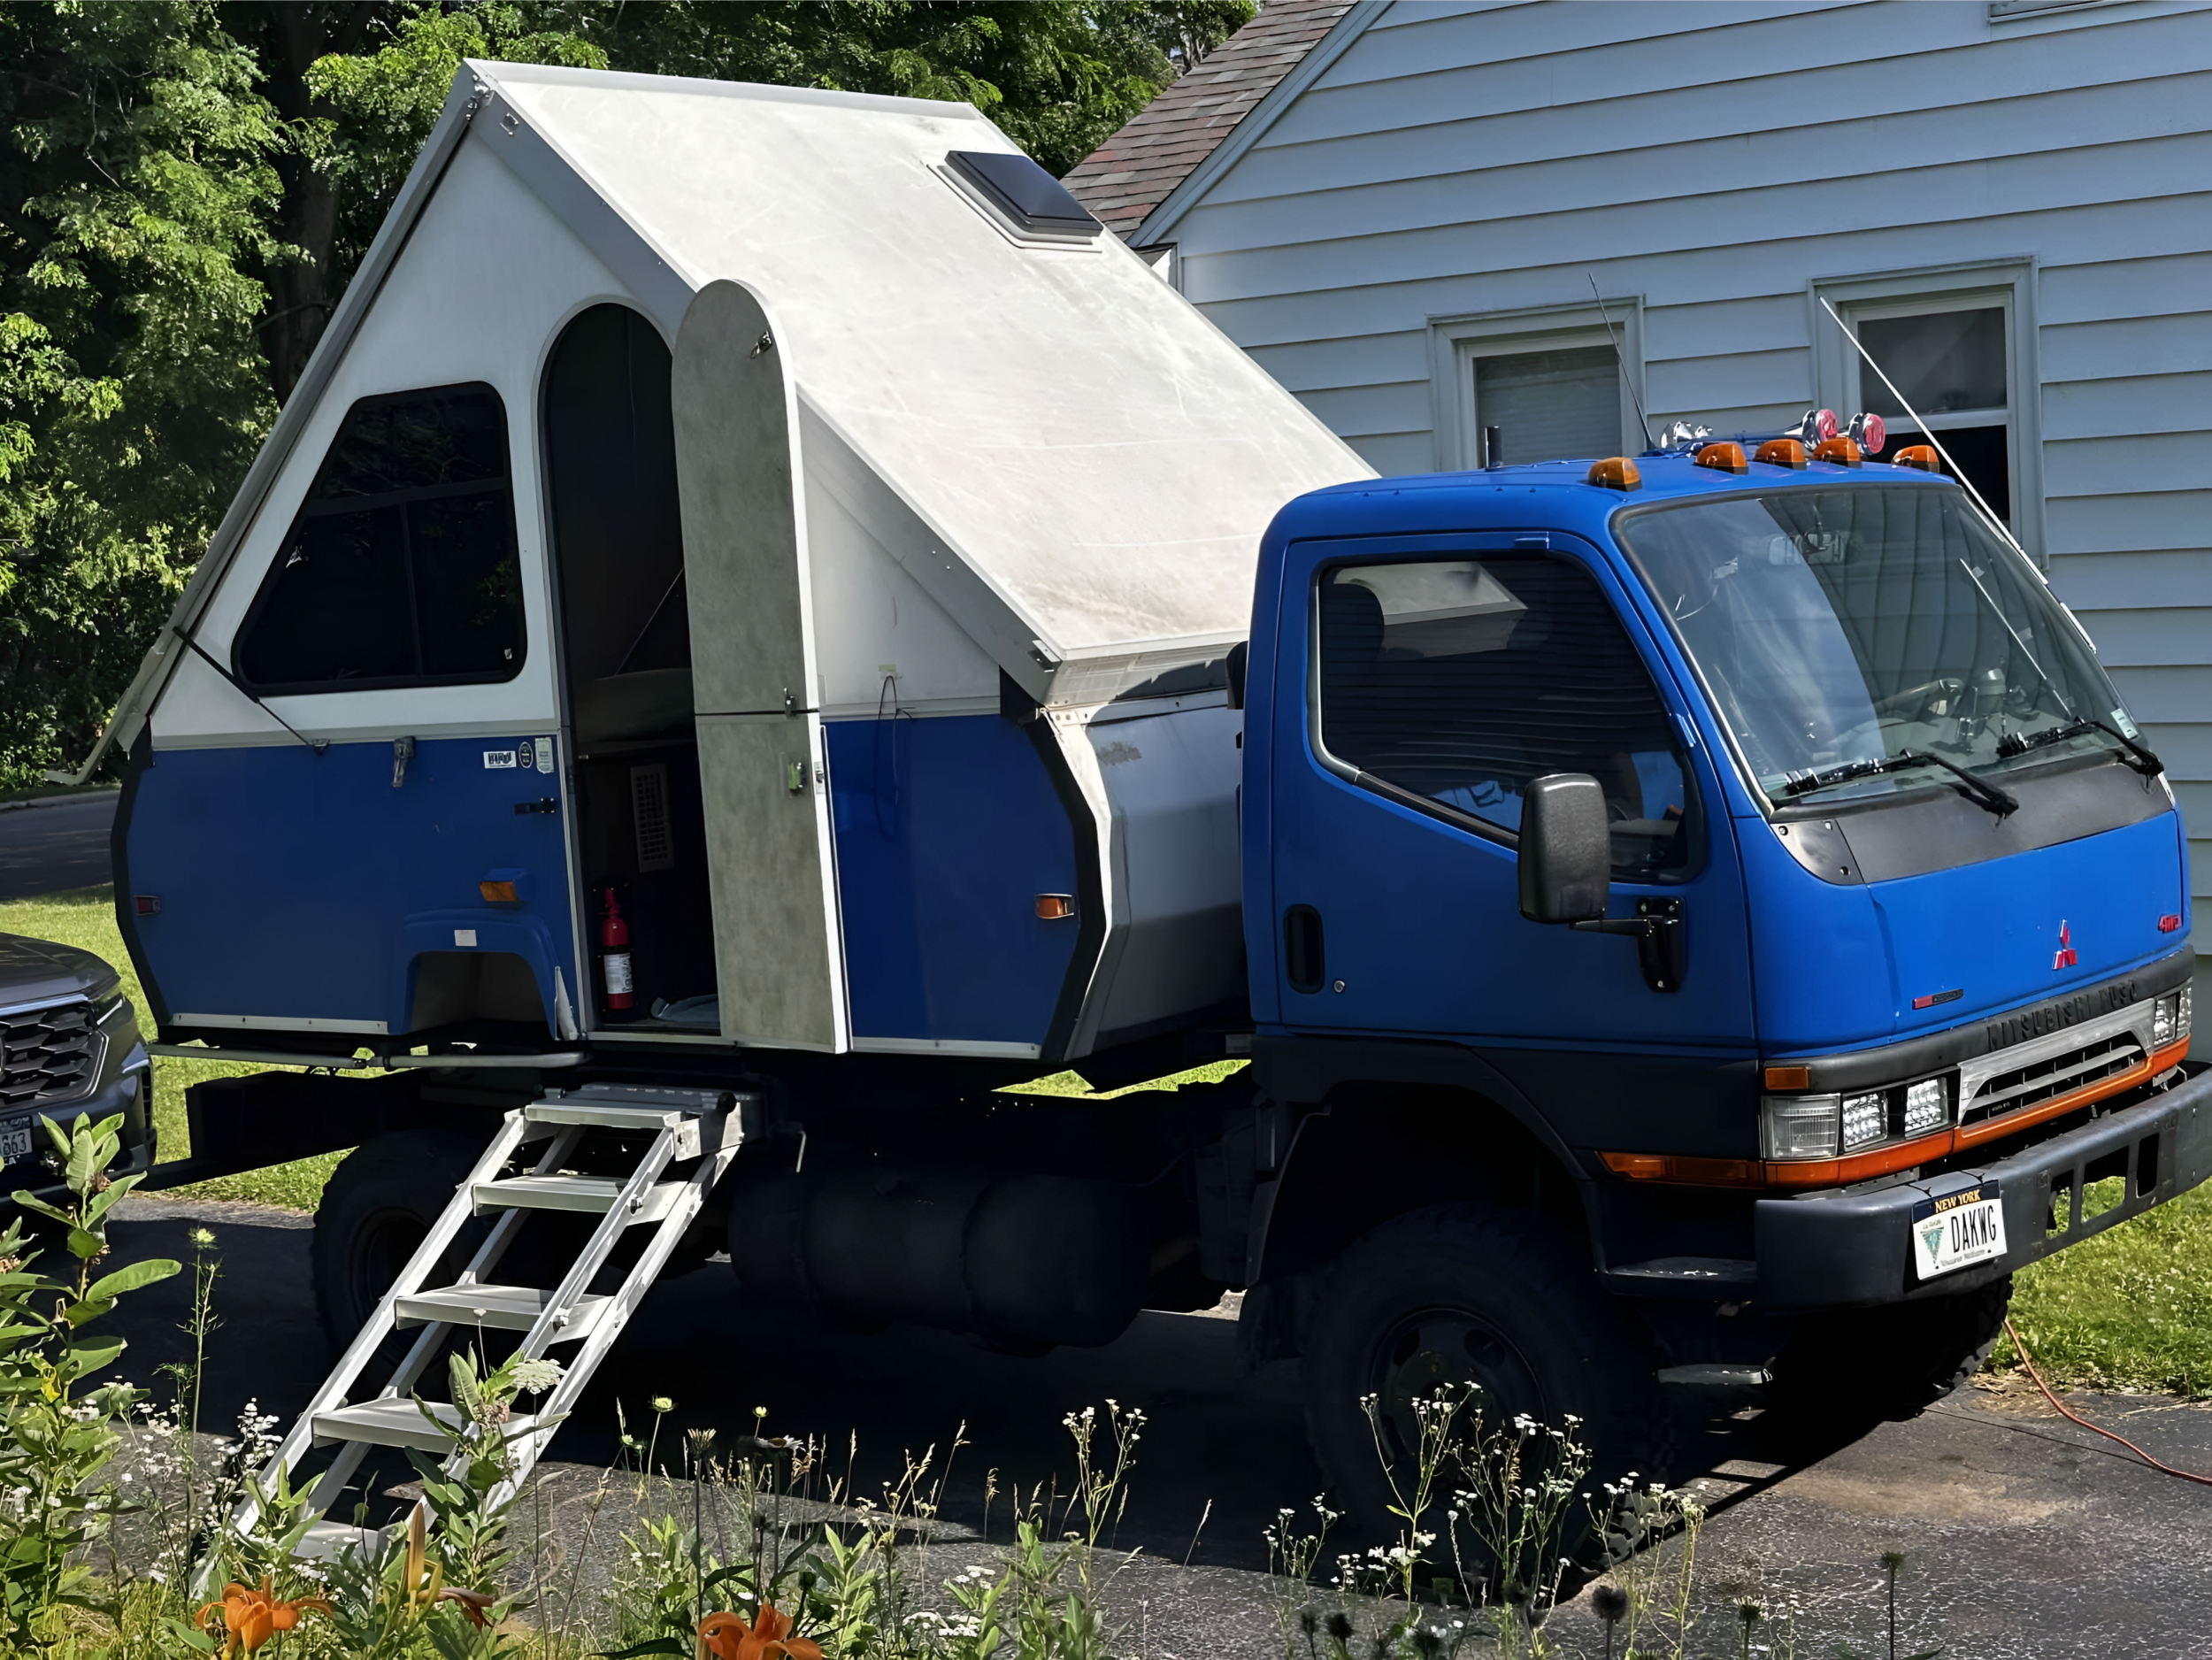
THE CAMPER IS MOUNTED!!


09/02/2023 Update - Just some updated pics showing the camper opened up.


09/21/2023 - Update. We extended the wind poles to make it easier to lift the roof panels from the ground. I asked to have the ends curved to match the curve of the armrest inside the door. Once I remove the dark window tint, it'll be easier to see, and hopefully will be a cool design feature. This also involved moving all four mounting brackets down to the corners so we could reach them from the ground.
I kinda like the way the wind poles flip up at the end. Great place for beach towels, or to tie a clothesline between!

10/20/2023 - Update. A couple pics of the truck parked at Clark and Son Automotive in Keeseville NY. Rear main seal, super singles, brake plunger and shoes are on the build list.

10/21 /2023 - Update.
HUGE UPDATE!
It's mobile!
10/28/2023 - Update. Here's the extended wind poles. In their stock form, they serve 2 purposes. First, they obviously hold the forward roof panel so the wind can't blow it open. Yes, there are small black levers inside that hold the panels in place, but a heavy wind will lift the roof right off. The wind poles prevent that. Their second use is to assist in lifting the roof, but now that the camper is higher off the ground, we felt we needed a little more reach. I also asked to have the ends curved to match the curve of the armrest inside the doors as a 'design feature'.
10/30/2023 - Update. Nothing major, but really helpful! I asked the welder to cut the bottom step off the driver's side, and weld it to the second step. This brings it up 1½", which makes it easier for me to get my bad leg up into the cab. This thicker step tread, combined with the rim step, and the two grab handles, really help me get into it.
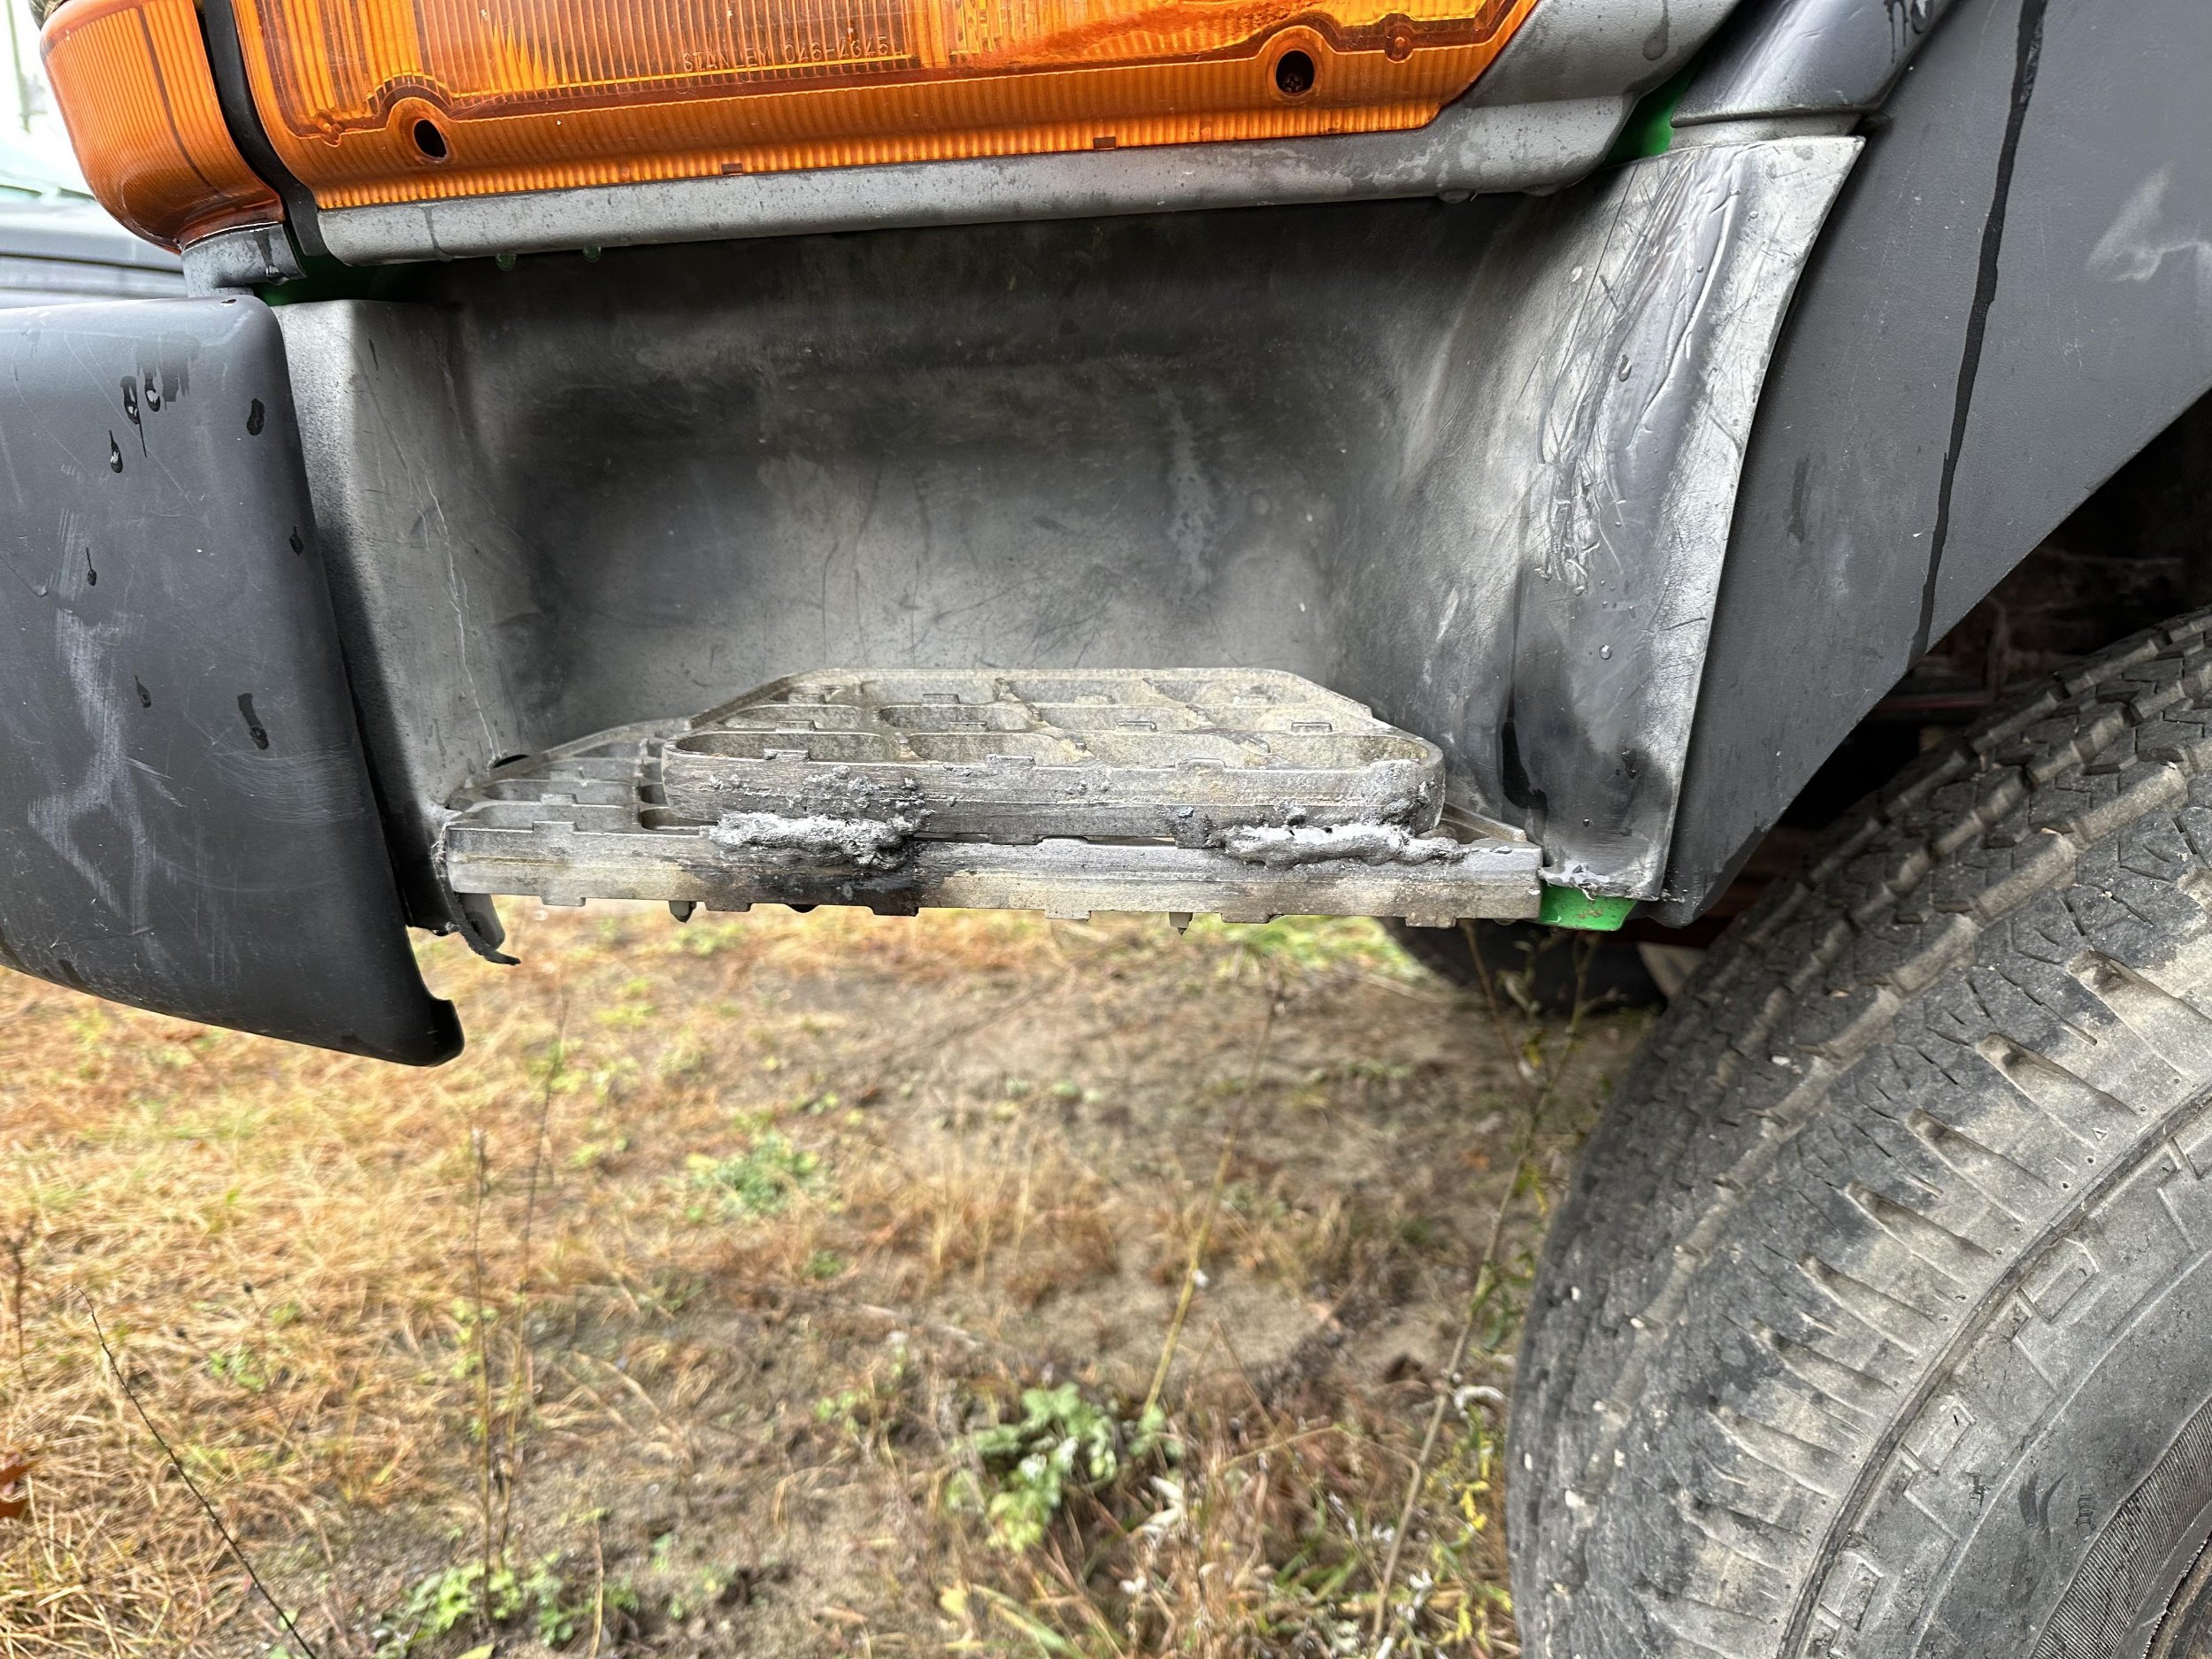

About the rim step.
I had Stan make a big ring to weld to the rim. I also asked for a ridge along the outer edge, as well as a notch for a rope. The rim helps keep my foot on the step, and the notch is for a rope winch!
I’ve seen the rope winches or bush winches on Cape Cod brush-breaker fire trucks. Trucks that are designed to drive through heavy brush, (like the low Scotch Pines that are all through the woods of southeast Mass), might need a quick winch. By wrapping a rope around this small drum, 99% of the winching needs are covered. It’s MUCH quicker to deploy than a full-size winch, (which the truck will have anyway).
11/1/2023 - Update. Nothing major, just some small steel blocks. These are welded to the top of the fishmouth subframe, and their purpose is to prevent the large, sprung U bolts from sliding forward or back as the truck frame twists to maintain ground contact of all four tires.
You can also see the blue urethane pads between the fishmouth subframe and the truck frame, as well as the ones between the side locator plates and the subframe, (Remember, these side locators are not through-bolted to the truck frame. It is a slip joint.
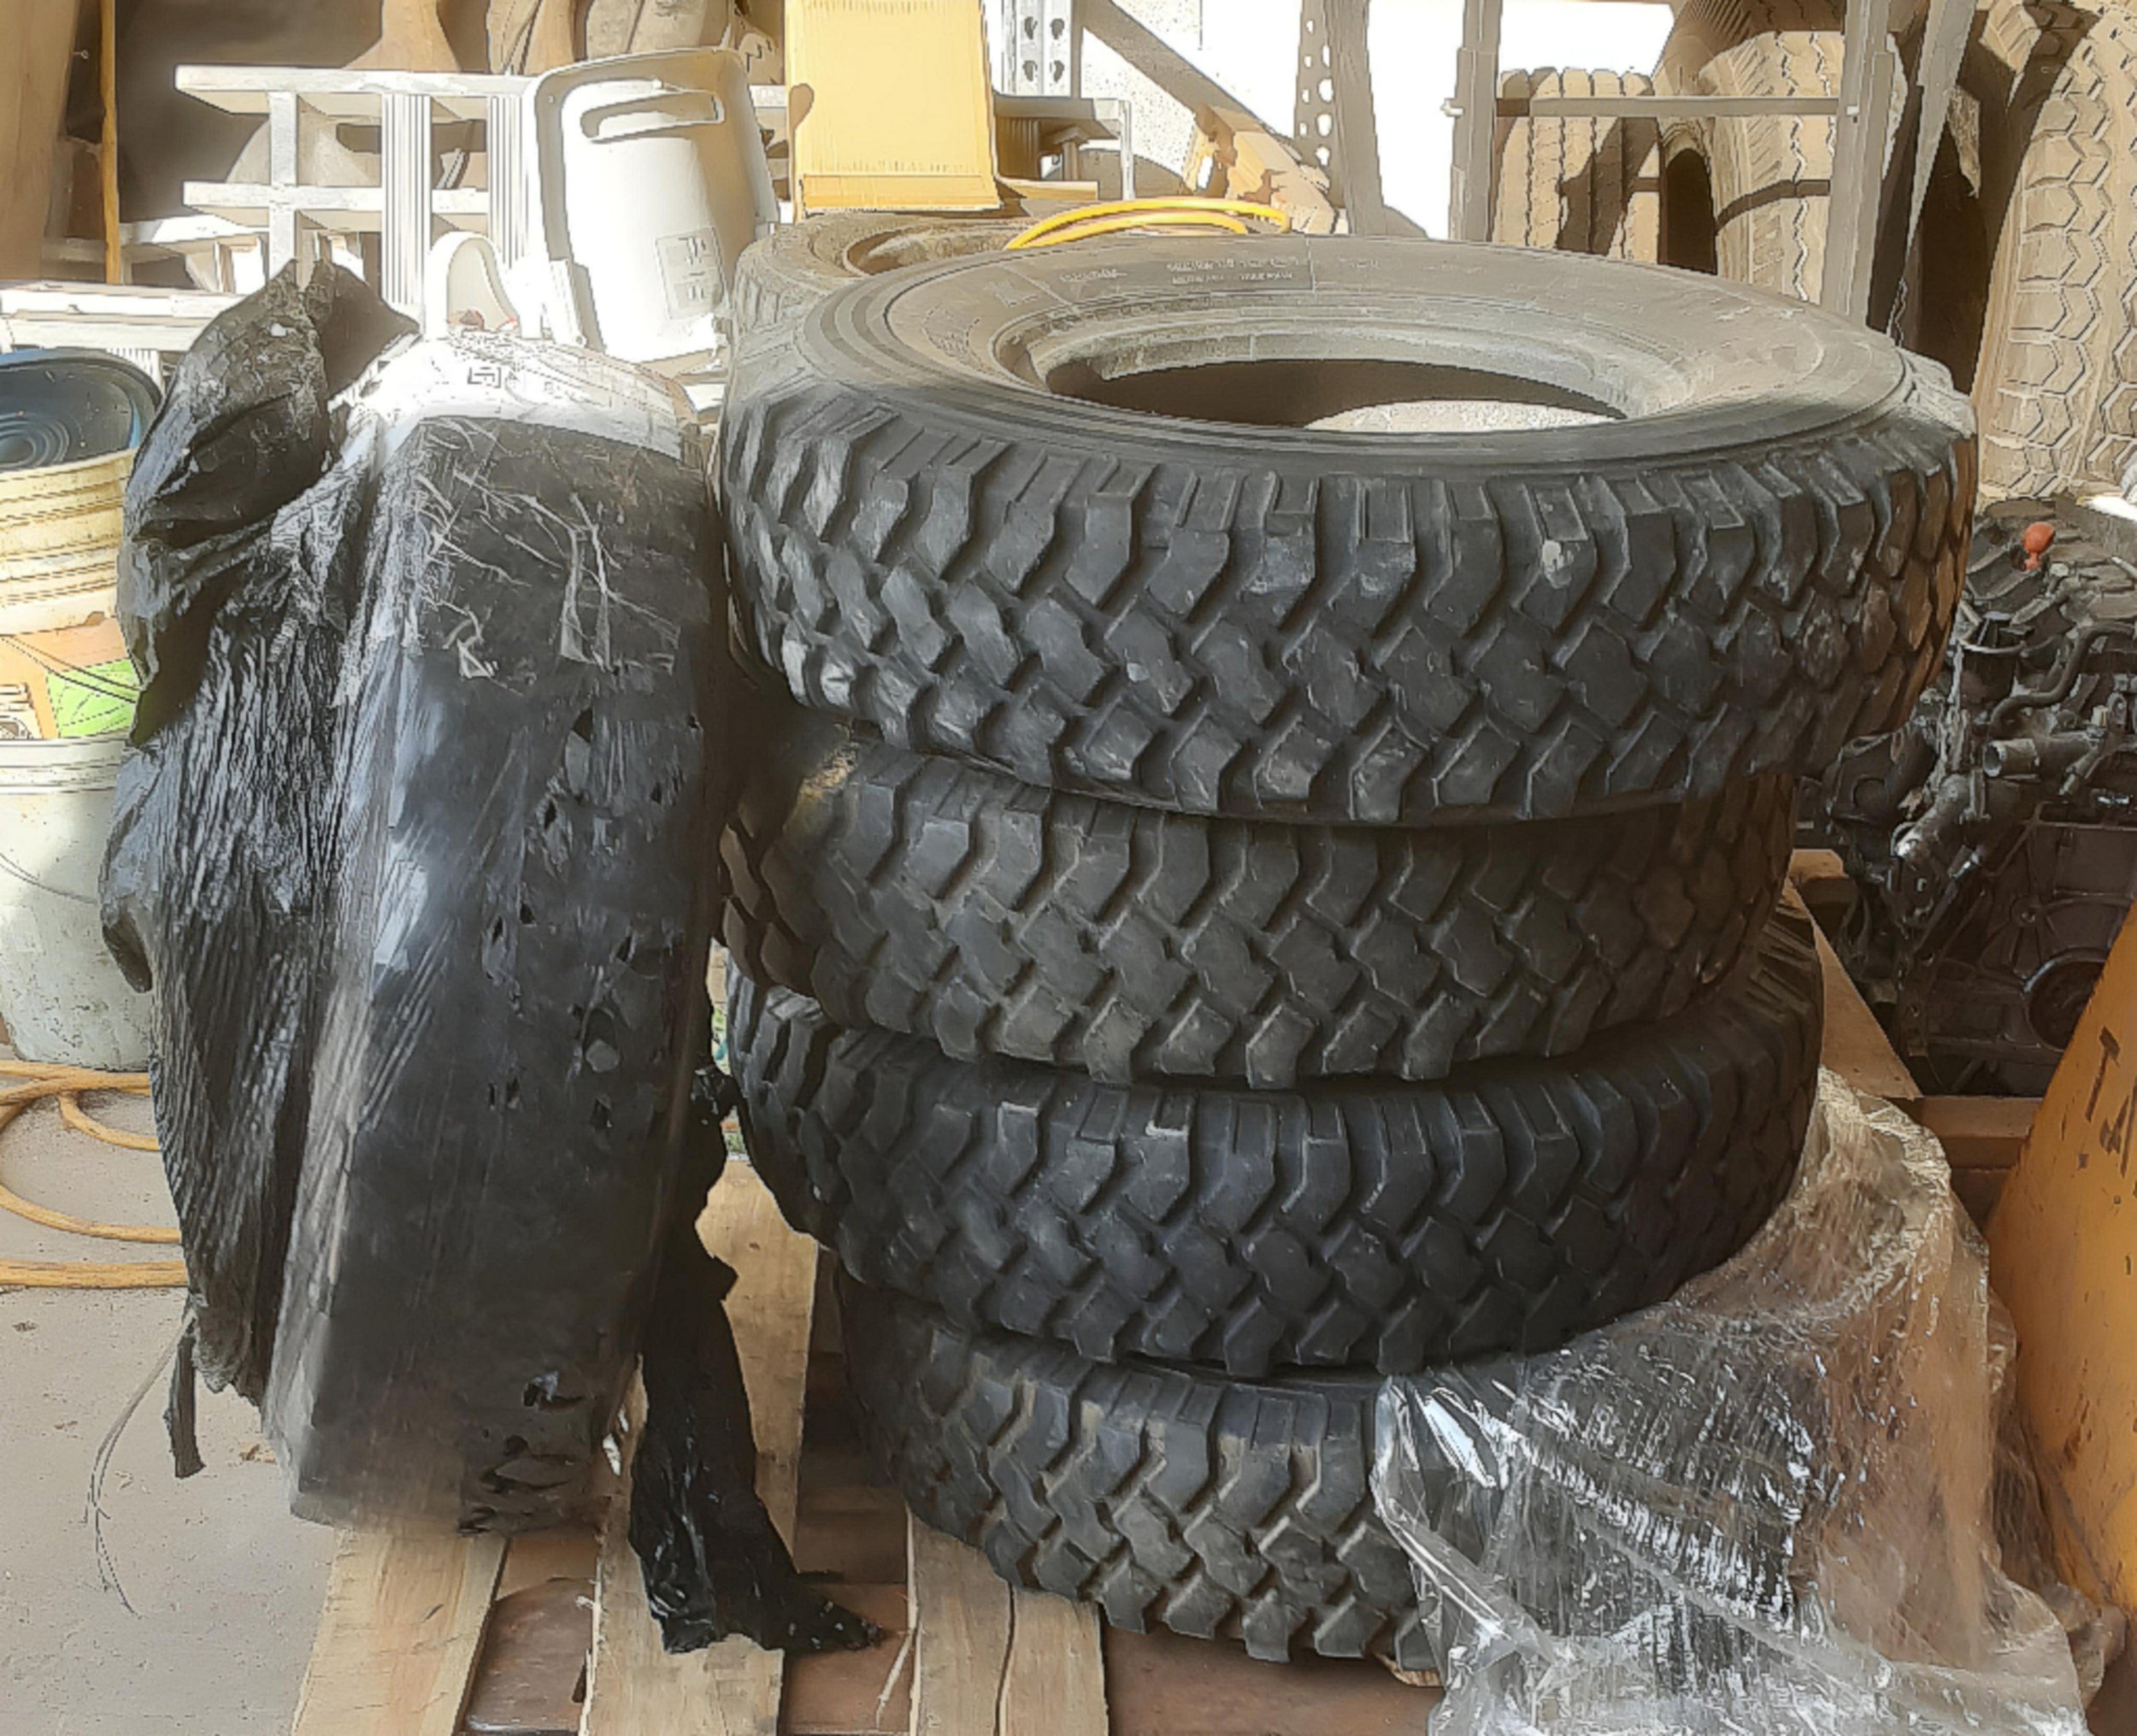
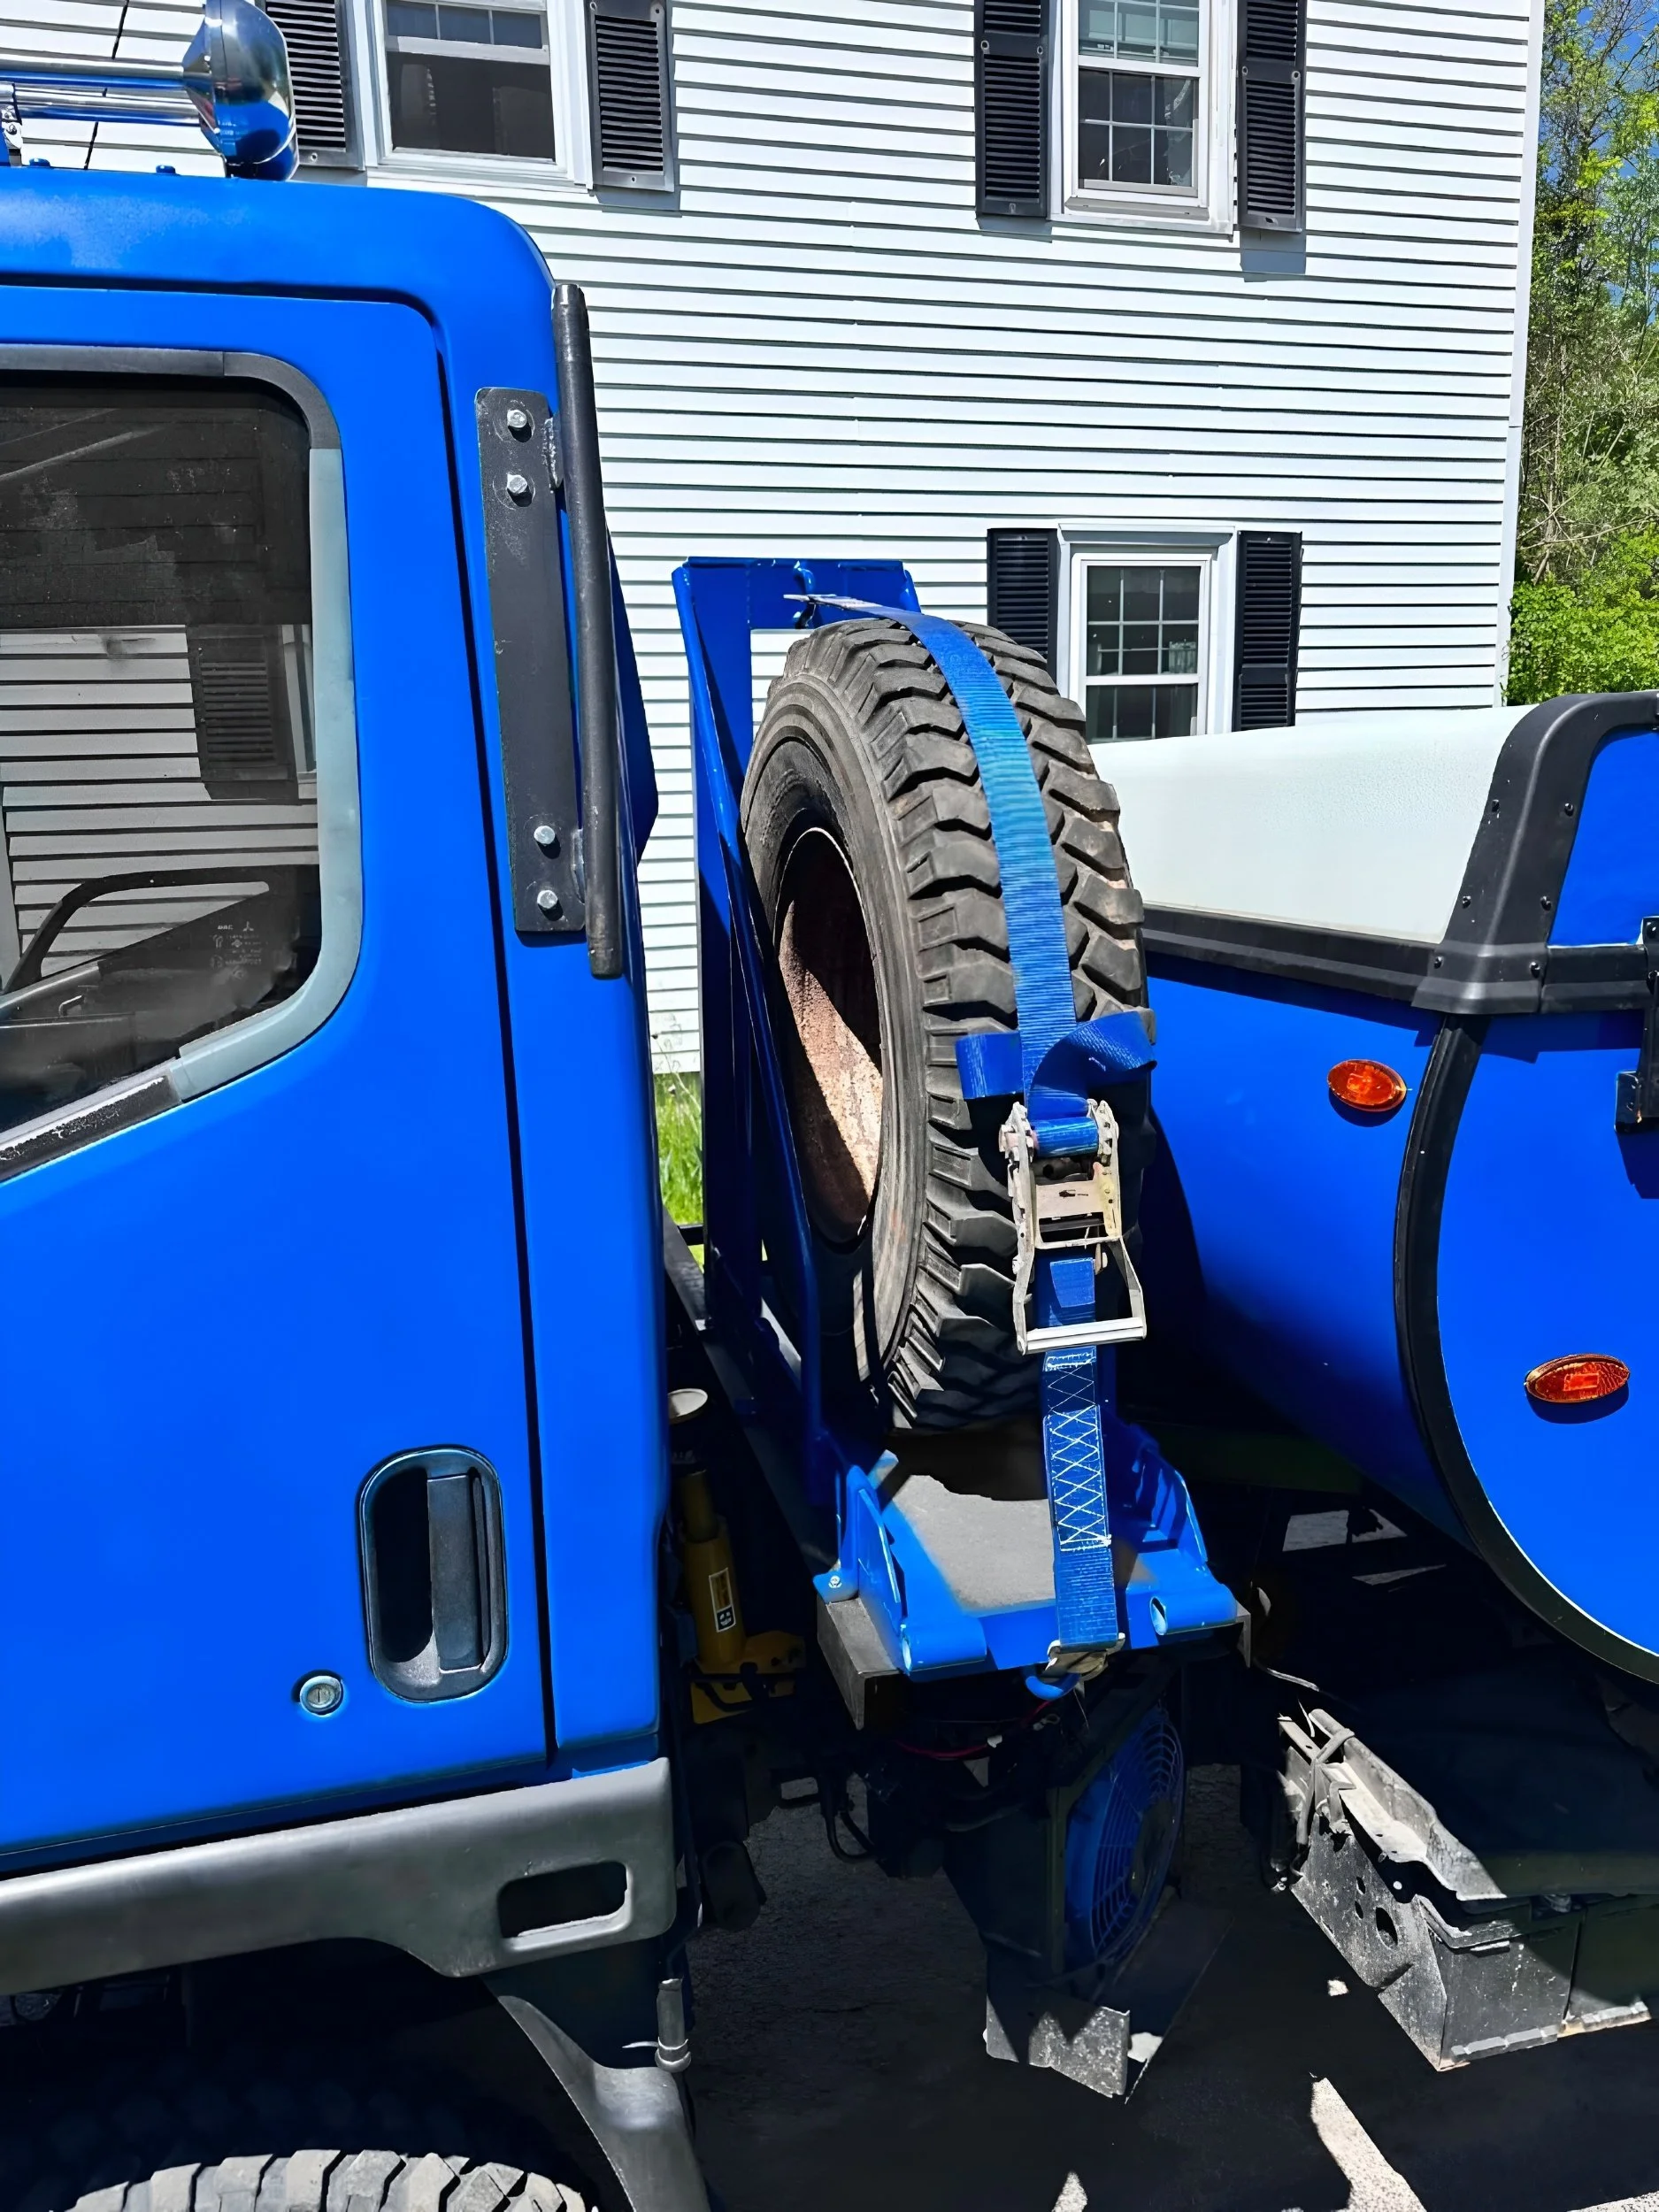
11/01/2023 - Update. Tires! These came in to Clark and Sons. Ordered from militarytires.ca up in Ontario. $120 a piece, which is a GREAT price for these regroovable Michelin XZL's! Size is 8.25R16, so they're roughly 35” tall. I wanted 9.00r16's, but they're impossible to find now, so these'll do!
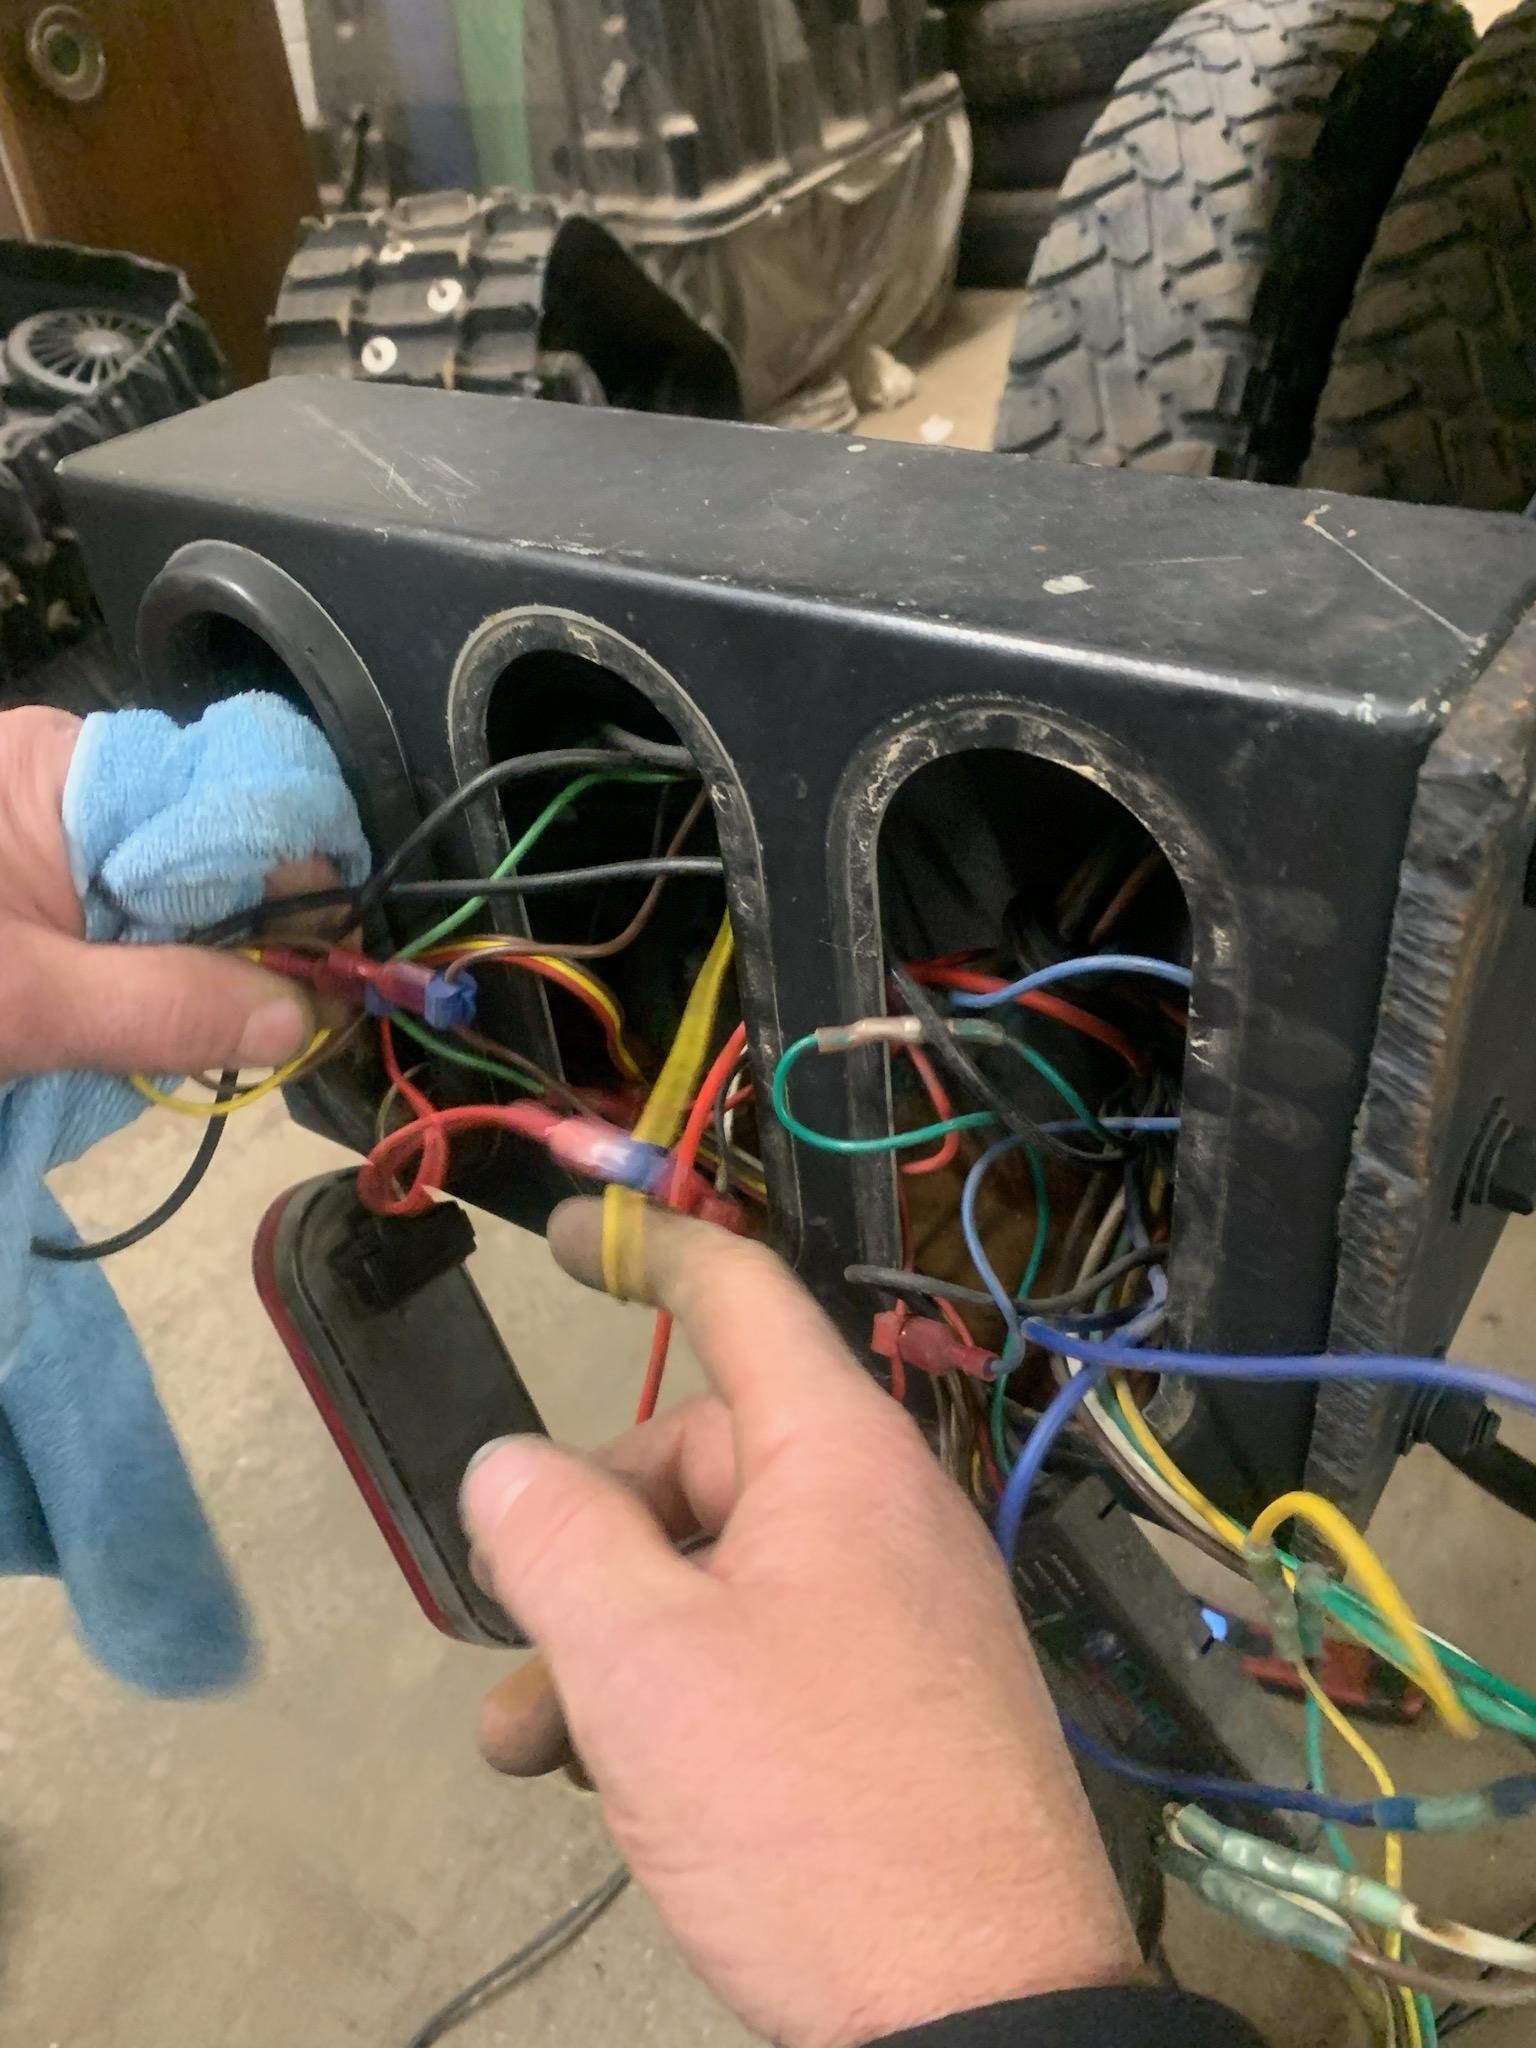
11/10/2023 - Update. RAT'S NEST!
Trying to track down old and new wiring harnesses, and getting all the lights working. Plus, wiring the camper running lights into the truck lights. Thanks Robbie!
HUGE NEWS!!
11/11/2023 - Update. IT'S NOT THE REAR MAIN SEAL THAT'S LEAKING!
This means we WON'T have to drop the transfer case and transmission! It was a turbo oil supply return line that's leaking. $2.00 O ring fixed it. Saved a thousand bucks in labor costs. Talk about HONESTY! How many automotive shops would pass up the chance to get an extra few grand out of a customer? Not Kris and Robbie. Thanks, guys!
02-15-23 - UPDATE
Just a couple vids of Kris moving Dackwagon from back storage up to the shop.
2-20-23 - Update
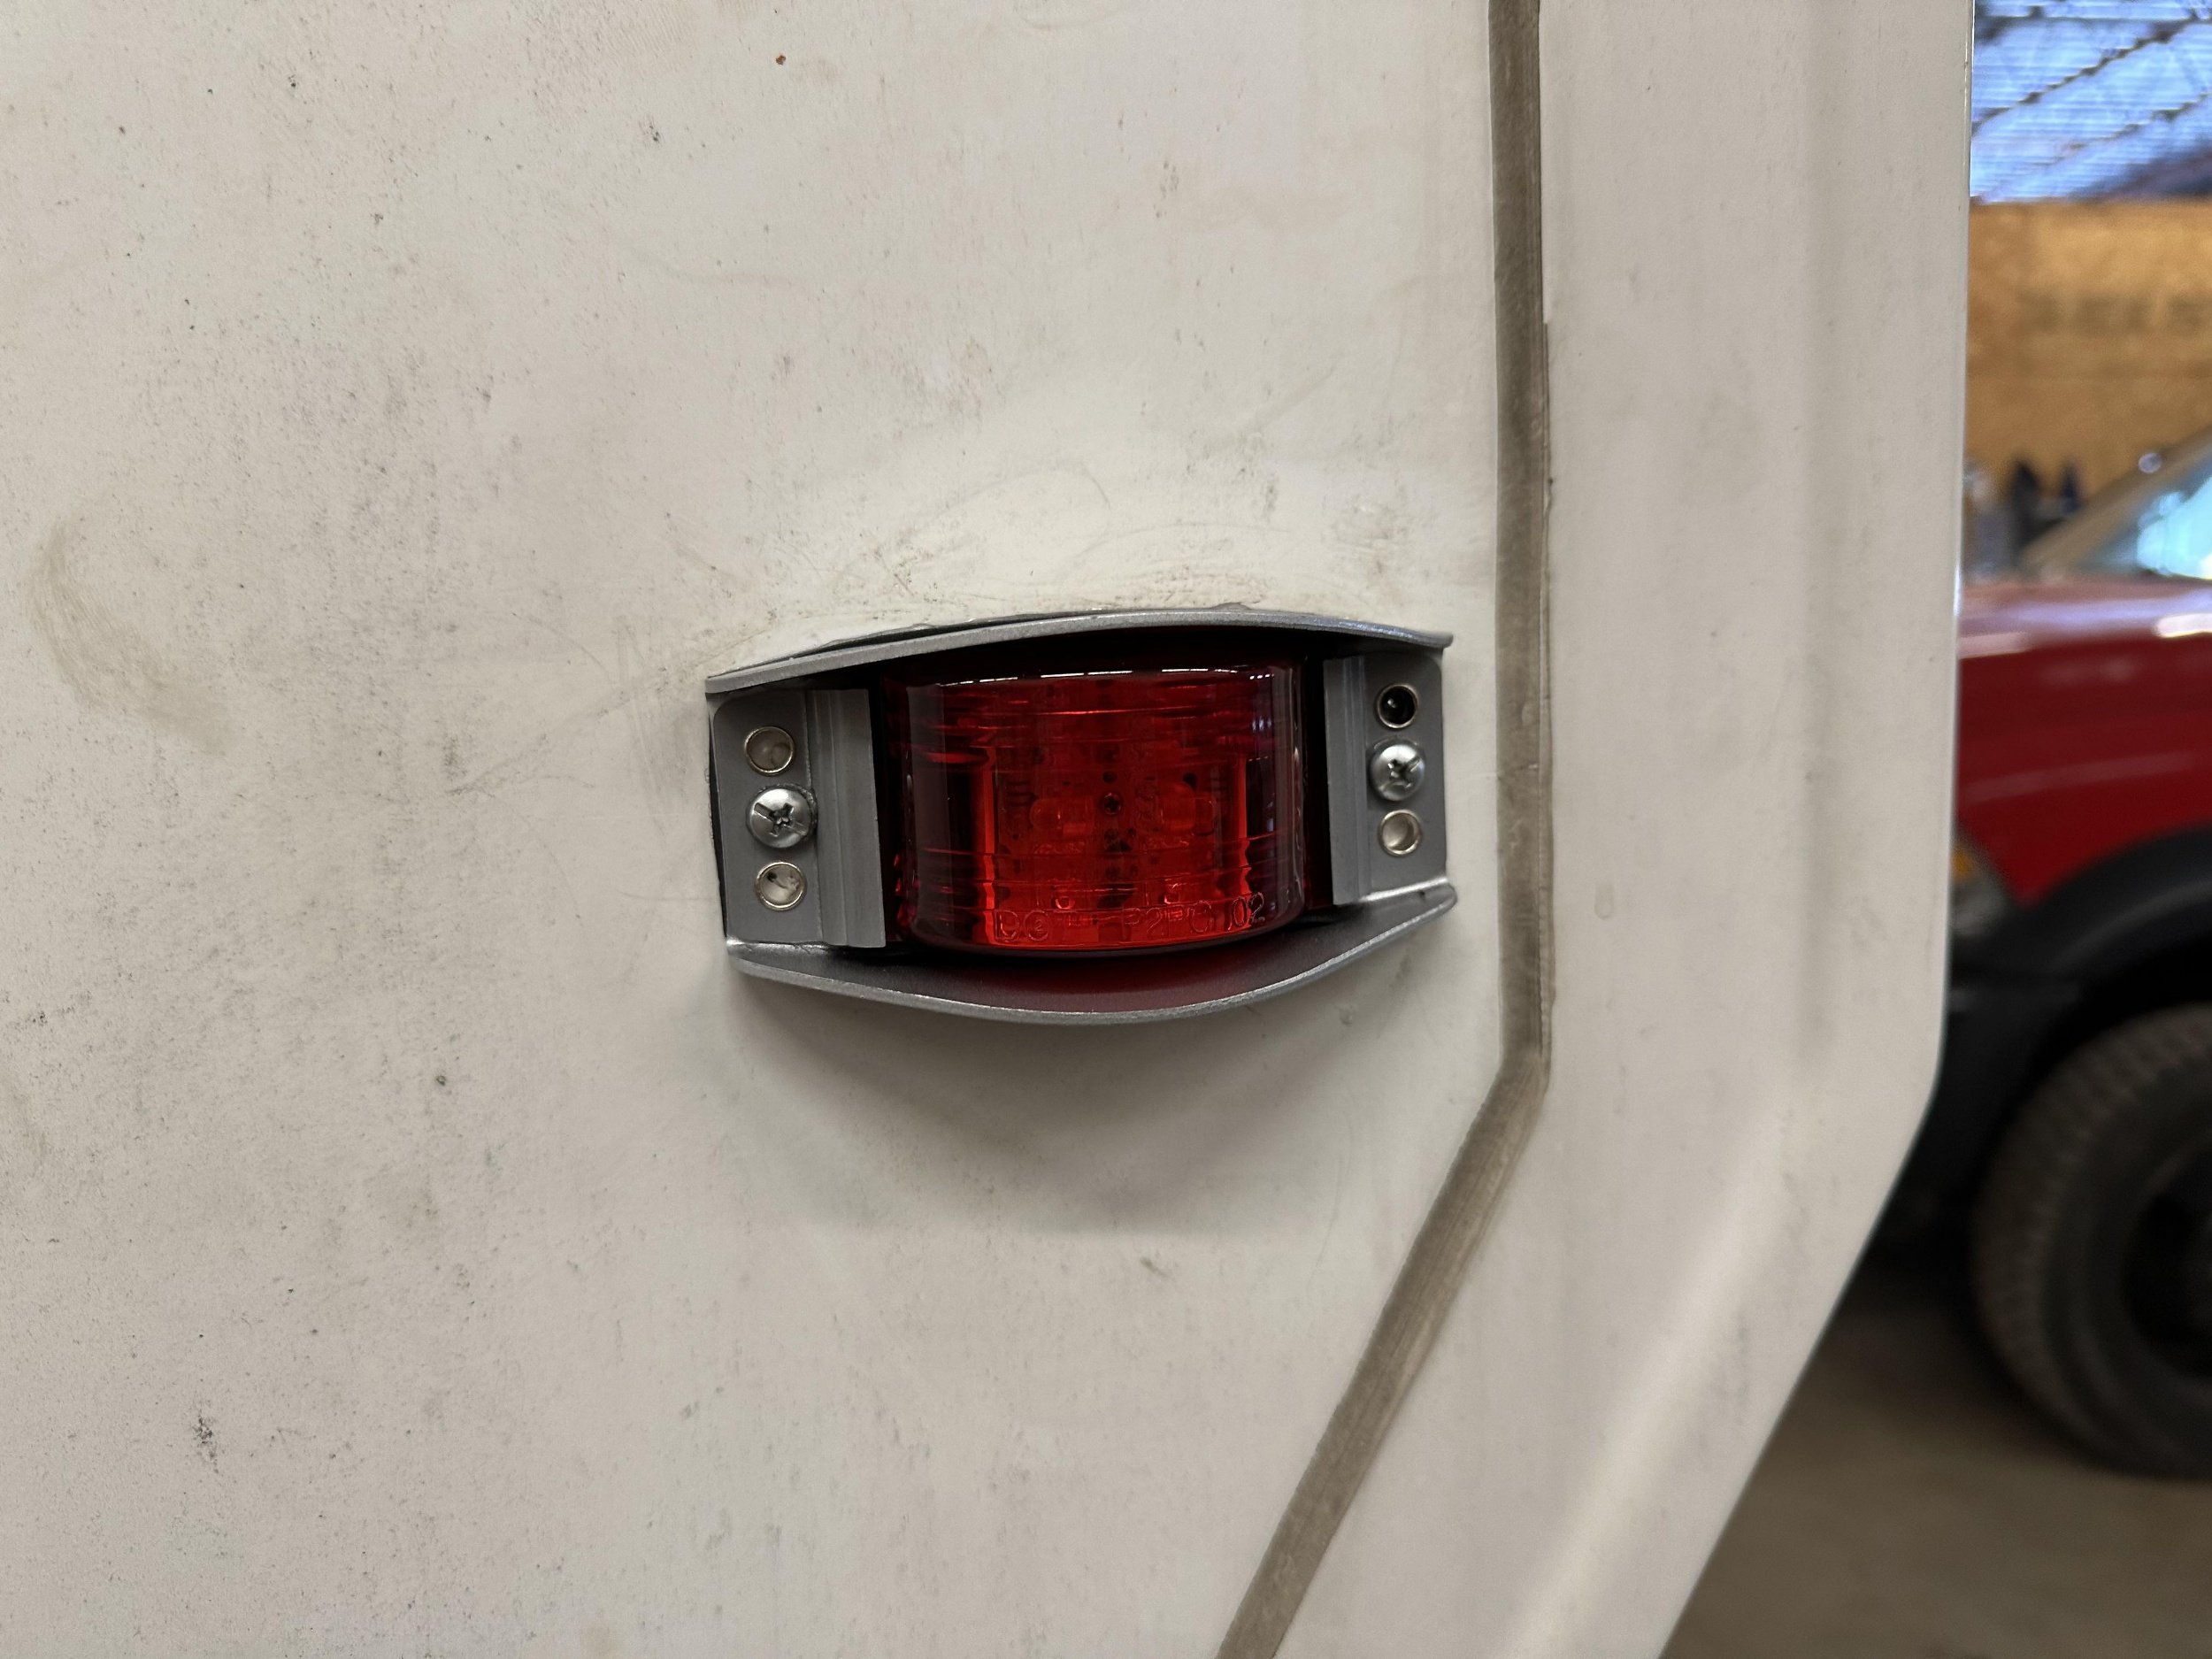
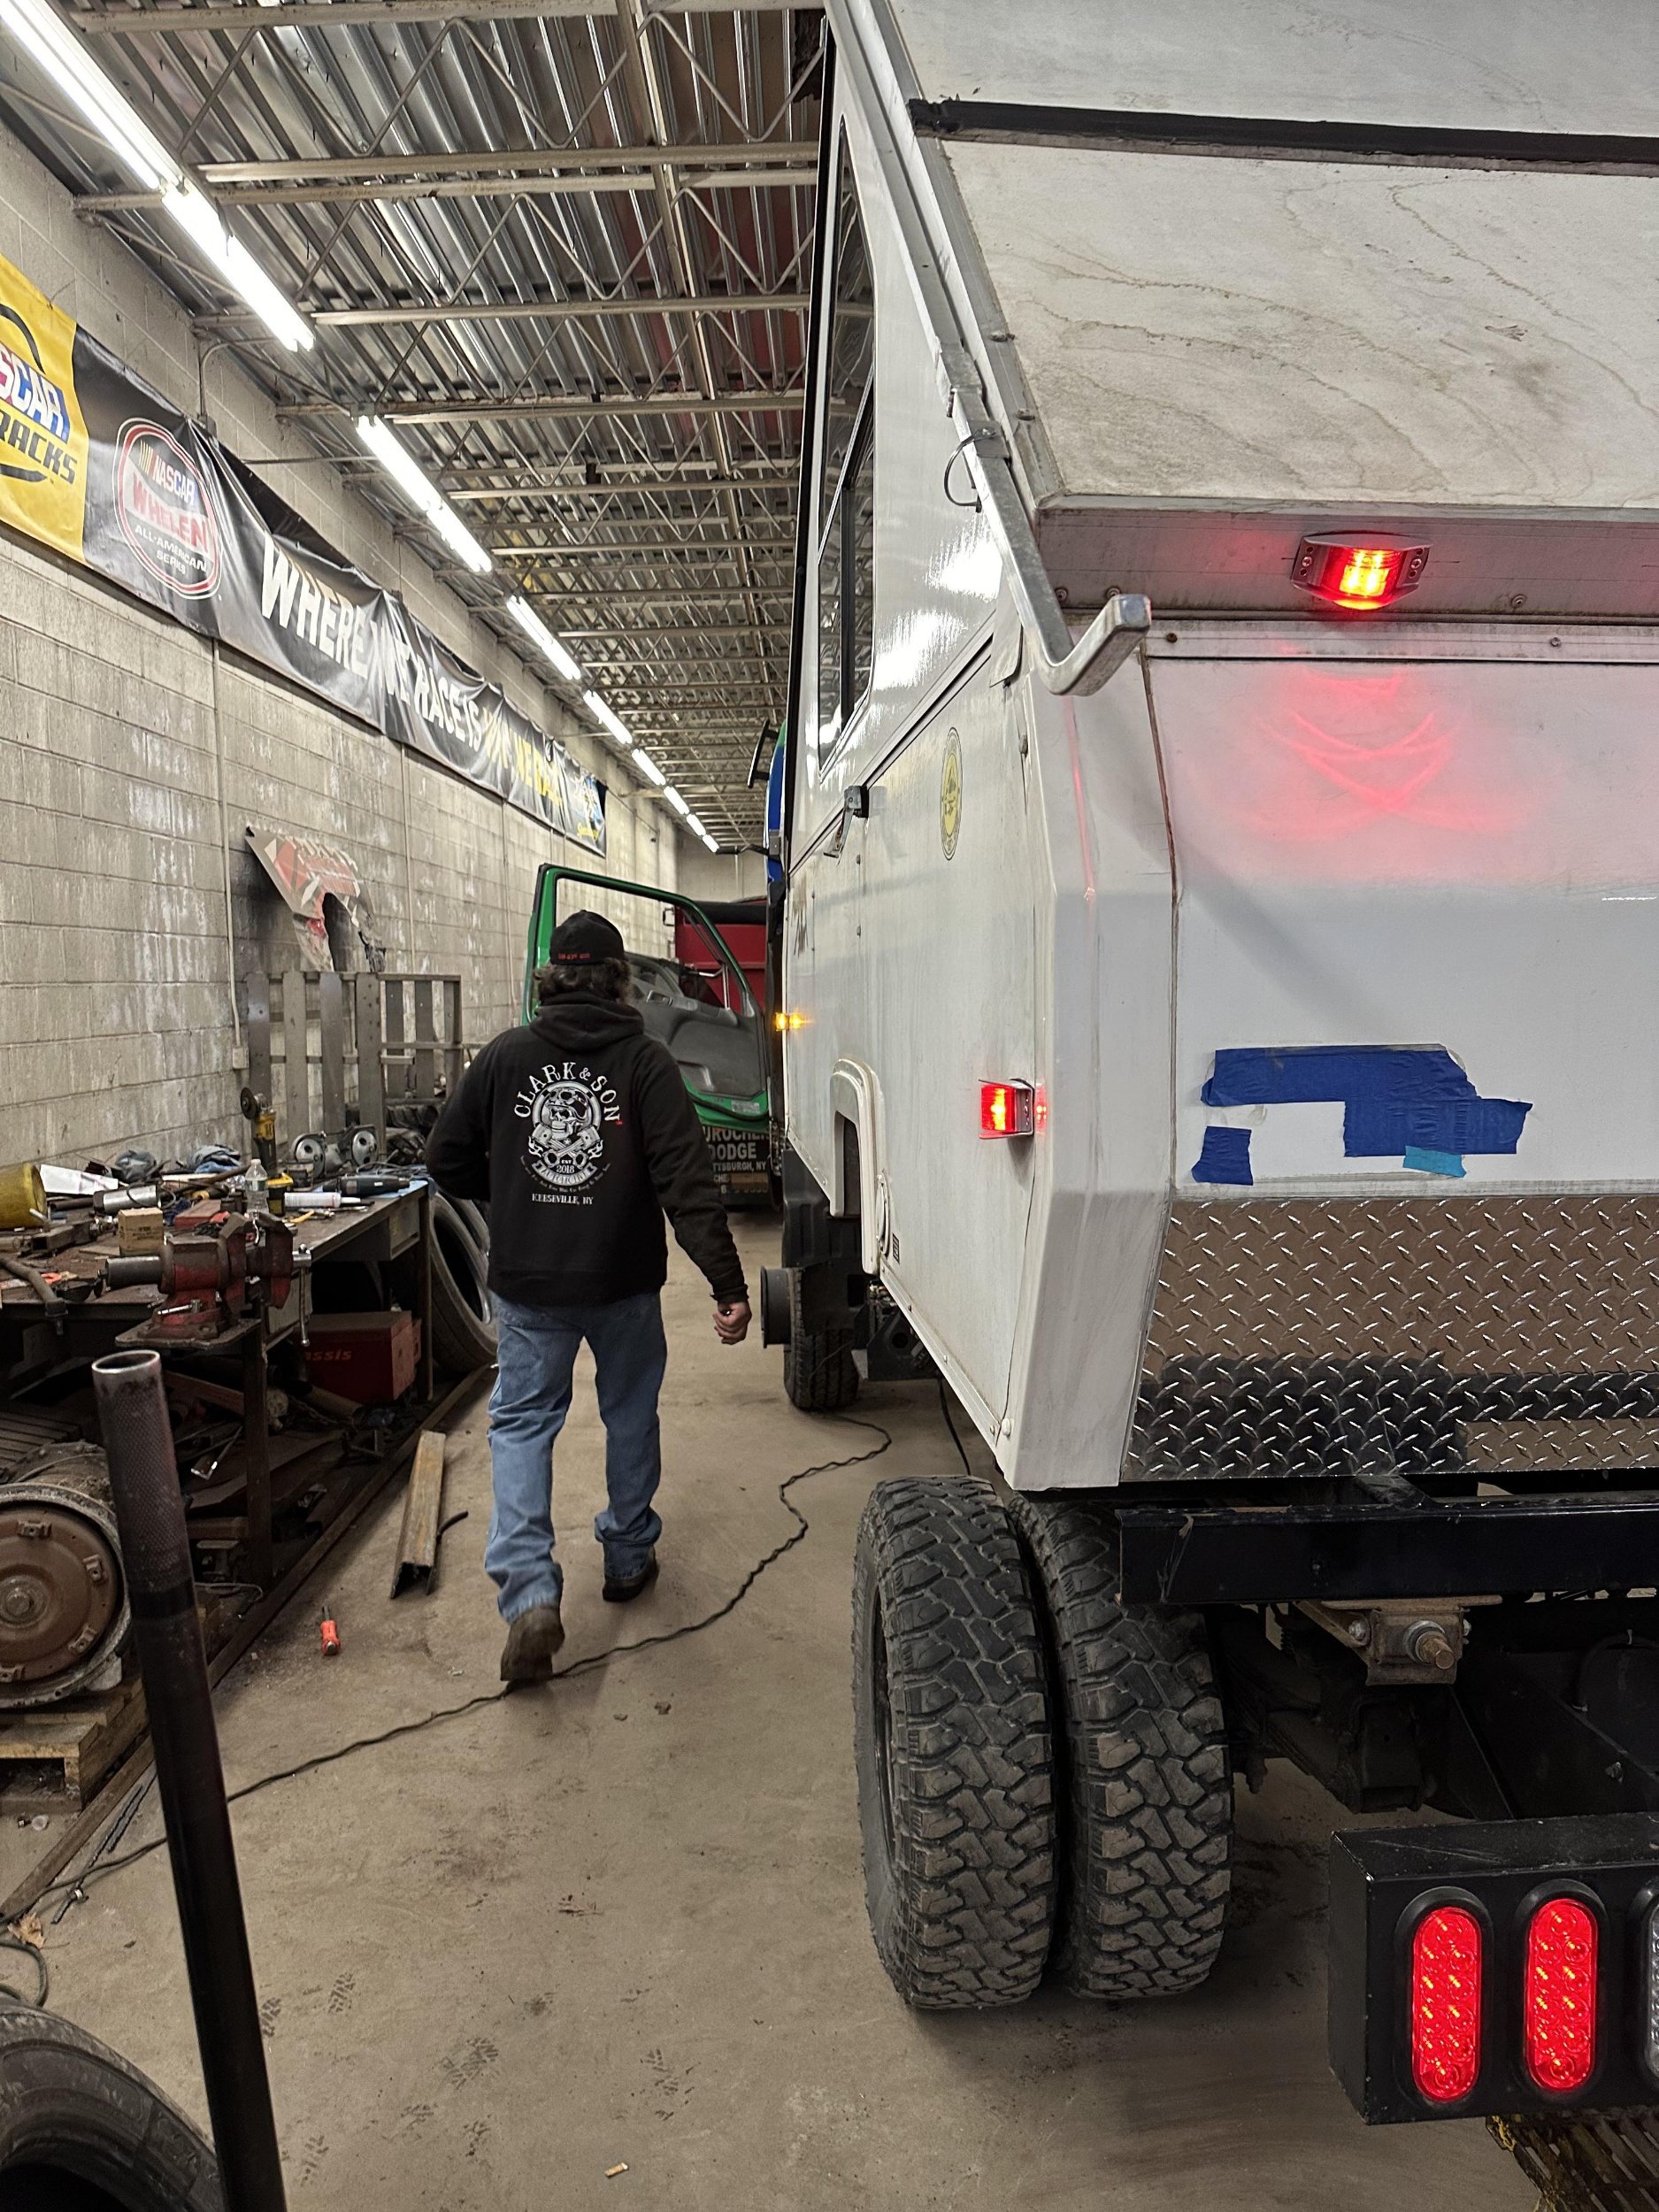
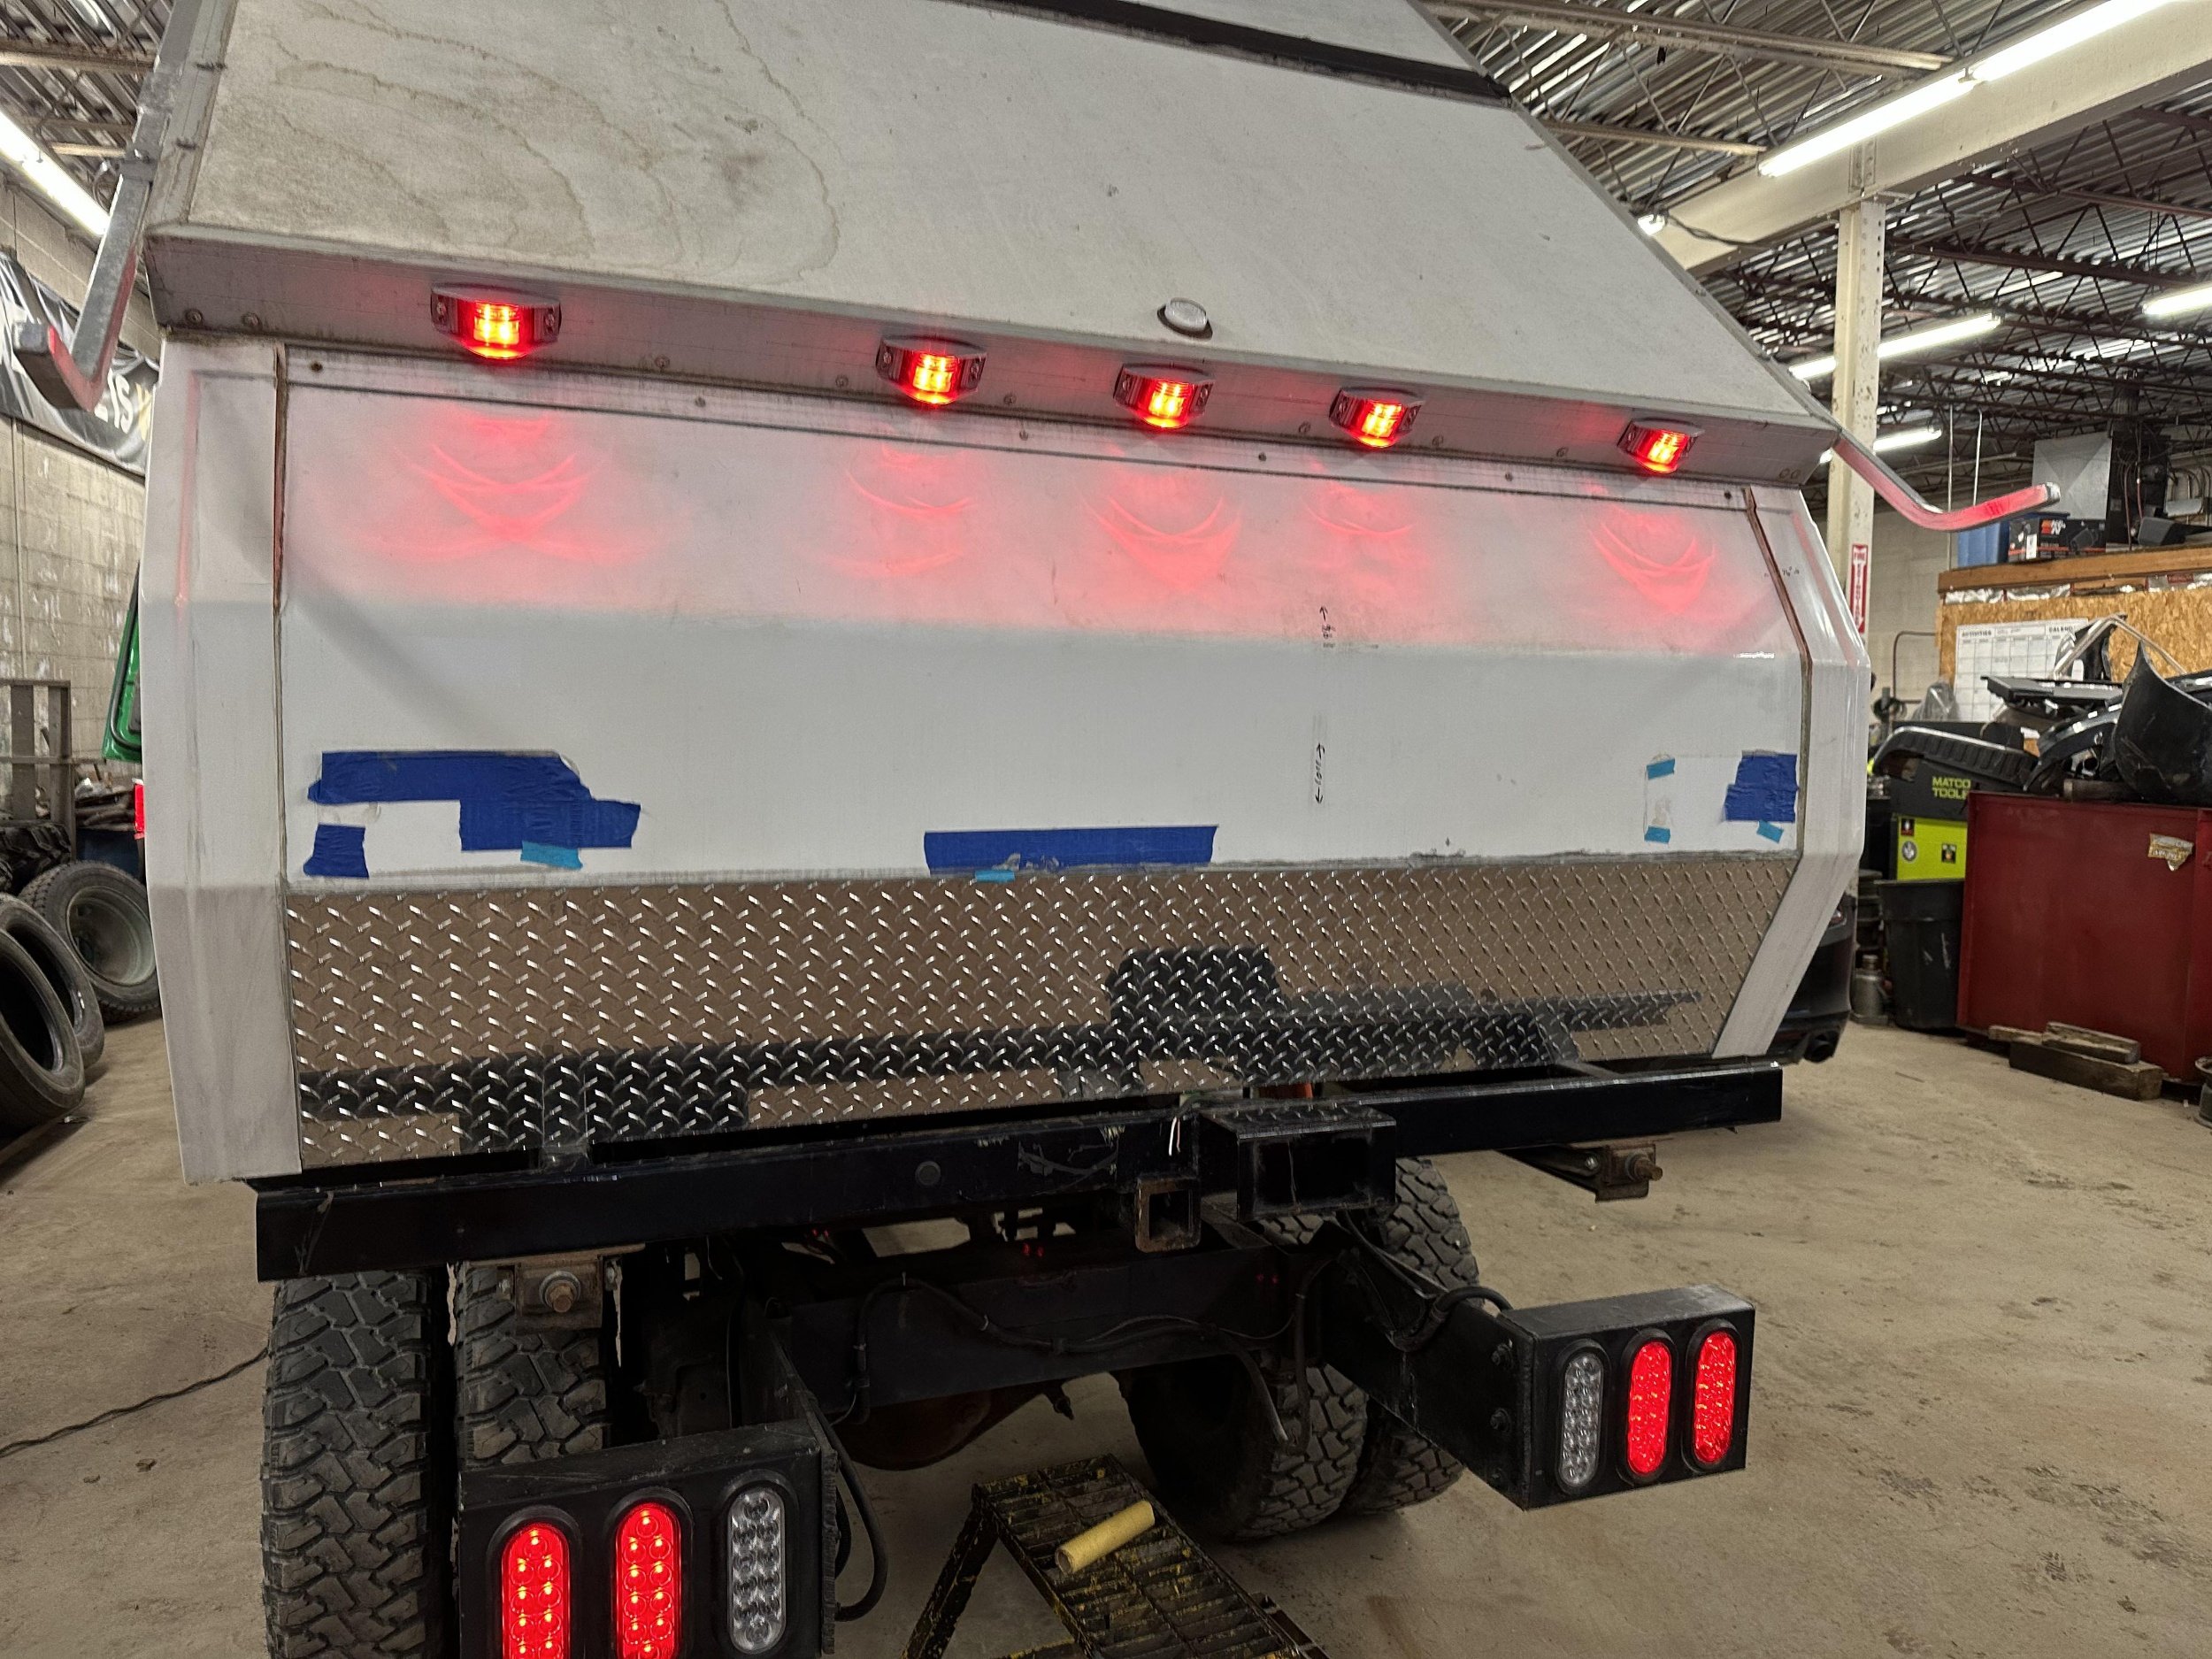
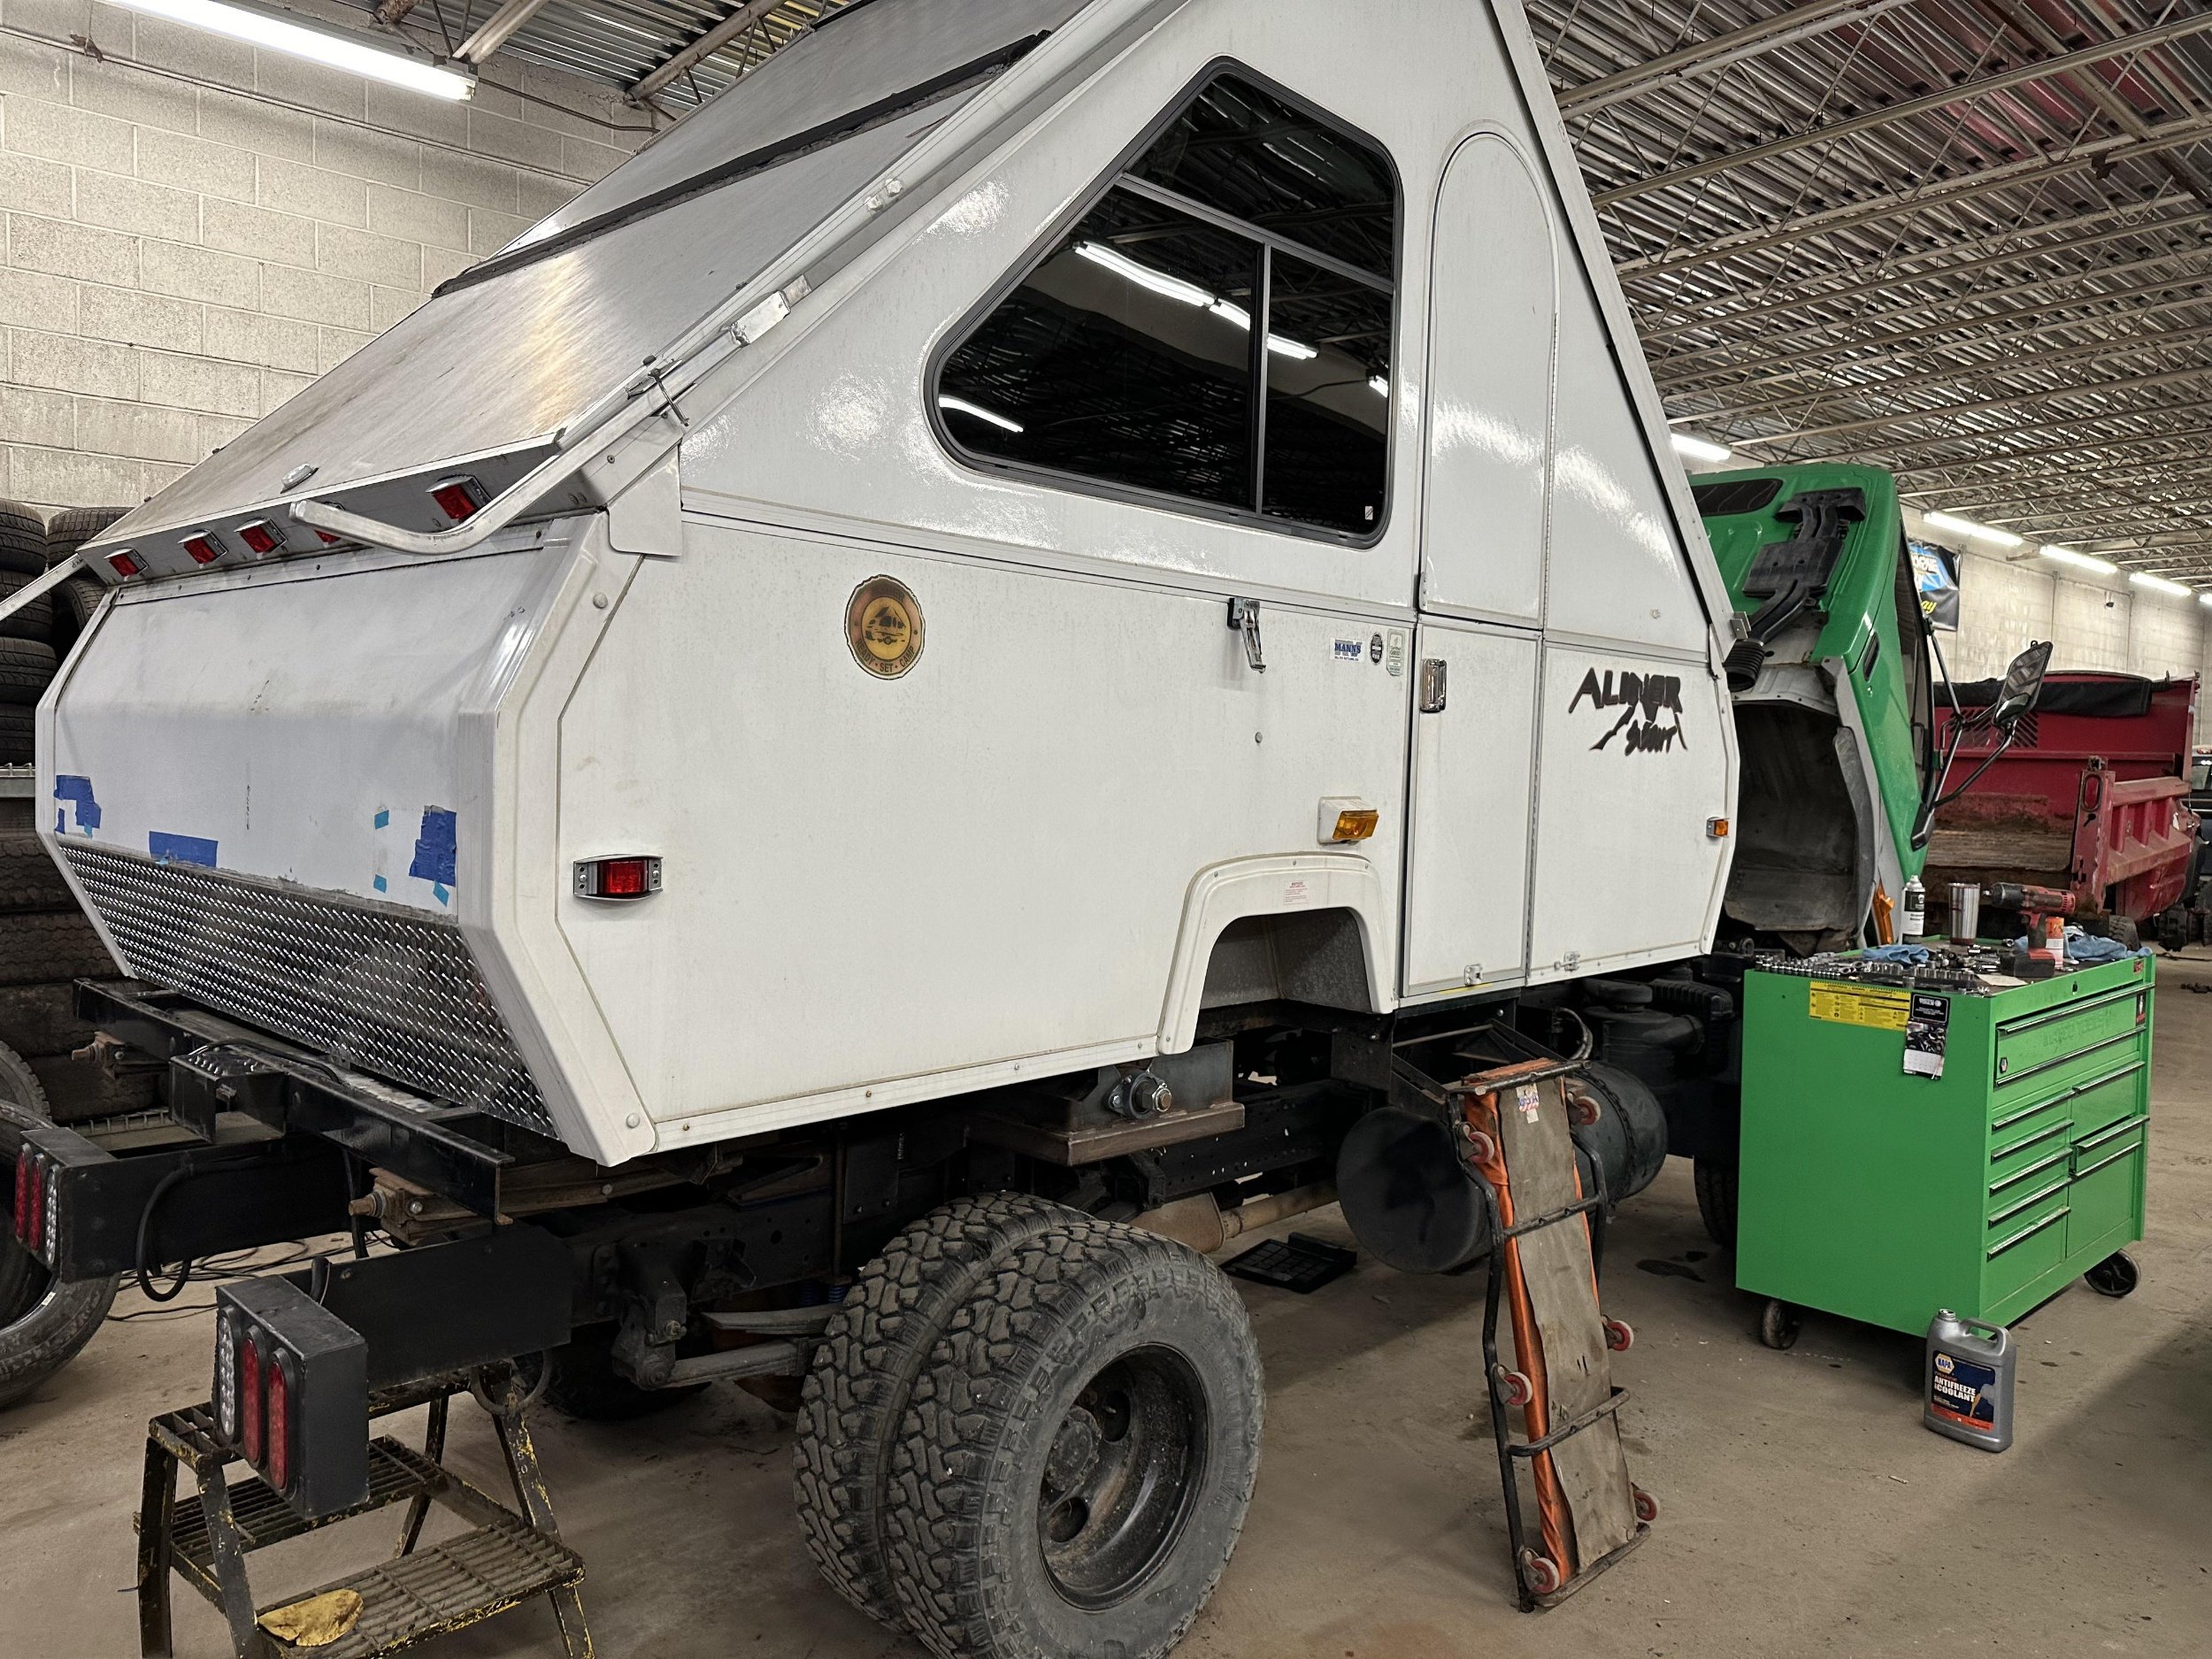
Clearance and marker lights.
I wanted guarded marker and clearance lights on the camper. The metal above and below the LED lenses will protect them from branches dragging them off in the woods. These are Optronics from eBay. Nice work, Robbie!
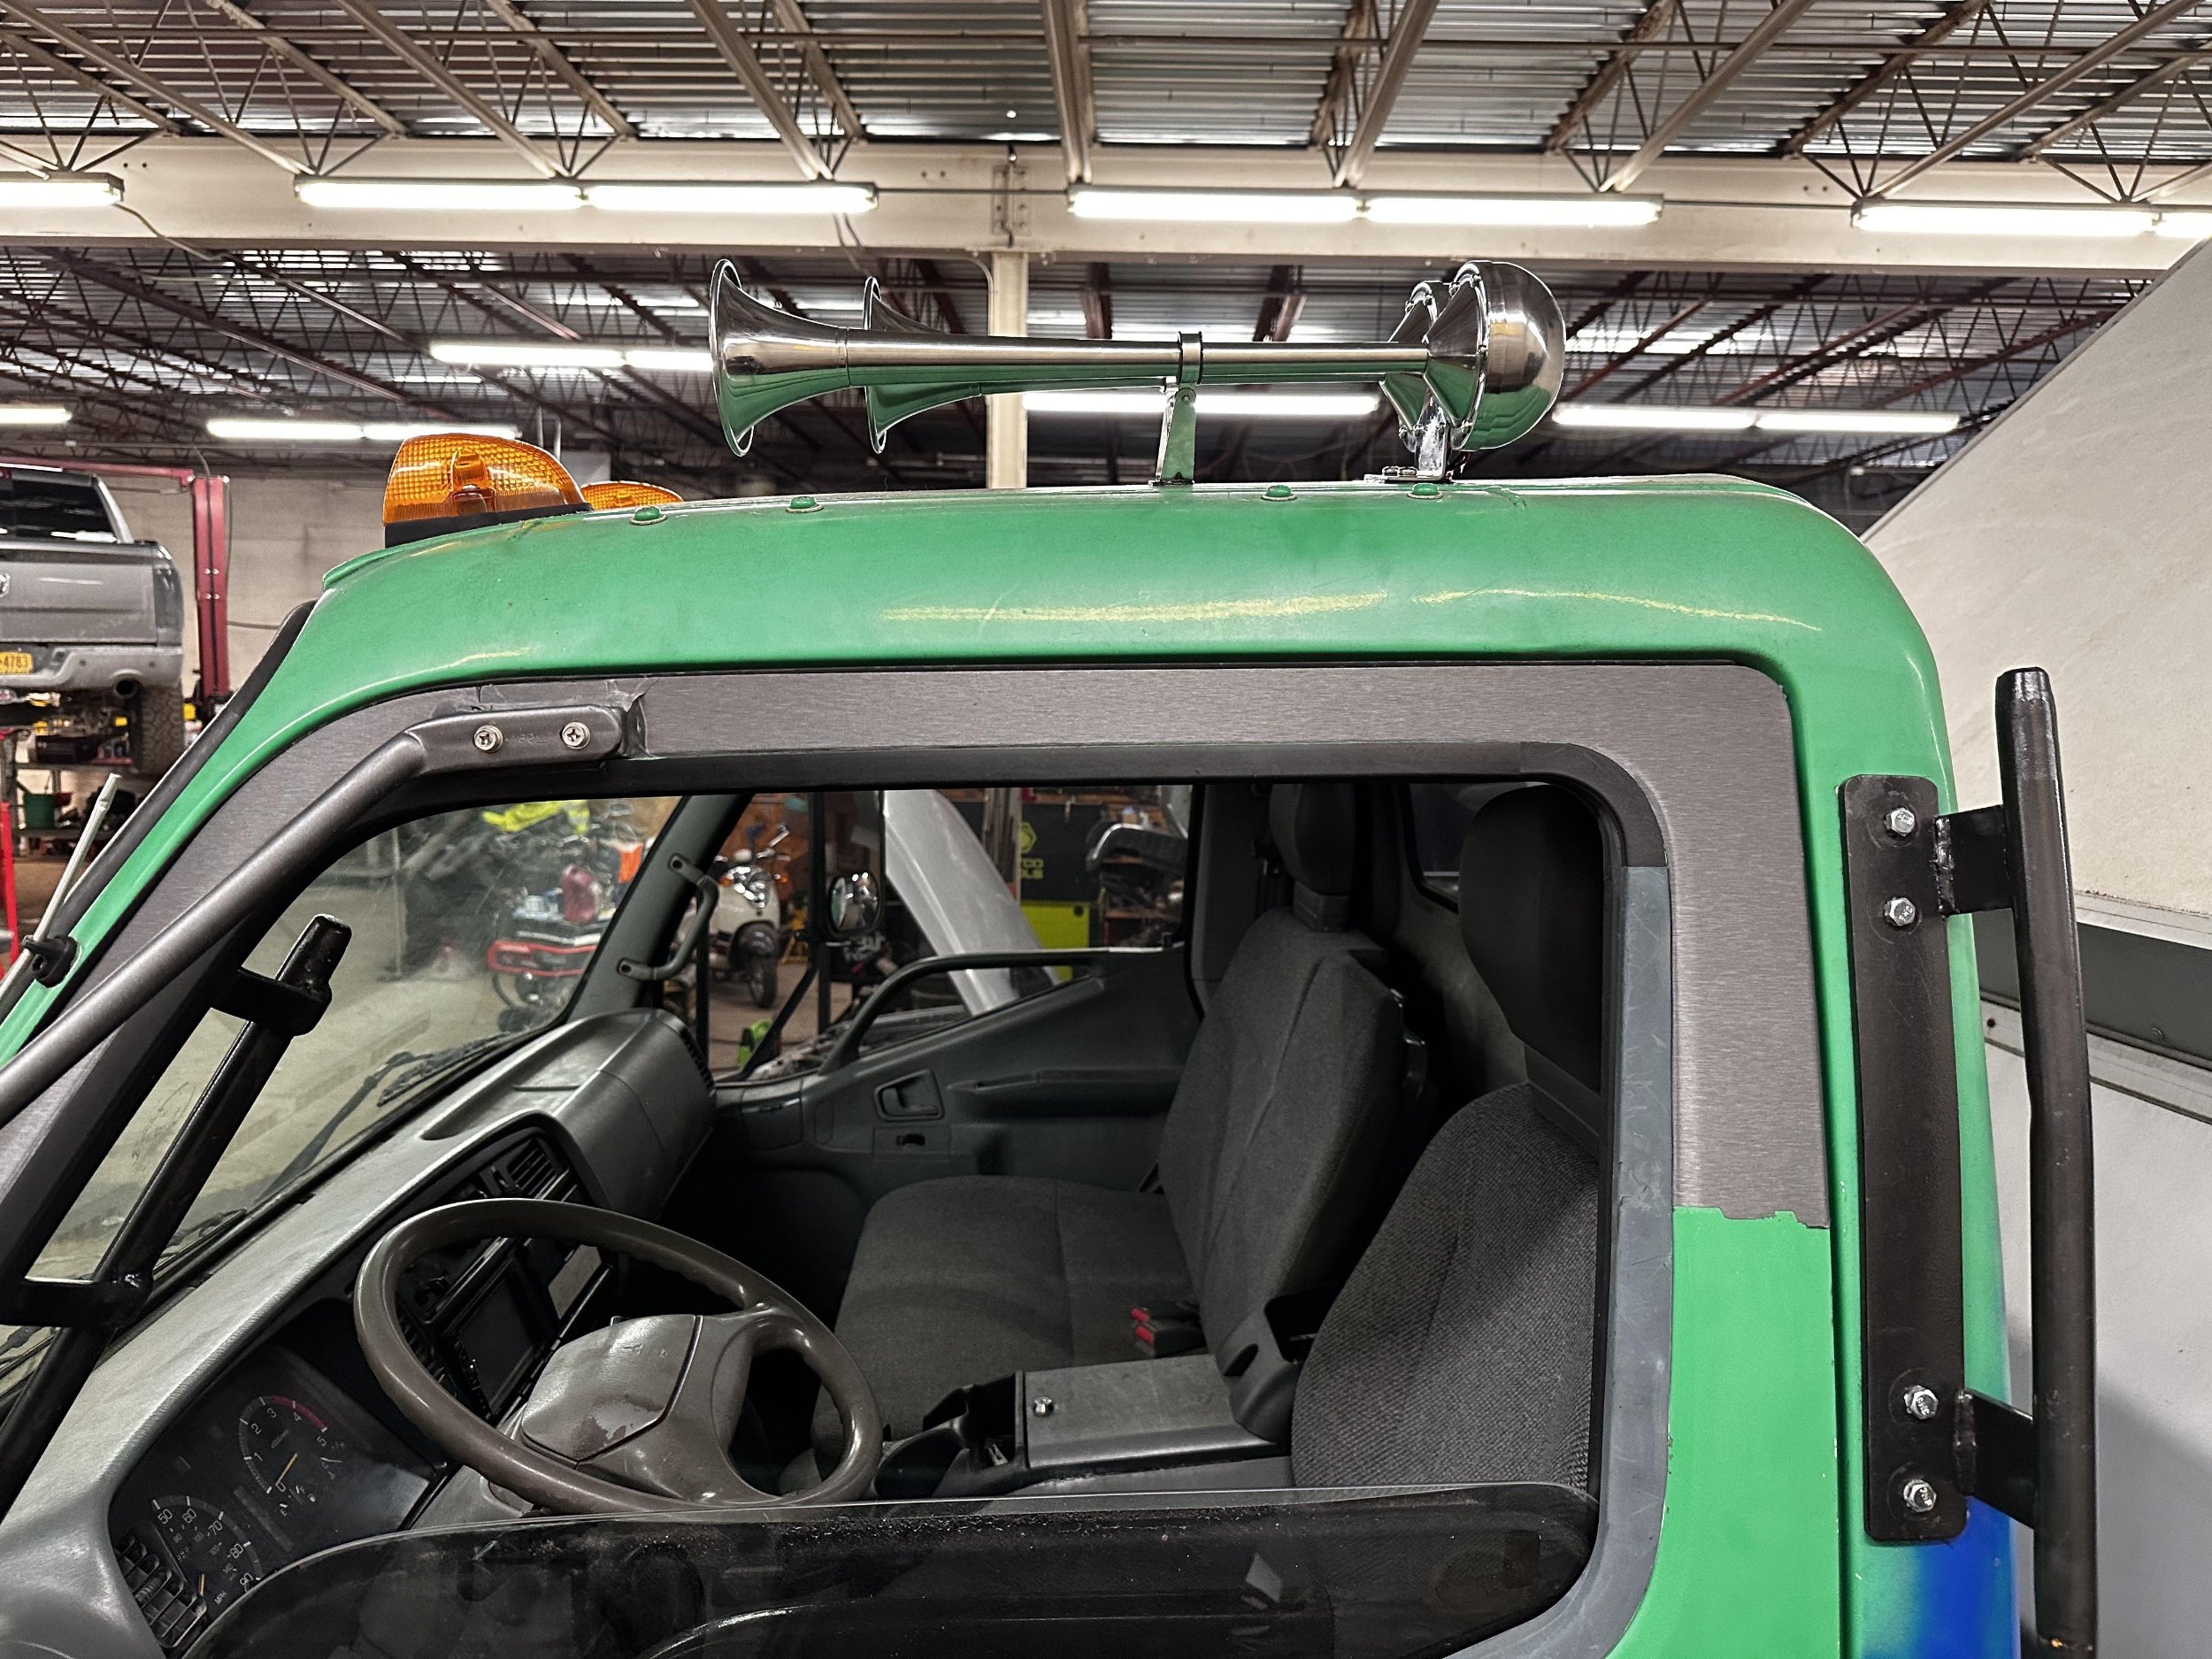
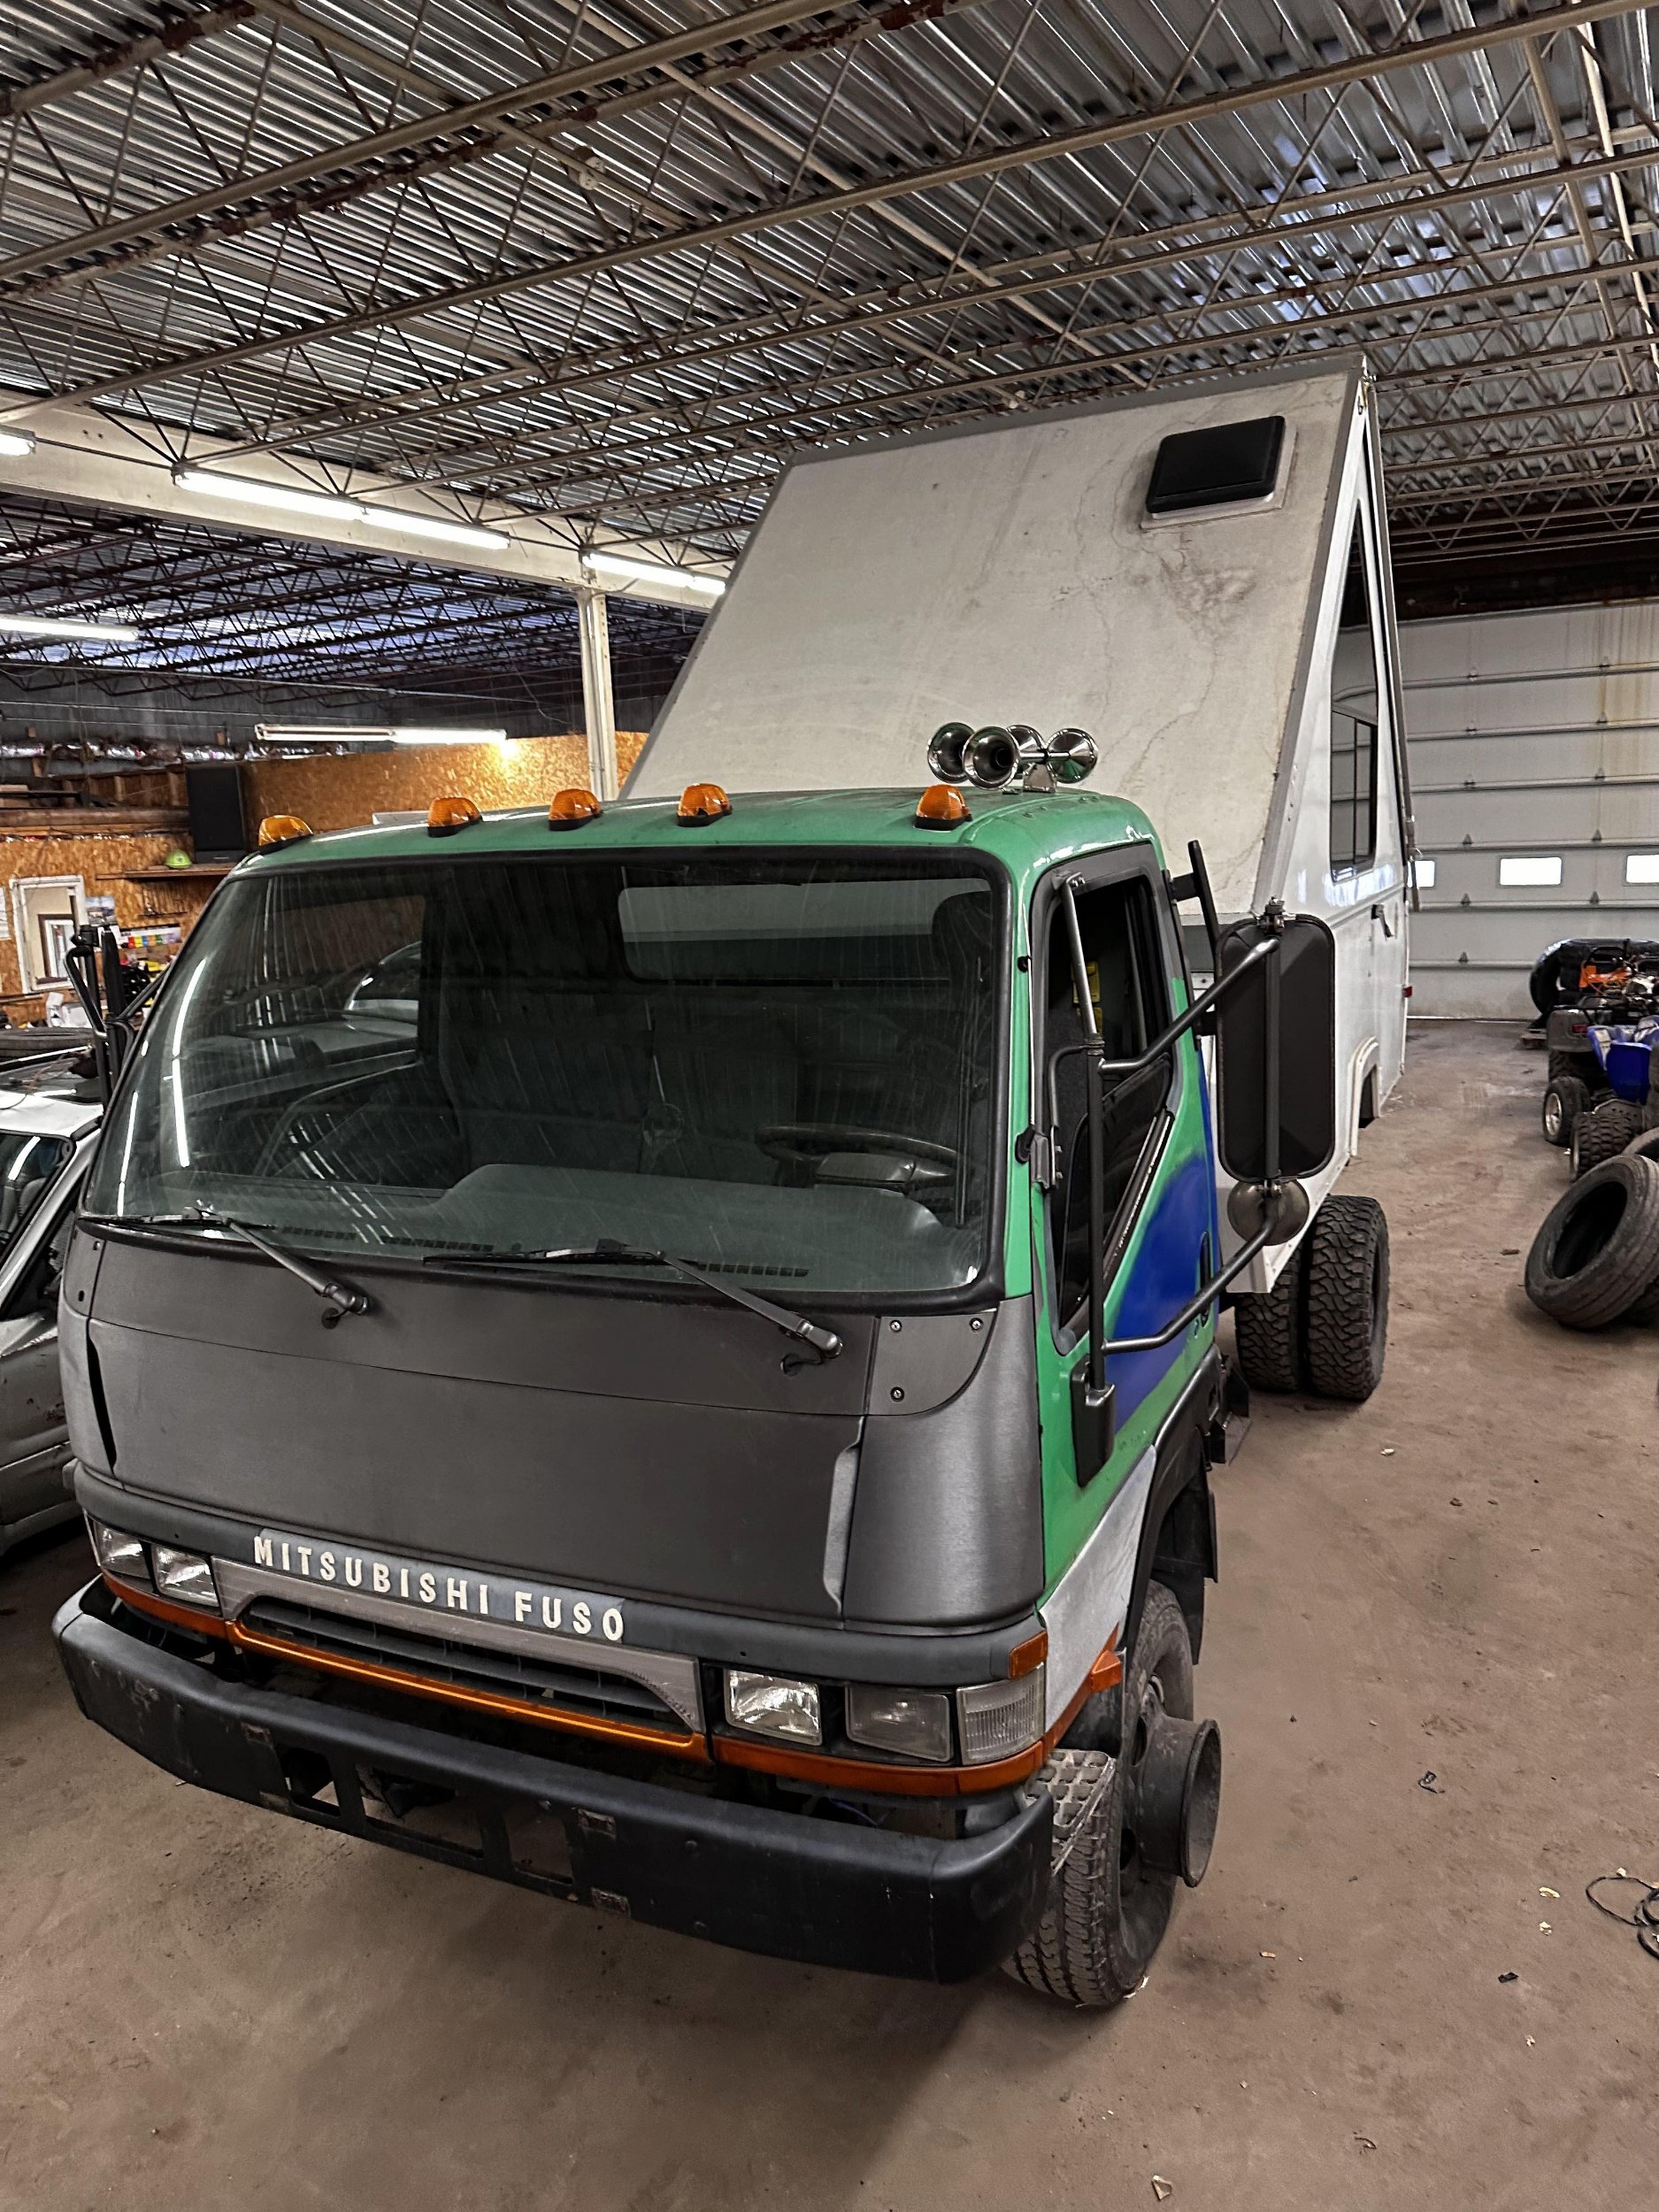
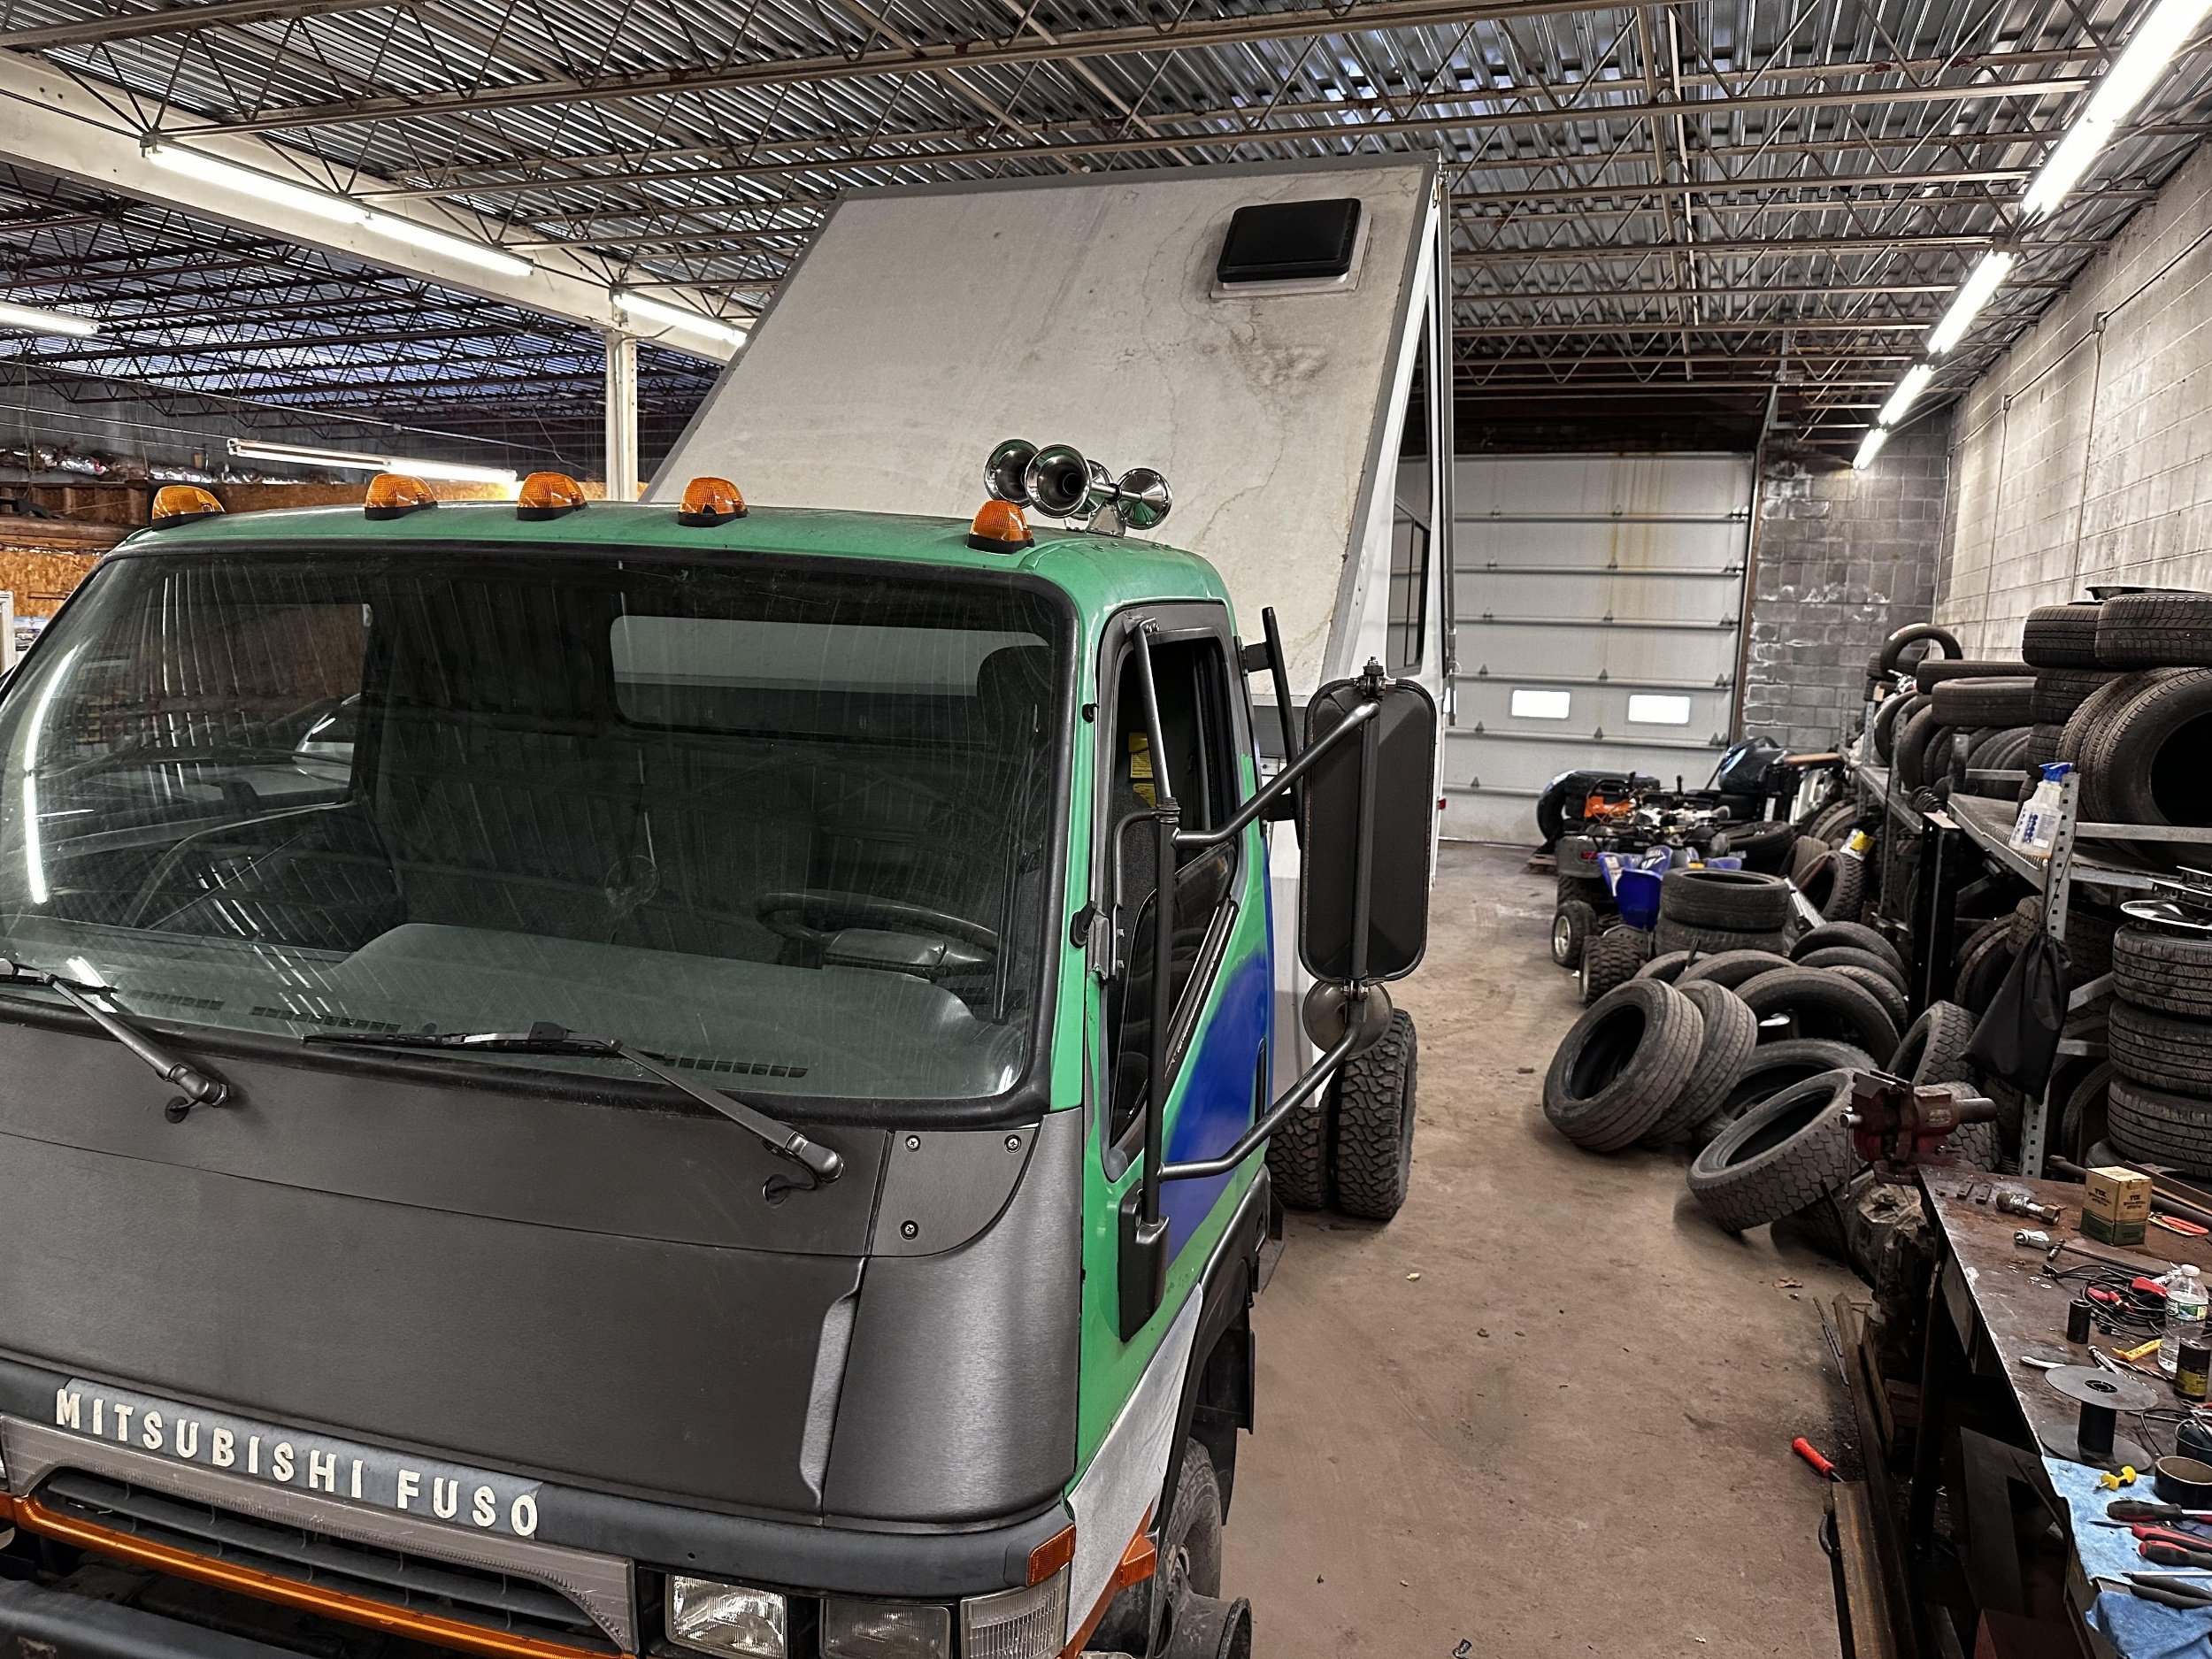
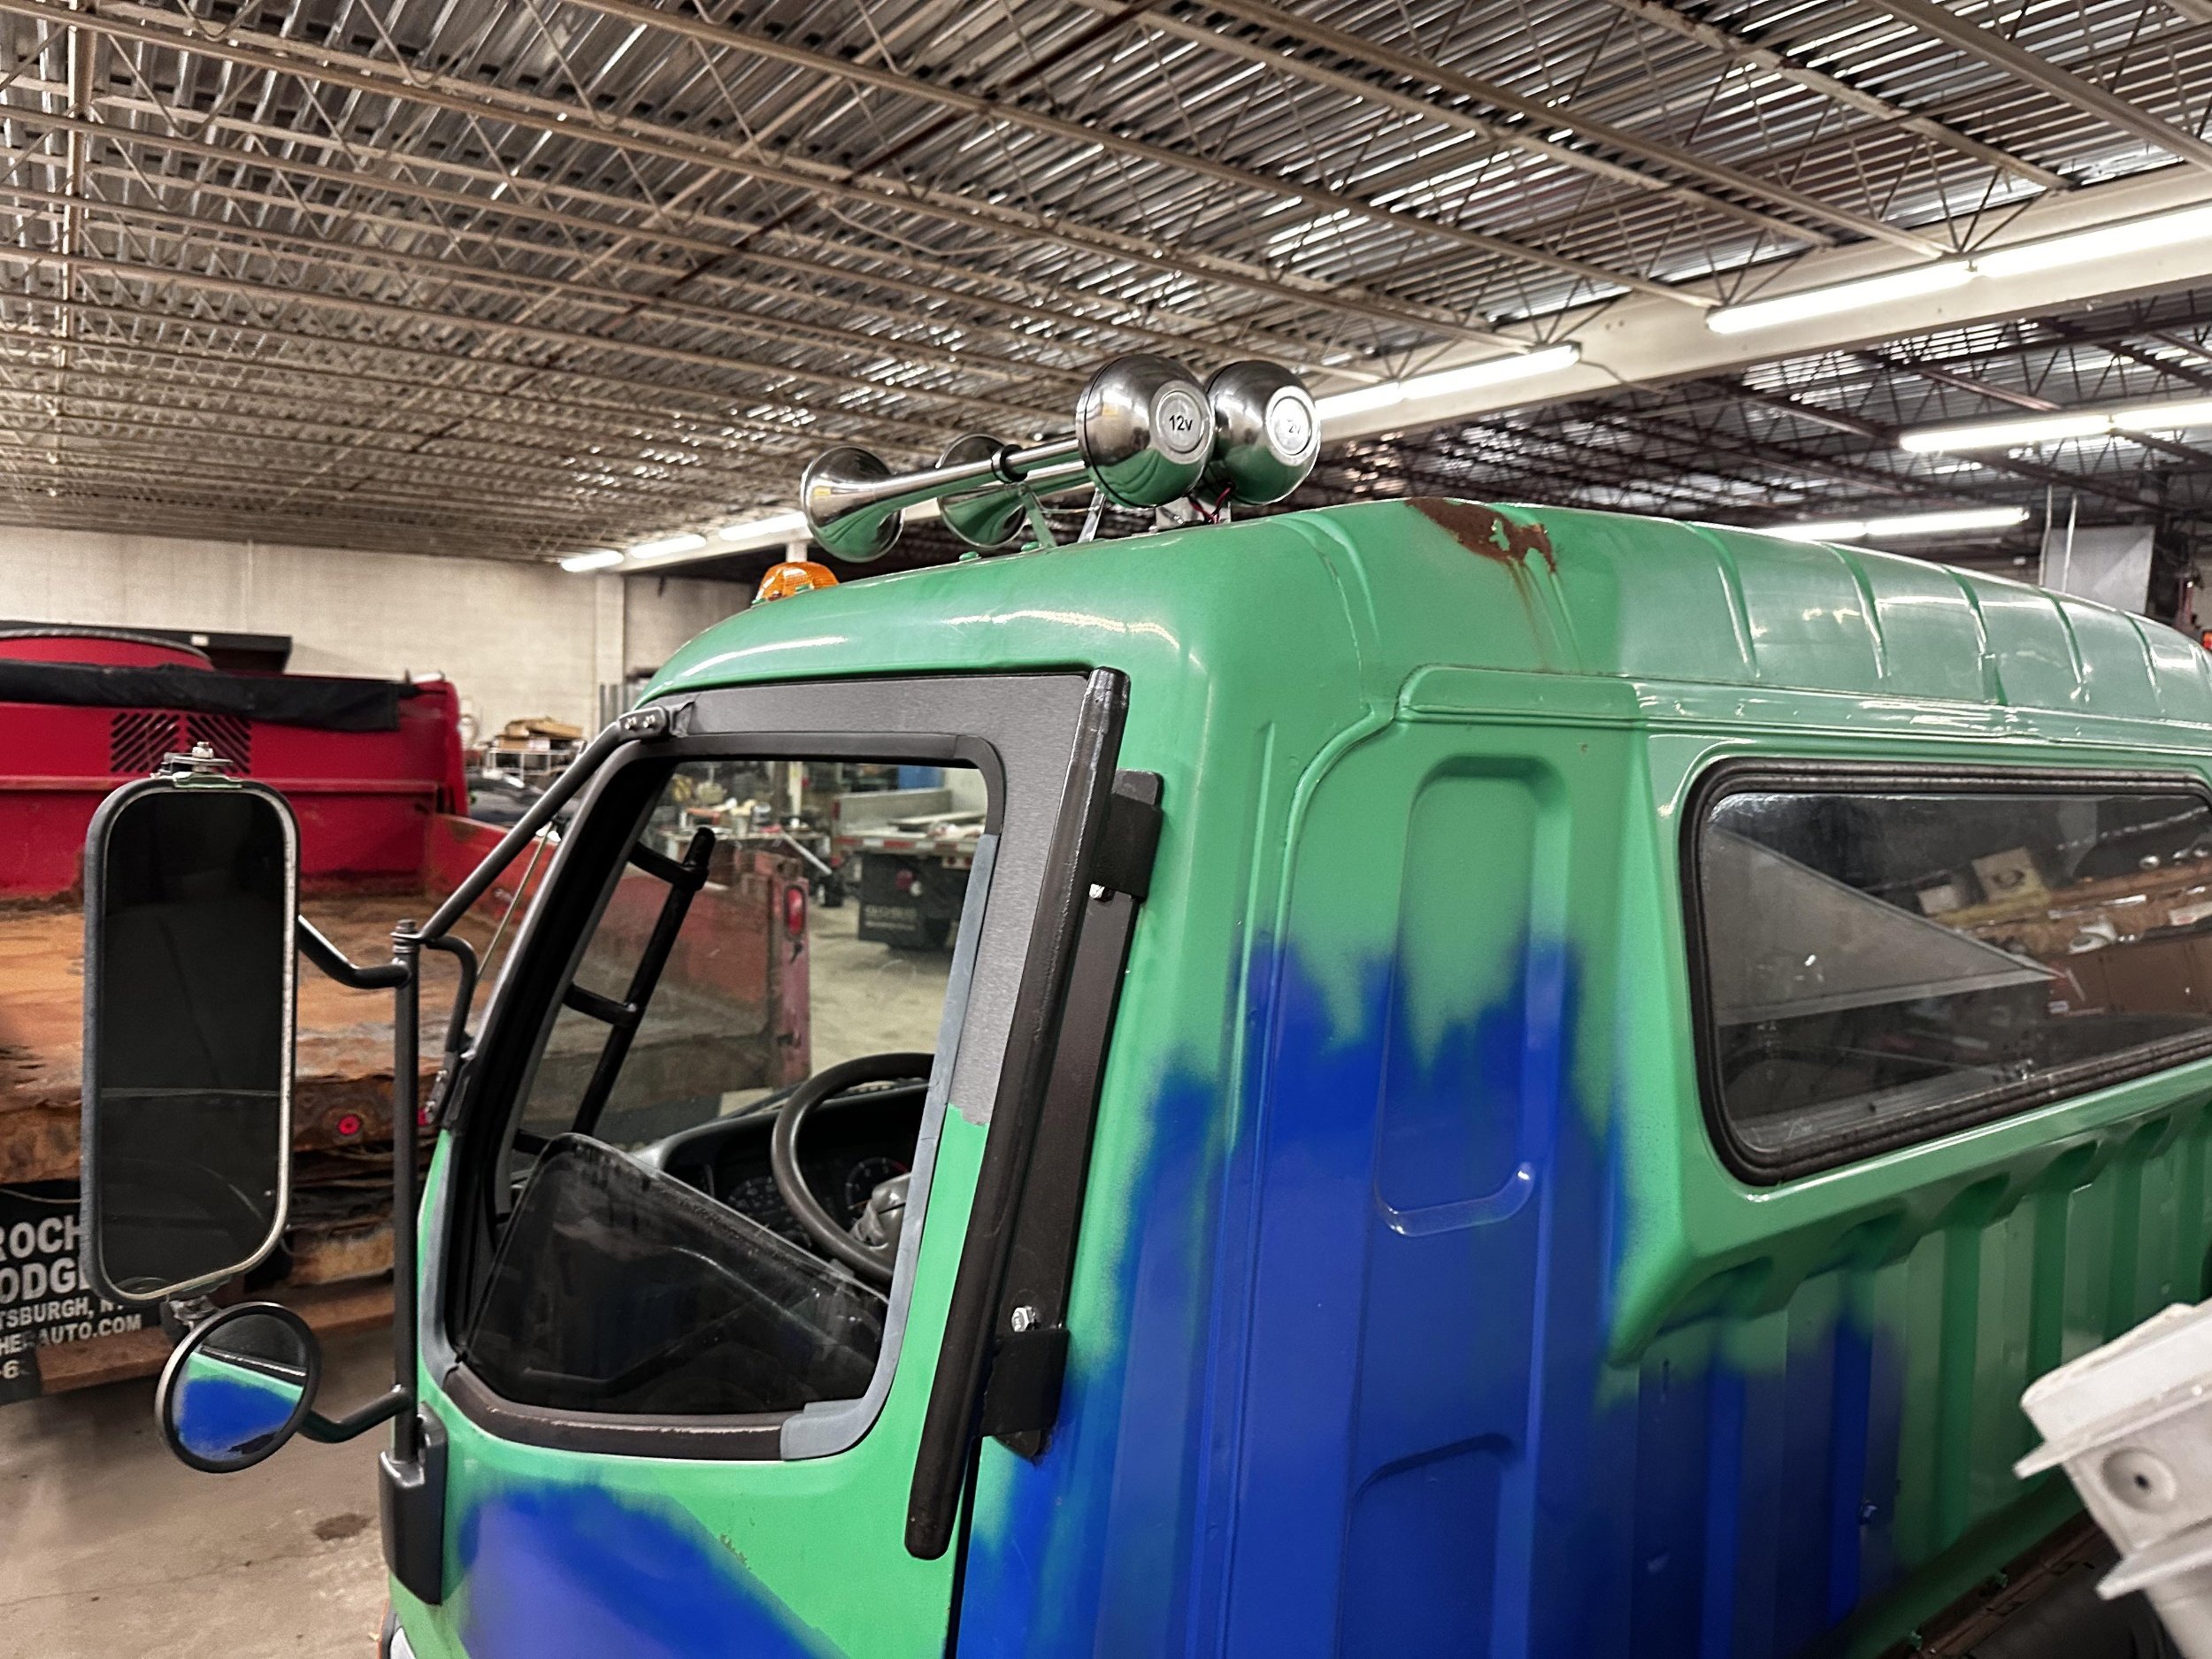
BRAAAAAAP!
02-23-24 - UPDATE!
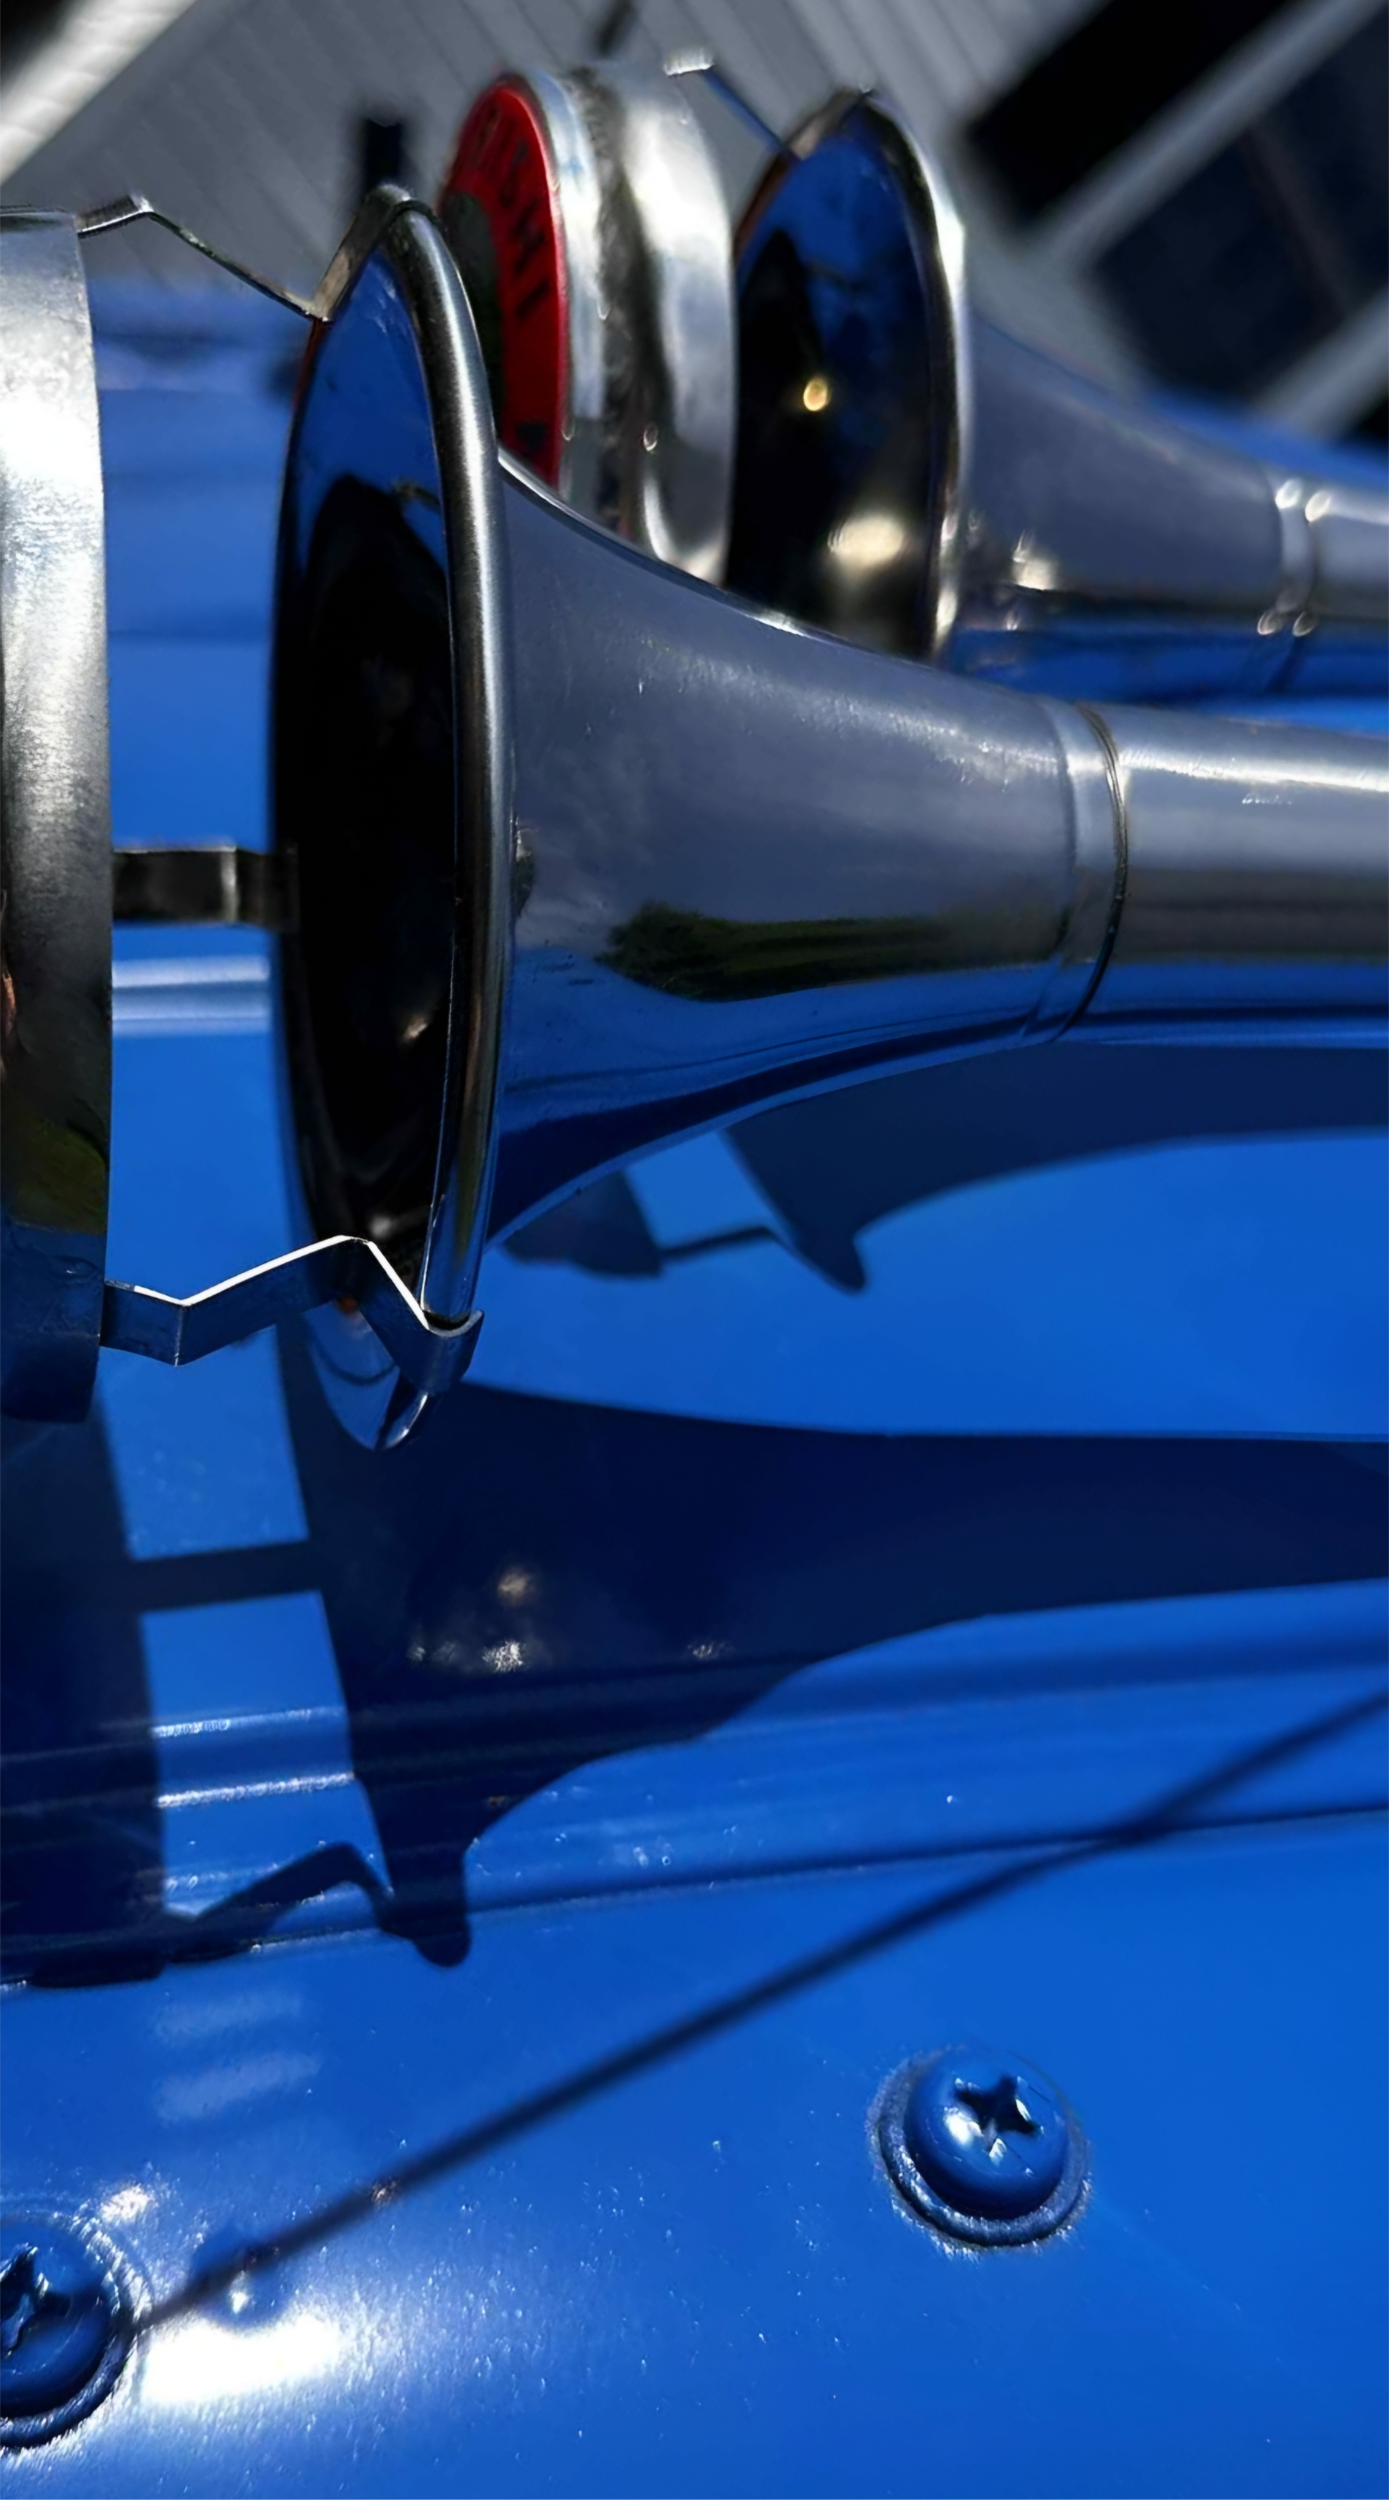
Bought some 12vdc air horns off ebay. They don't require an air compressor. Boy, are these things LOUD! Rob did a great job with the install.
4-25-2024 Update
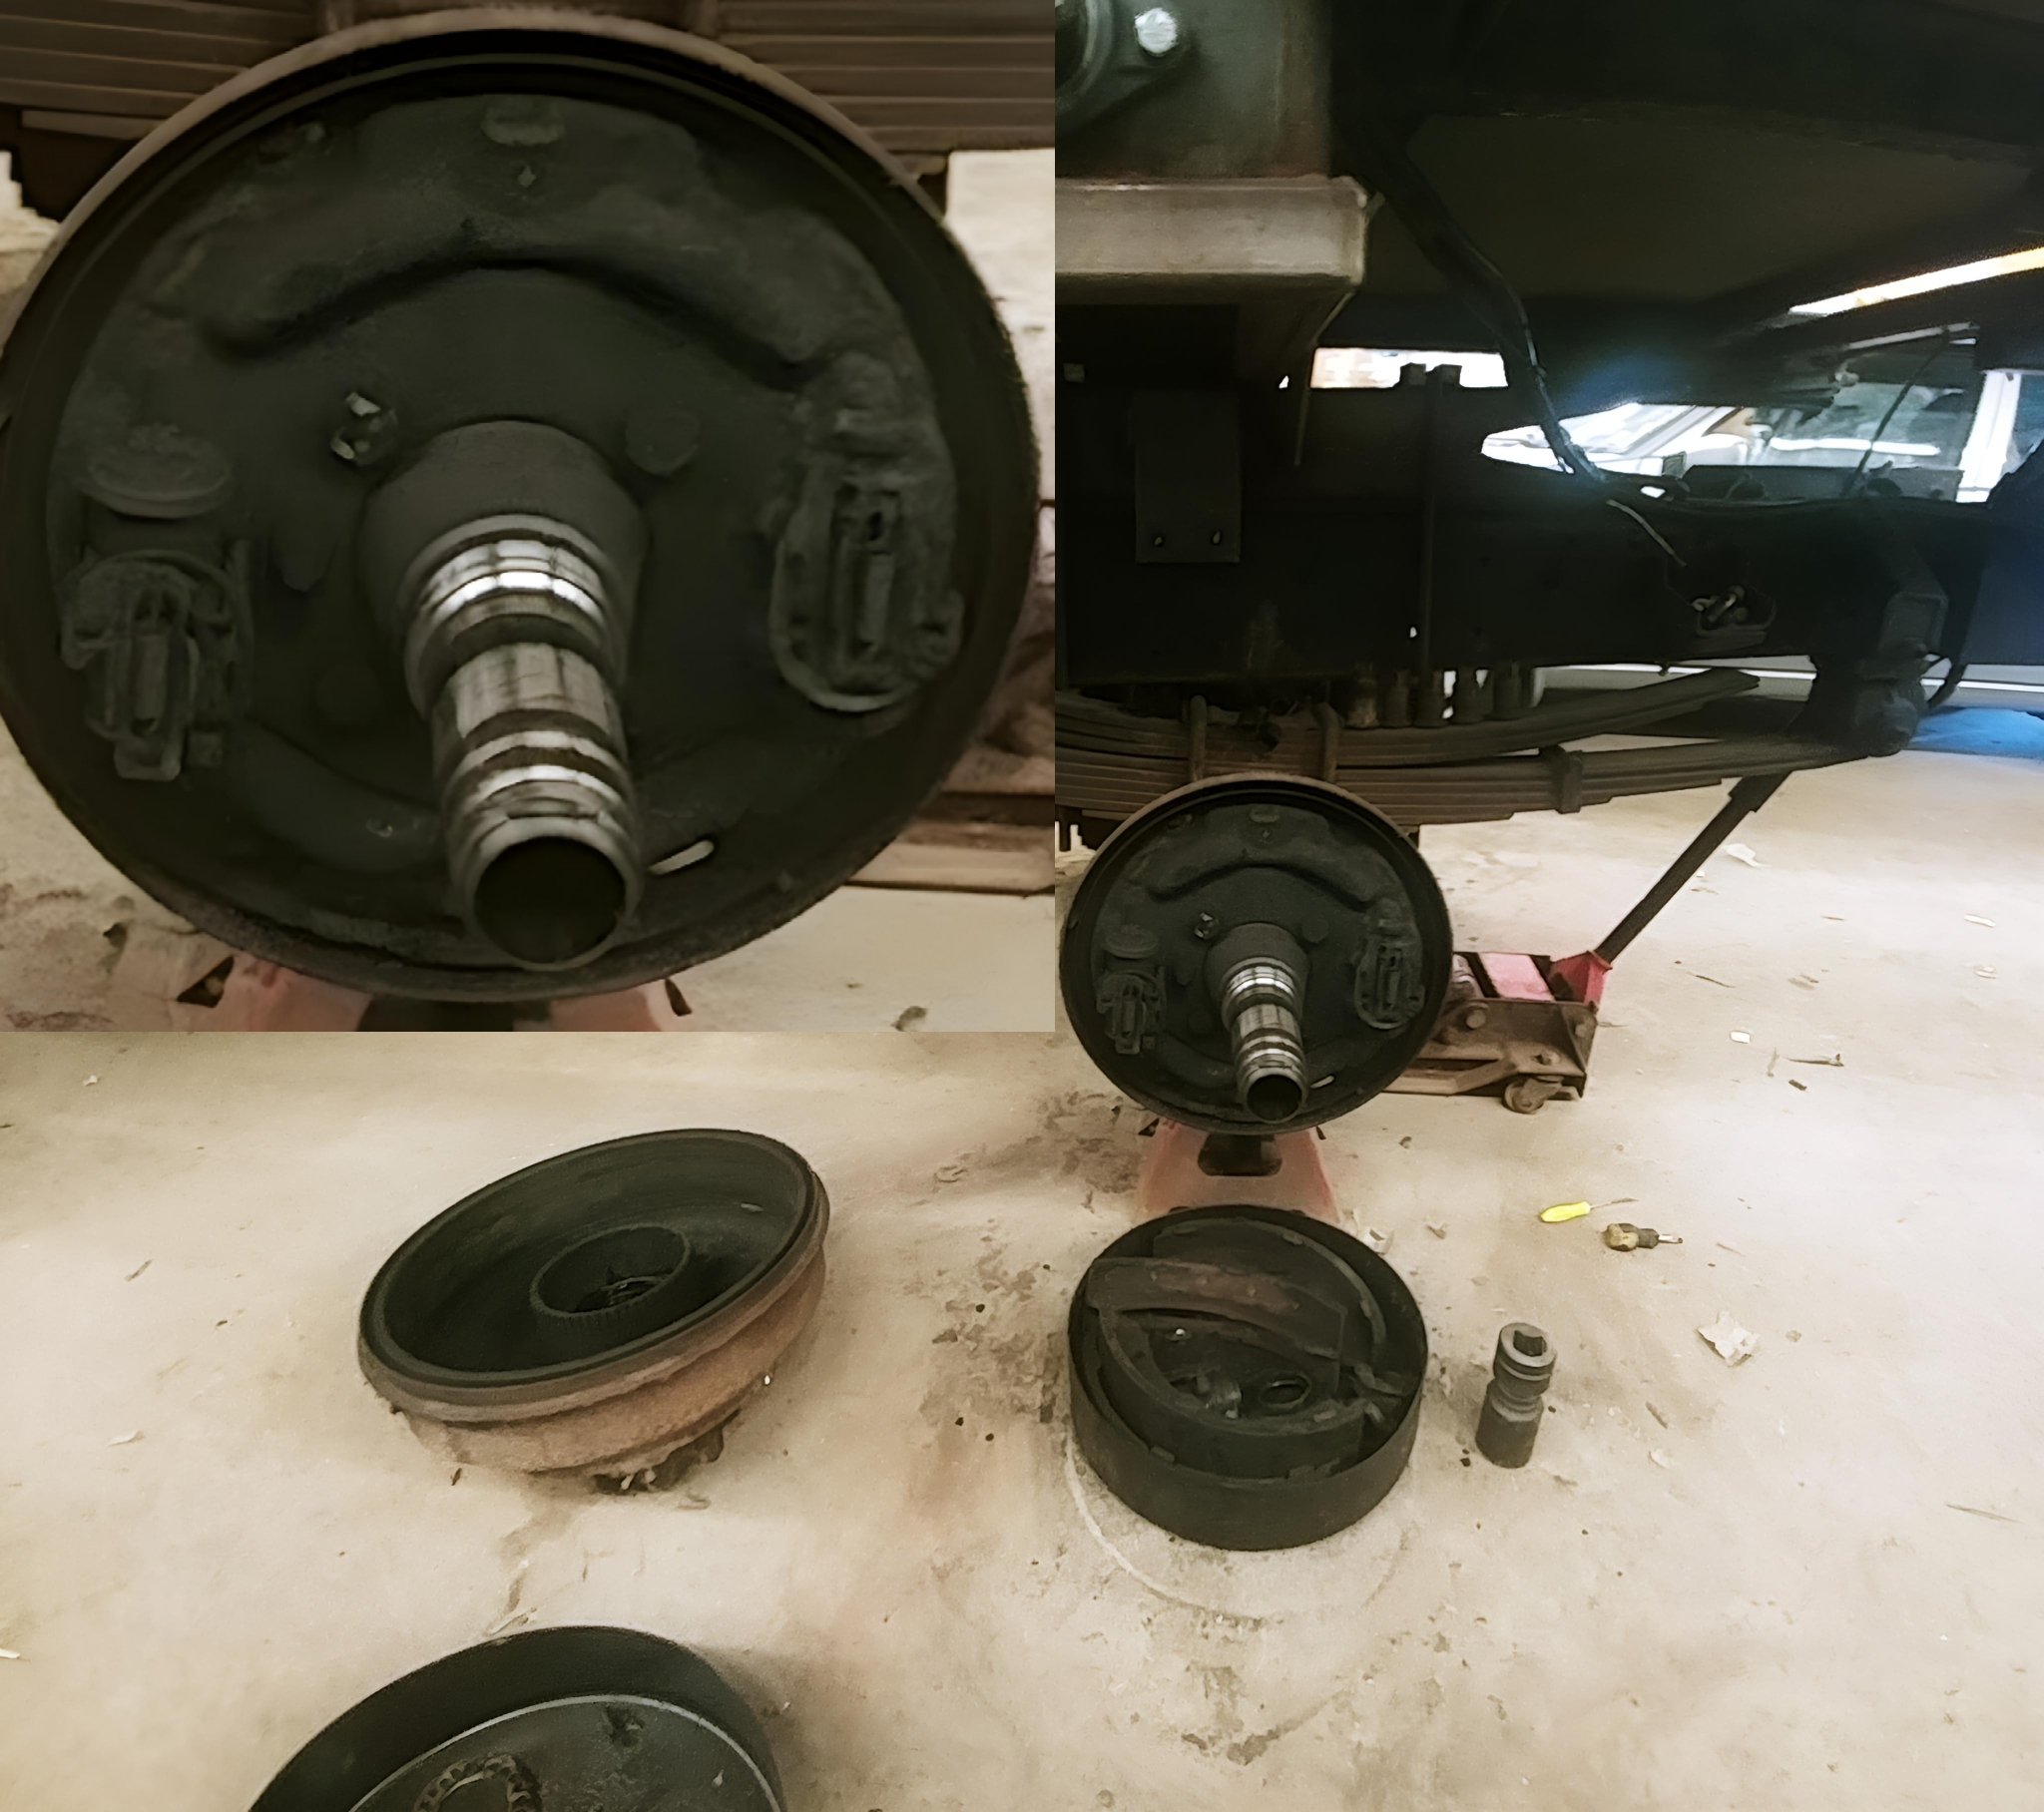
Sorry it took so long to update the progress, been having some health issues, and we were waiting on parts. This is about brakes on the rear axle. 4 new wheel cylinders, and four new brake shoes. You can see how much and how long it's been leaking. Also installing the 8.25R16 Michelin XZL's. New tranny filter and mounting assembly, (filter is remote, meaning not attached to the tranny, but connected by fluid lines). Other things that were done:
Installed Wolfbox rearview mirror system
New backup camera to head unit
2nd 12v power port on dash
Airhorn switch overhead
Complete lube job


06-04-2024 Update
The mechanical and electrical work is done! Everything works, thanks to Rob, Kris, and Bill at Clark and Son Automotive in Keeseville NY. Talk about a versatile bunch of guys. I saw late model vehicles being worked on, as well as old muscle cars, racecars, commercial delivery vans, and my Fuso 4x4 truck, all in their shop at the same time. If you have a machine that makes noise, I'm sure they can fix it! Here's a list of what was done:
Oil leak at turbo return line
New A/C radiator fan
New tranny radiator fan
Taillight wiring
Clearance lights on truck roof
Clearance/marker lights on camper
Full service, (all fluids and filters changed, new fan belts)
Tranny filter bracket assembly changed
Air horns installed
Overhead console wired for both switched/constant 12vdc
Installed Wolfbox rearview camera system
Installed new backup camera for head unit
Rear axle brake shoes, both sides
Real axle brake cylinders, both sides
Repacked or replaced all seals and bearings on the rear axle
Five 8.25R16 Michelin XZL's installed on rims, balanced, and mounted, (33” tall, 8¼” wide, pizza cutters!)
Oh yeah, and it's registered and insured! Just needs an inspection, (got a headlight out, so I'll have to get that swapped first). Truck is at the welders to make the slide-out stairs, a rear bumper, and a little tweaking on the subframe. Can't inspect it til the bumper is done, too. So VERY close to camping!
ON TO THE PICTURES!
(Remember, all pics are clickable to the full size image!)


06-19-2024 Update
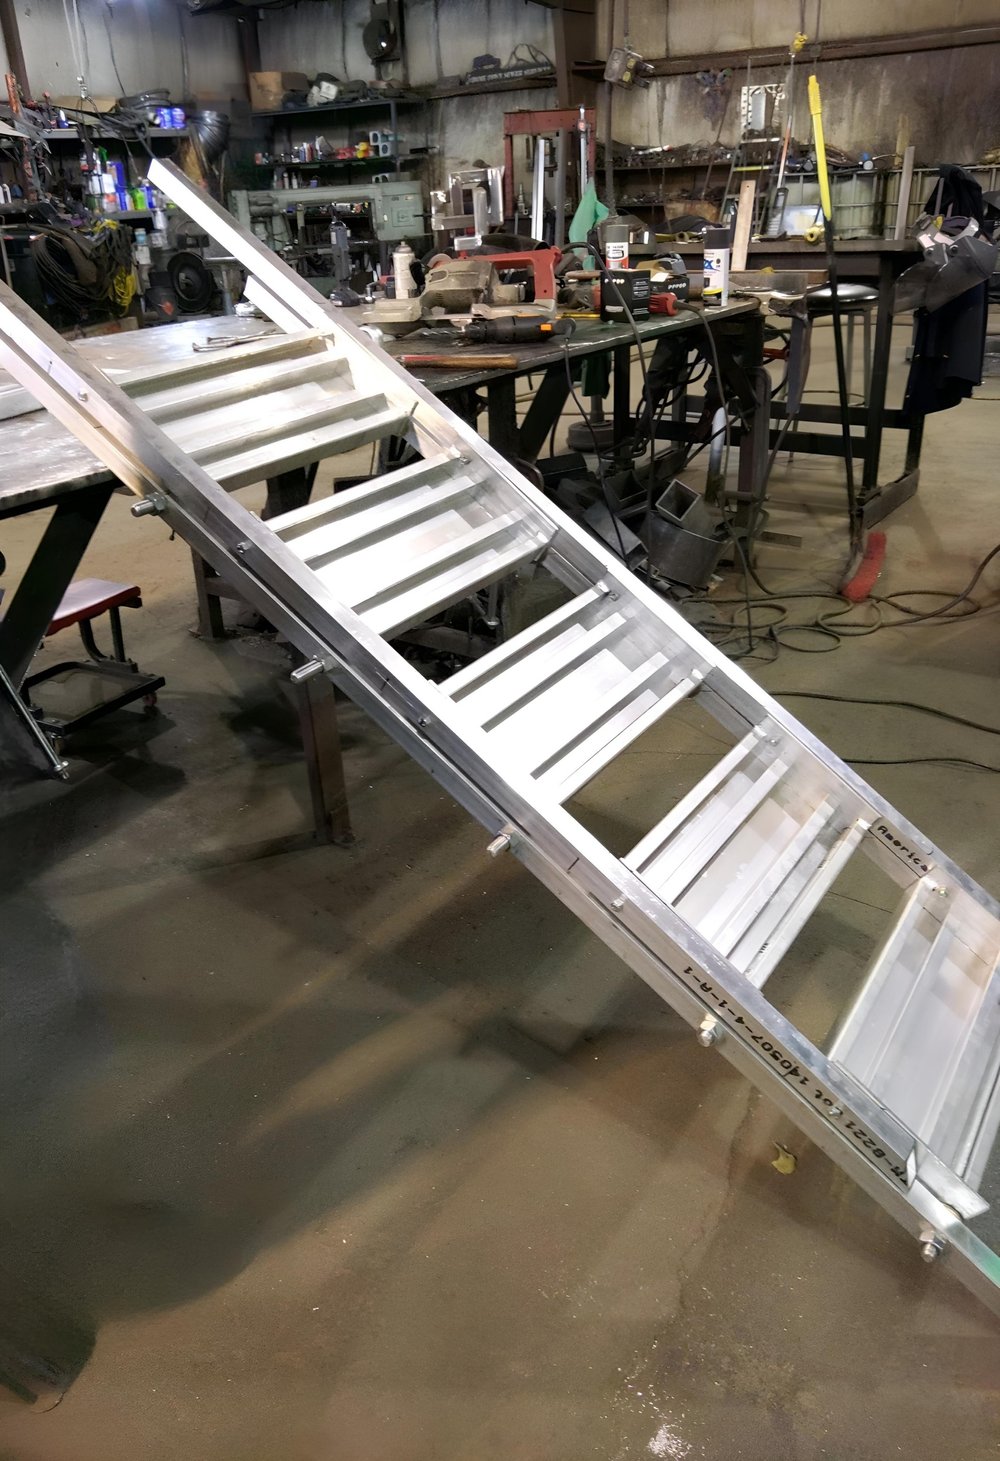
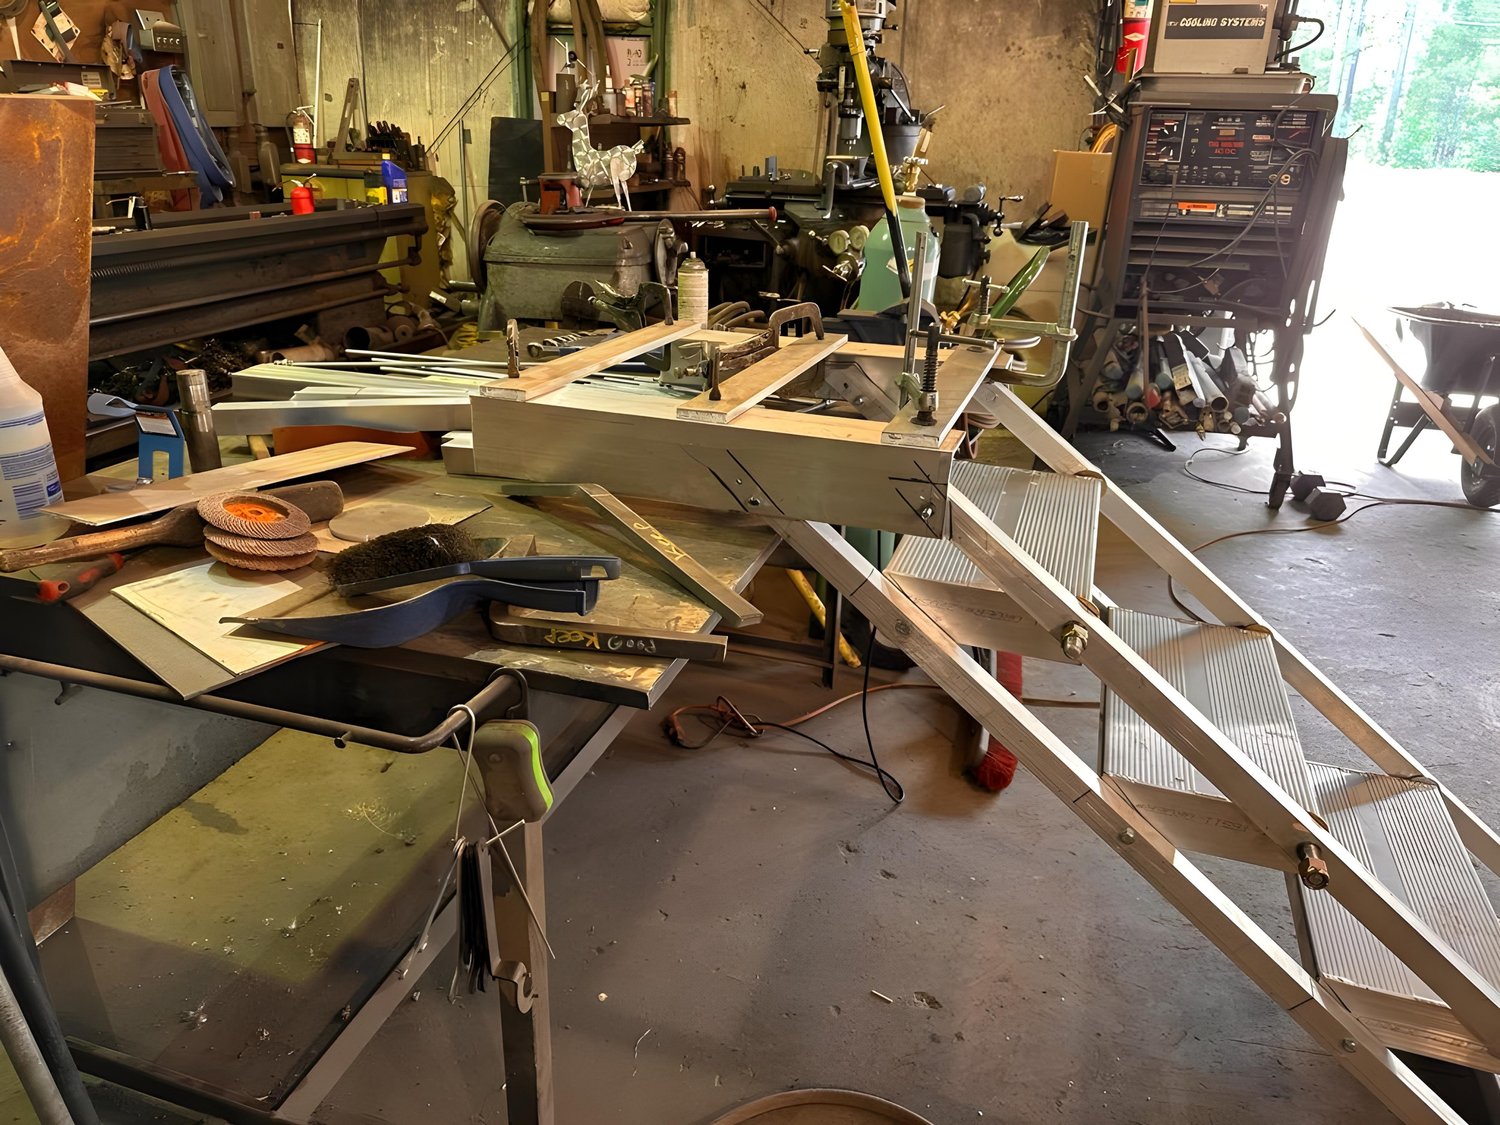
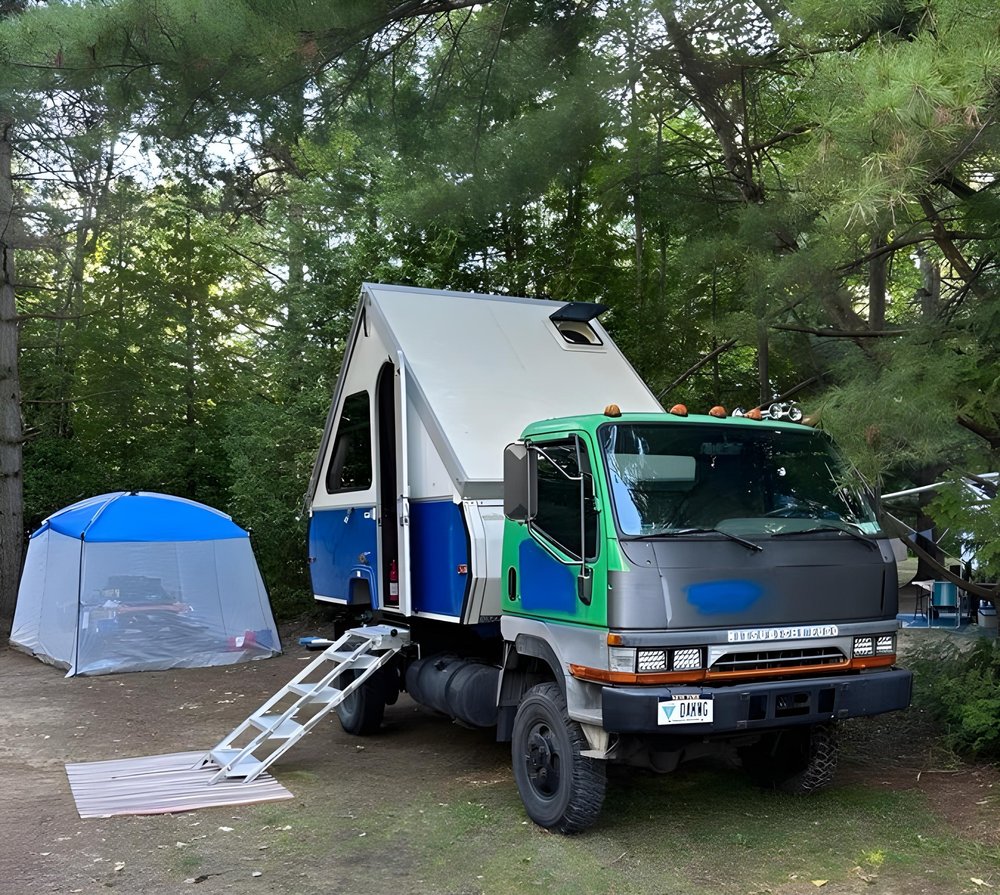
Stairs! Way above, there's a vid of another guy's stairs. They're perfect because they collapse flat and stow under the camper in minimal space. This is my version of them. They are built with thicker wall aluminum.


Rear bumper and camper stabizer shelves.
The rear bumper had to be added to make it legal height. I didn't want to reduce the departure angle, but I had no choice. Only lost a couple inches. The two shelves on top of the light boxes are a spot for the stabilizers on the camper to land on. By playing with the height of either or both, I can level the camper both sideways and front/back.


7-5-2024 Update
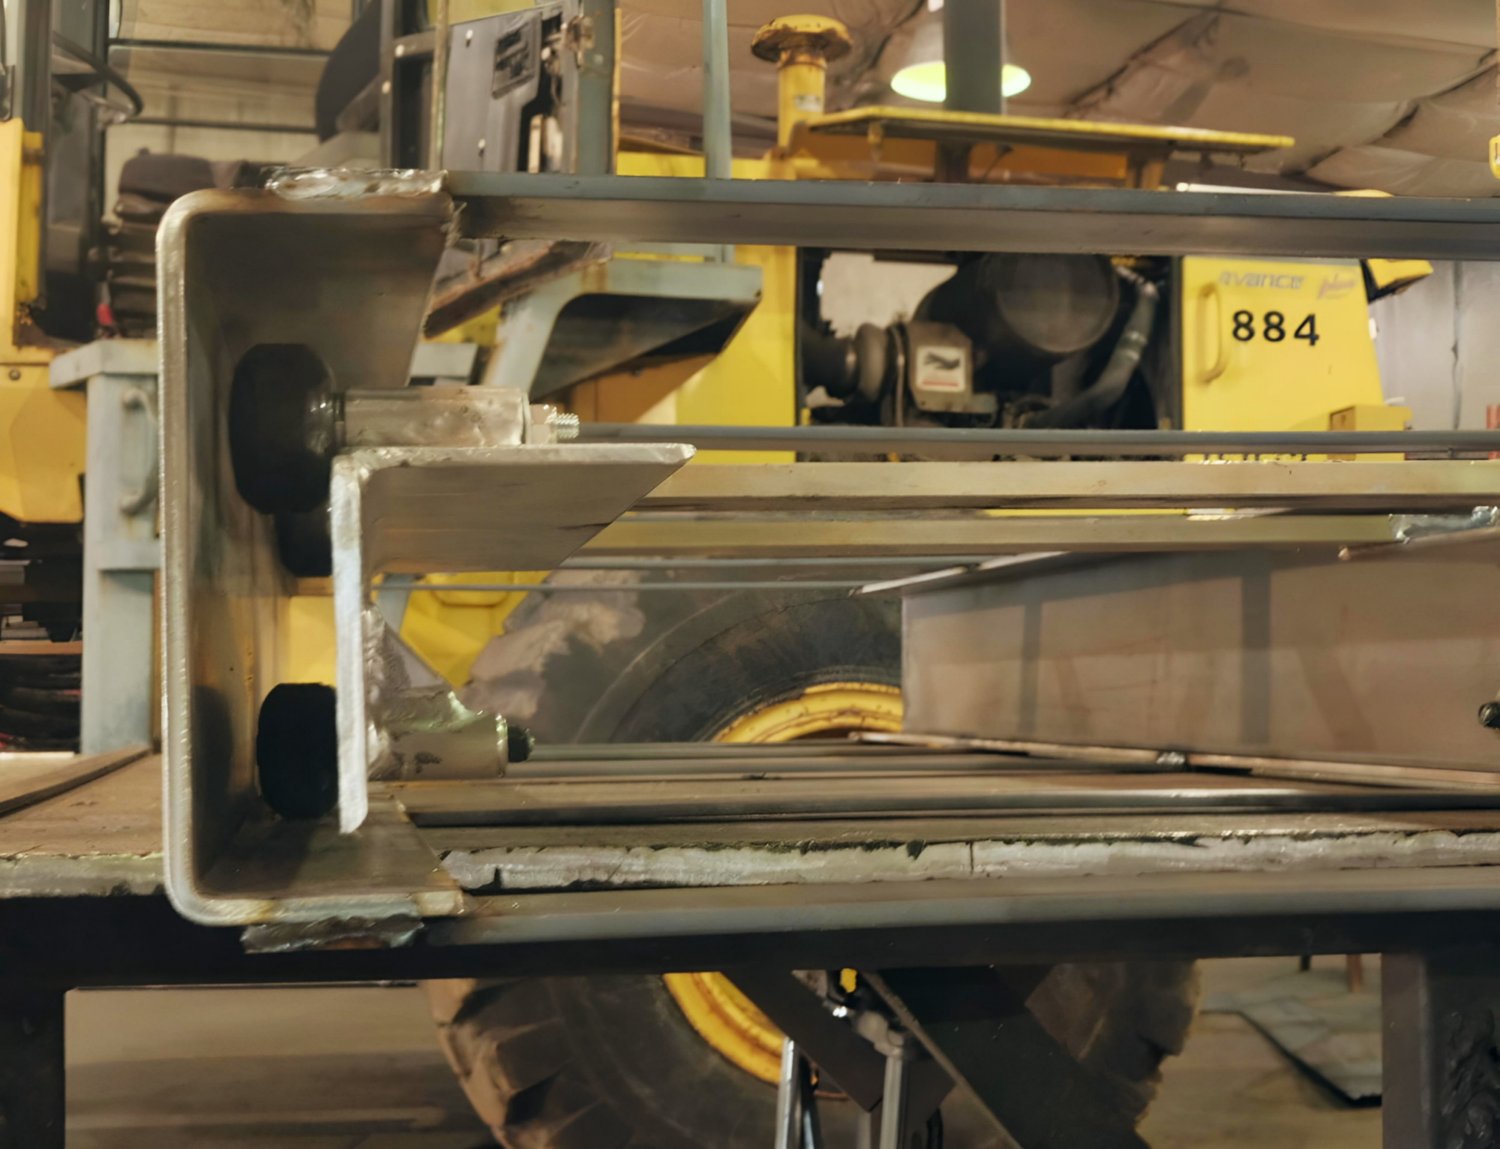
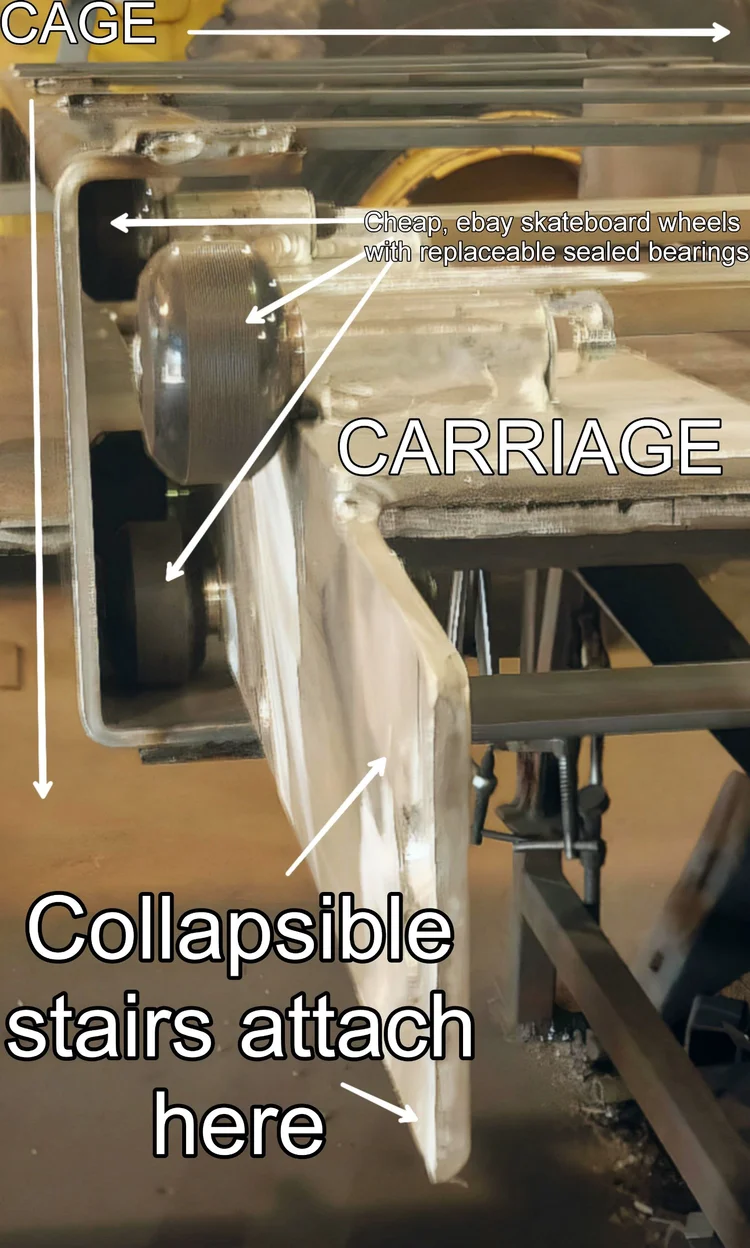
The cage and the carriage.
The cage is the steel part that encloses the stairs and carriage assembly. It's all steel because it'll be welded to the camper frame. It's basically two eight foot long C channels with flat stock cross members for integrity. It'll also be secured to the bottom of the camper floor in the door area, because that's where all the weight will be.
The carriage is what's attached to the stairs, allowing them to slide into the carriage for travel. Like the stairs, it's all aluminum. It has cheap, easily replaceable skateboard wheels I found on ebay. They have sealed bearings.
The only contact between the cage and carriage will be the urethane skateboard wheels, so no trouble with galvanic corrosion between the dissimilar metals.

Also got a couple pics of the new tranny filter and mount. They were rusted so bad, they were fused together. Trying to spin off the filter caused the mount to tear apart. All fixed now!


PAINT!
OK, it's just rattle-can Rust-Oleum, but it's a good blue, dont’cha think? Thanks for your help, Tom!


11/26/24 - UPDATE
Huge apology for not updating the page. Camping season hit, and we were off! Hope everyone understands, it's a camper first!
That doesn't mean that we didn't get a lot done, though. First, some camping pics…
CAMPING PICS!


Fenders, steps, and paint.
I'm a huge fan of Rust-Oleum paints. Easy to use, sticks well, holds up well, and cheap. Blue is Rust-Oleum 2X Ultra Coat Paint-Primer. The black is Rust-Oleum Rust Reformer, which sticks extremely well to the black plastic Fenders.


DETAILED!
I had Joe Ratliff from our local area detail the inside of the truck. he did an amazing job, considering its a 24 year old work truck with 215,000 miles!


Undercoating.
I chose NHOU, New Hampshire Oil Undercoat. With 216,000 miles on the truck, there’s significant surface rust on the frame, springs, and axles. NONE of this rust is structural. The frame is thick enough that there’s no worry about rust-through at all. I needed to stop this rust immediately, and my choice was needle scaling and paint. This would have cost a fortune in labor, (I’m a disabled vet, remember?), because i cant do the work myself.
The Boss Wax product seeps amazingly well in between metal parts , so well that the springs no longer squeak! It even seeps into the joints between spring hangers and the frame, as well between the frame and crossmembers. The rust is stopped!
(As a small regret, this stuff stinks! And it drips for a couple weeks, so be prepared to have to pressure wash your driveway!)


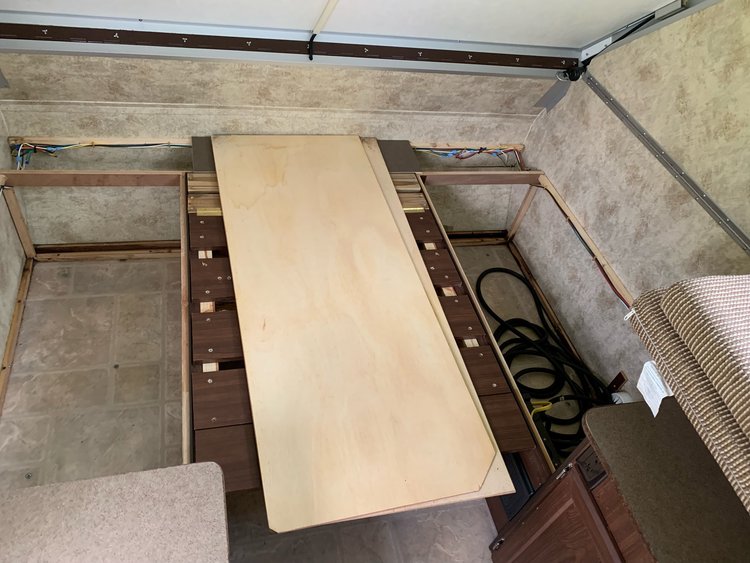
Some Interior work.
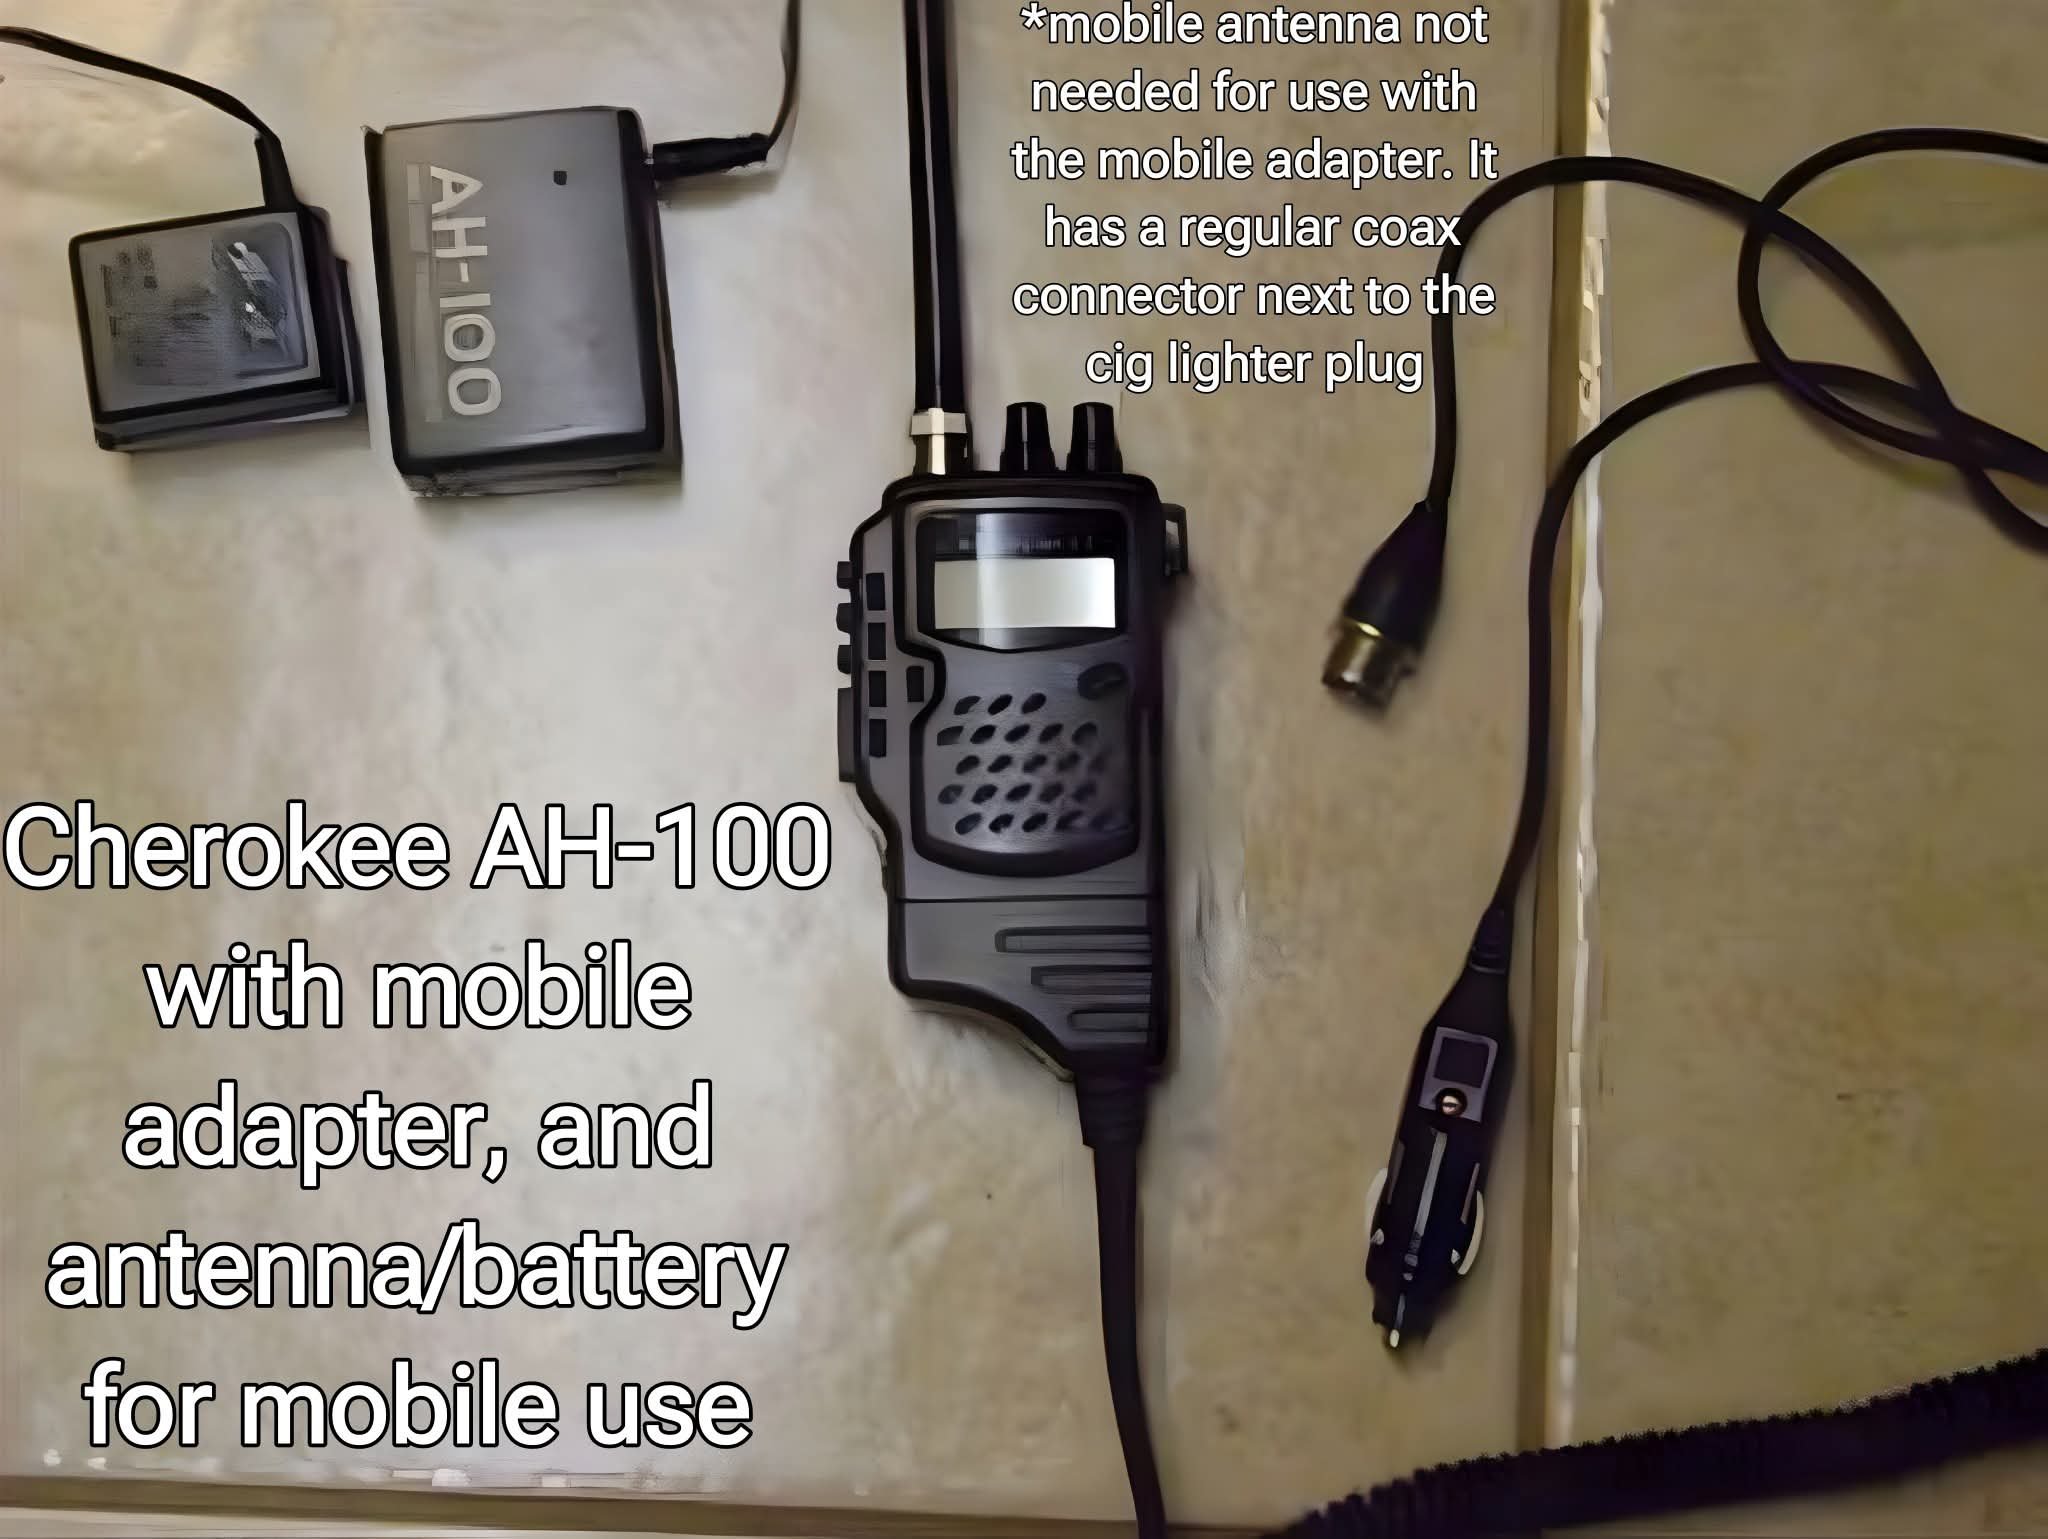
Radios. I opted for a CB and a Baofeng UV-5r. During trail rides with clubs, they either use CB’s, GMRS, or FRS. The Baofeng works just fine on both GMRS and FRS, so between the two radios, I’m covered.
The CB. I’m a HUGE fan of the walkie-talkie CB’s with the mobile adapters. They are full legal power, can usually be unlocked, (mine are), and if you carry the battery pack and rubber duckie antenna, can be readily be transformed into a walkie-talkie CB.
The Baofeng UV-5r. Yes, I’m aware it’s not type-accepted by the FCC for use on GMRS or FRS, but I’m not the type to abuse fellow radio enthusiasts. I’m not a nuisance operator, and I only use it to keep in contact with a group, or an emergency situation, (when anything’s legal). Better to have and not need, than need and not have.
Added a marine compass to the dash, along with a hula girl! (Yes, i added a small pair of glasses so she’d remind me of the Mrs!)


The pic below shows the Samsung Galaxy Tab A 10.2 we’ll use for navigation, as well as the head unit that came with the truck. I used the worthless dash coffee cup shelf as the shelf for the tablet by dropping a couple bolts through the holes.


For the overhead, I had Rob from Big Apple Audio in Plattsburgh cut two big holes in the headliner to expose all the storage space, and bend a couple cargo nets with a heat gun to fit. He did a great job. He also added a three hole cig lighter box in the right one so I can plug in the radios.


Airhorn switch. I added a momentary switch to the headliner, drilled a small hole near the end of the paddle, and attached a chain to it. Then, I attached the other end of the chain to an eye bolt thats mounted to the top of the A pillar trim. The horns are 12vdc, so don’t require any air compressor. They are LOUD!

The Hula Girl with the glasses!

Roof and antennas.
I added a mag-mount CB antenna to the middle of the roof, for proper ground plane. I like the idea of a mag mount antenna for woods work. I can’t stand the constant, ‘bonging’, sound of hard-mounted antennas. Hard-mounted antennas can do a lot of damage if they get ripped off on a branch. Mag-mounts just fall over, and easily able to be stood up at the next stop.
For GMRS and FRS, I chose a stubby mag-mount for the same reasons as above. It’s mounted on the passenger side roof. Both coax cables pass through a cable gland, a small waterproof enclosure.

Also added a new AM/FM antenna to the driver’s side A pillar.

Next up, some anti-slip pads for the Mrs. Bought a roll on Ebay, made a pattern, cut them out, and applied them.


Oh yeah, and we got the roof painted! You can also see the Go-Pro camera, the hula girl, the compass, and the small blue metal tin I bolted to the seat area as a trash can! Also, a phone holder and the small GPS head for the Wolfbox.

Next up, double wipers and new mirrors! The old mirrors were rusting pretty bad from the inside. When this happens, they start to shake, so I replaced them with smaller mirrors that bolt right to the original mounts, (after drilling a couple holes). Now the view is much better out of the side windows, and I can still see what I need to for driving. The double wipers work GREAT!


Next up, bigger mirror heads, (see pics below), and LED bulbs in the camper to replace the power-hungry incandescents. Stay Tuned!

As you can see, they’re roughly a third bigger than the first ones, (which looked a little small, according to the Mrs, and I completely agree!) *Note to self, start listening to her more! DRASTICALLY improves the view, too!

Quick mock-up of how it’ll look.

Spoilers for the double wipers. I’m finding that in heavy wind, the wipers, when running, lift off the windshield during heavy gusts, leaving streaks. I *think it’s because of the extremely flat aerodynamics of the truck. The old wipers did the same thing, (I thought the new double wipers would cure that, but I guess not). I just happened to have a set of old wiper spoilers in the basement from my old jeep, so I sprayed them black and zip-tied them on the end of the wipers at the end where lift-off was occurring. THIS seems to have stopped the lifting and streaking. If it didn’t work, my next step would be bending the wiper arm to get a little more downward force, or replacing the springs, or the whole arm. This arrangement works extremely well, and was dirt cheap!


New, bigger mirror heads. Not sure if these will work. The shaft and ball on the other arms are a little too small and short. I trimmed away a little plastic on the bottom of the new mirror head, but they still lean outward a tiny bit. im gonna try shimming the bottom bolt on the arm’s mount, and see if that will tip them in enough. We’ll see….


As you can see in the above pic, it’s a combination of a larger upper mirror, and a small adjustable blind spot mirror. We’ll see how they hold up. The mirror arm can fold back against the door for tight woods work.
GRAPHICS!
Birch log font, VERY realistic. I want people to walk by and say, “Look at THIS guy! He nailed birch logs to the side of his camper!’ Complete with drop shadows, highlights, realistic colors, and even some tiny branches with leaves left on it.
The ‘adiron’ at the beginning and the ‘.camp’ at the end are just placed there as a idea, the font will be determined later.
The shingle siding should also be very realistic. We’ll be camping out on the beaches of Race Point at the tip of Cape Cod, and Want people to scratch their heads and say, ‘How did he get a cottage out here on the beach!”

Like this!

Some dimensions. I’ve specified area sizes instead of actual sticker sizes so the graphic designers can kind of, “play with the space”, and come up with a few choices.


Here’s the font I want for the, “adiron”, at the beginning, and the, “.camp”, at the end. I like the swoopy brush stroke at the ends, as well as how the underlying paint shows through making it look thin and older. Not sure if I want these in Caps or lower case. Try to make the color the same off-white as the birch log bark.

SEAT COVERS!!!
These were a real nightmare. They are designed for our year, make, and model of Fuso, but they’re designed for left-hand drive Australian and English trucks. The driver’s seat wasn’t that much different from left to right, but the passenger side double seat sure was! Got ‘em cheap on Ebay , and they’ll protect the stock material. It’s in surprisingly good shape, except for a frazzled spot on the lower right of the driver backrest, (keys hooked on a belt?) Another small stain right in the middle front of the center seat bottom drew our eye every time we got in. I tried everything I could think of to get this spot out, but no dice. I’m thinking it was a drop of polyurethane or something like that. NOT grease or oil based. And I don’t want to get too aggressive with solvents on the old material. After all, the trucks got 216,000 miles, and 25 years of sunshine coming through the front windshield. It deserves to be treated gently, now that it’s retired with us.
The fit is, well, ‘weird’, to say the least! We did our best to use the existing stretch strap/hook assemblies to pull it underneath, to get the wrinkles out. I have it on good authority from the seller that, “sitting on it for a while, along with the hot sunshine, will make them fit better over time”, but I think that might be snake oil. We’ll see. I’m gonna get a few of those mattress hold-down stretchy straps with the suspender clips on the end and see if we can pull some of those wrinkles out, and get the alignment a little better. The blue bungy cord is just holding the material in the split, because the disk thingies designed to do it, well, don’t!
One HUGE downside to these covers is losing the drop-down center console. I’m considering taking them to an upholsterer to figure out a way to fit the material by adding some black edging so we can separate the two upper halves, but at what point would it be cheaper/easier to just have seat covers made. It’s weird because there’s a zipper down the middle making you think it’s supposed to separate, but it’s attached at the top so it can’t. Stitching mistake or designed to be cut? if we do cut it, there’s no provision for holding the material to the seat. So, for now, we’ll live without using the drop-down center storage. We only kept binoculars in there so far, but they fit in the glove compartment, so…
PICS!


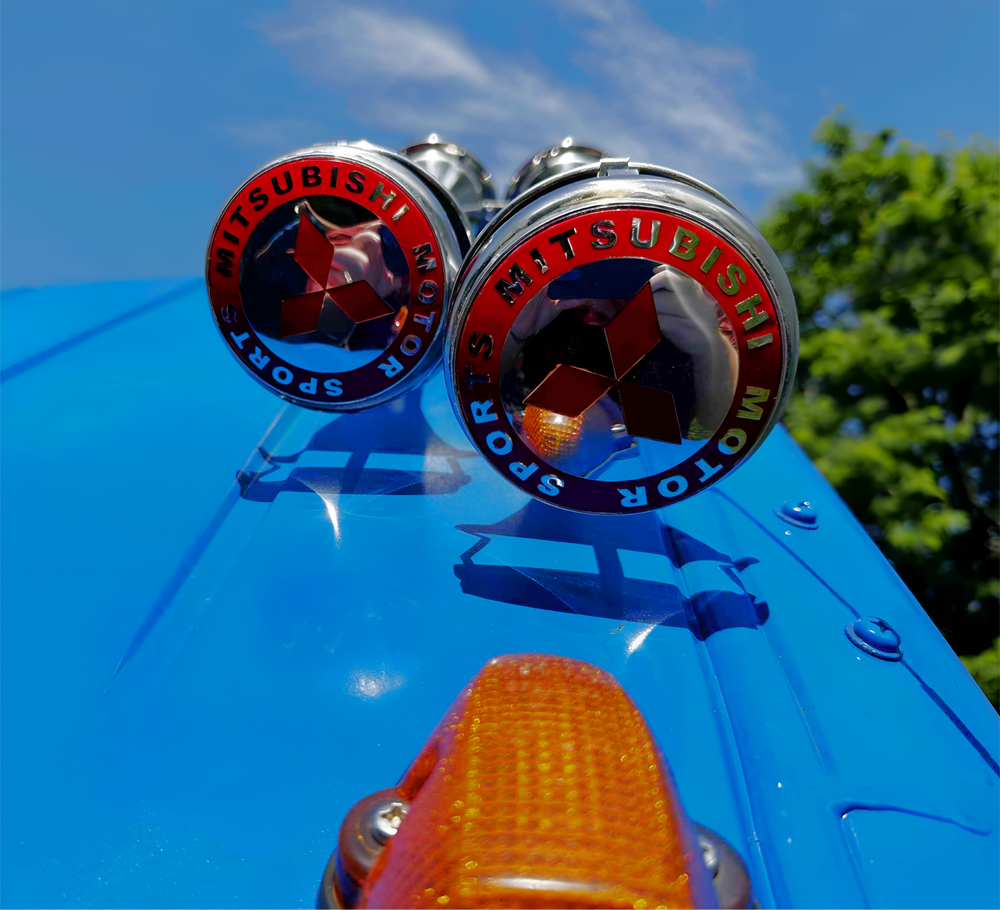
7/8/2025-Air horn trumpet covers
These are used on “big trucks” to keep snow, rain, bugs, and birds out of the air horn while driving. They were just plain stainless steel, but I found some chromed plastic Mitsubishi Motor Sports grill badges on ebay cheap. I glued them together with JB Weld putty, and snapped em on! Classes up the joint a bit, don’tcha think?


3 August, 2025
Breather tank.
High performance engines, and older engines like mine, (216,000 miles!), have to maintain a certain crankcase pressure to function properly. They need to breath. Not talking about air intake for combustion or exhaust here, it’s about pressure inside the engine and head. This truck used to have a simple hose connected to the top of the valve cover that hung down near the bottom back left of the engine. Along with the movement of air comes a fine mist of oil and diesel fuel from the valves. This mist travels down the breather tube, collects on the walls, and drips out the bottom as you drive. We’re talking MINOR amounts, like one drip every thousand miles or so. (Higher performance engines operate at higher crankcase pressures, so they produce more mist). My tired little 3.9 liter has started misting a little more. Engines do that as they age. Choices are either rebuild the head/entire engine, or catch the mist in a breather tank. So, I bought a $30 tank off of Ebay, scuffed it, painted it Caterpillar yellow, slapped a Cat sticker on the side, and bolted it on! The hose came from O’Reilly Auto Parts, who were nice enough to let us walk to the back and find a radiator hose we could cut to fit.
Why did I put a Cat can on a Fuso? Well, the truck is weird enough as it is. Might as well give ‘em something else to scrath their head at!


The pic to the right shows the small sight glass on the right side to show the amount inside.
There’s a drain screw on the bottom to empty it.
05/08/26 YUGE update!
Well, I have good news and bad news. The Aliner was falling apart, so unfortunately we had to replace it. The roof sections were ripping away slowly at the hinge area, and because of that shift, the door was getting harder and harder to close.
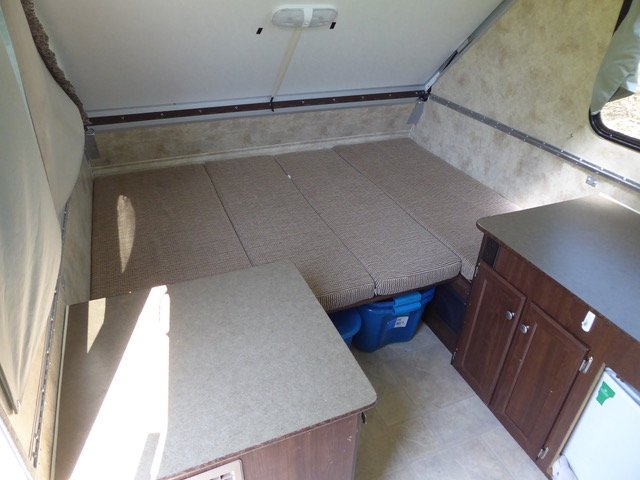
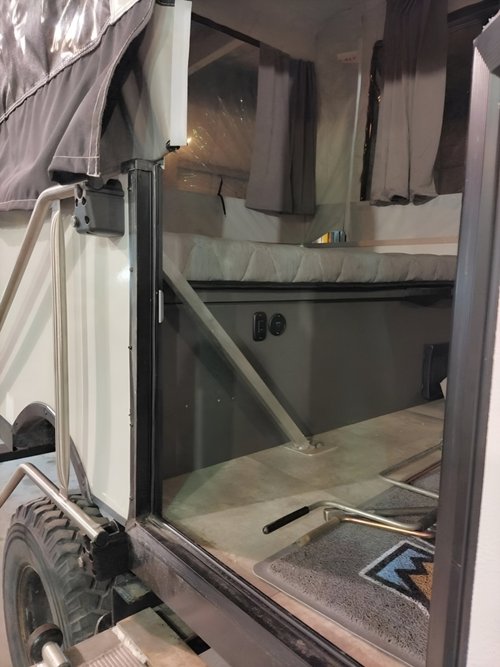
Now to the good news! We bought a new camper to replace it! Brand new! Its a 2026 Forest River Rockwood 19OTG. It has almost exactly the same floorplan as the old Aliner, but the bed is a queen size instead of the double bed. Unfortunately, there is no storage cabinet inside the door to the left as you come in, but we have other plans for the bathroom. Its still a pop-up, but this one has vinyl-coated fabric instead of hard walls. This will make it easier to raise the roof.
On to some pics!


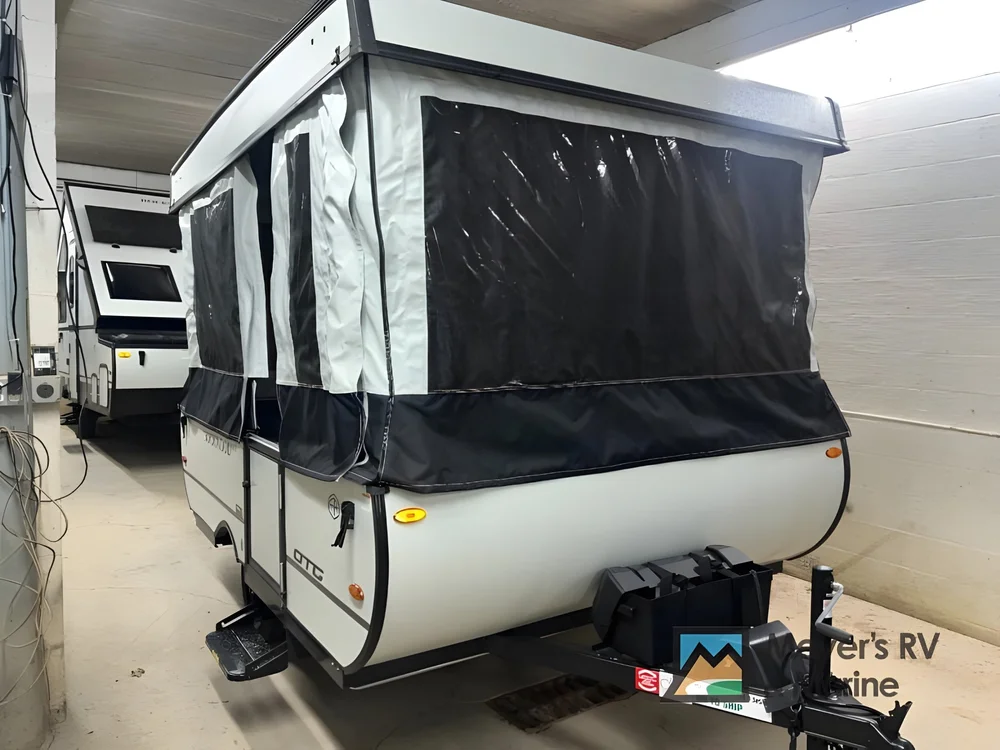


And these below pics are of our exact camper…


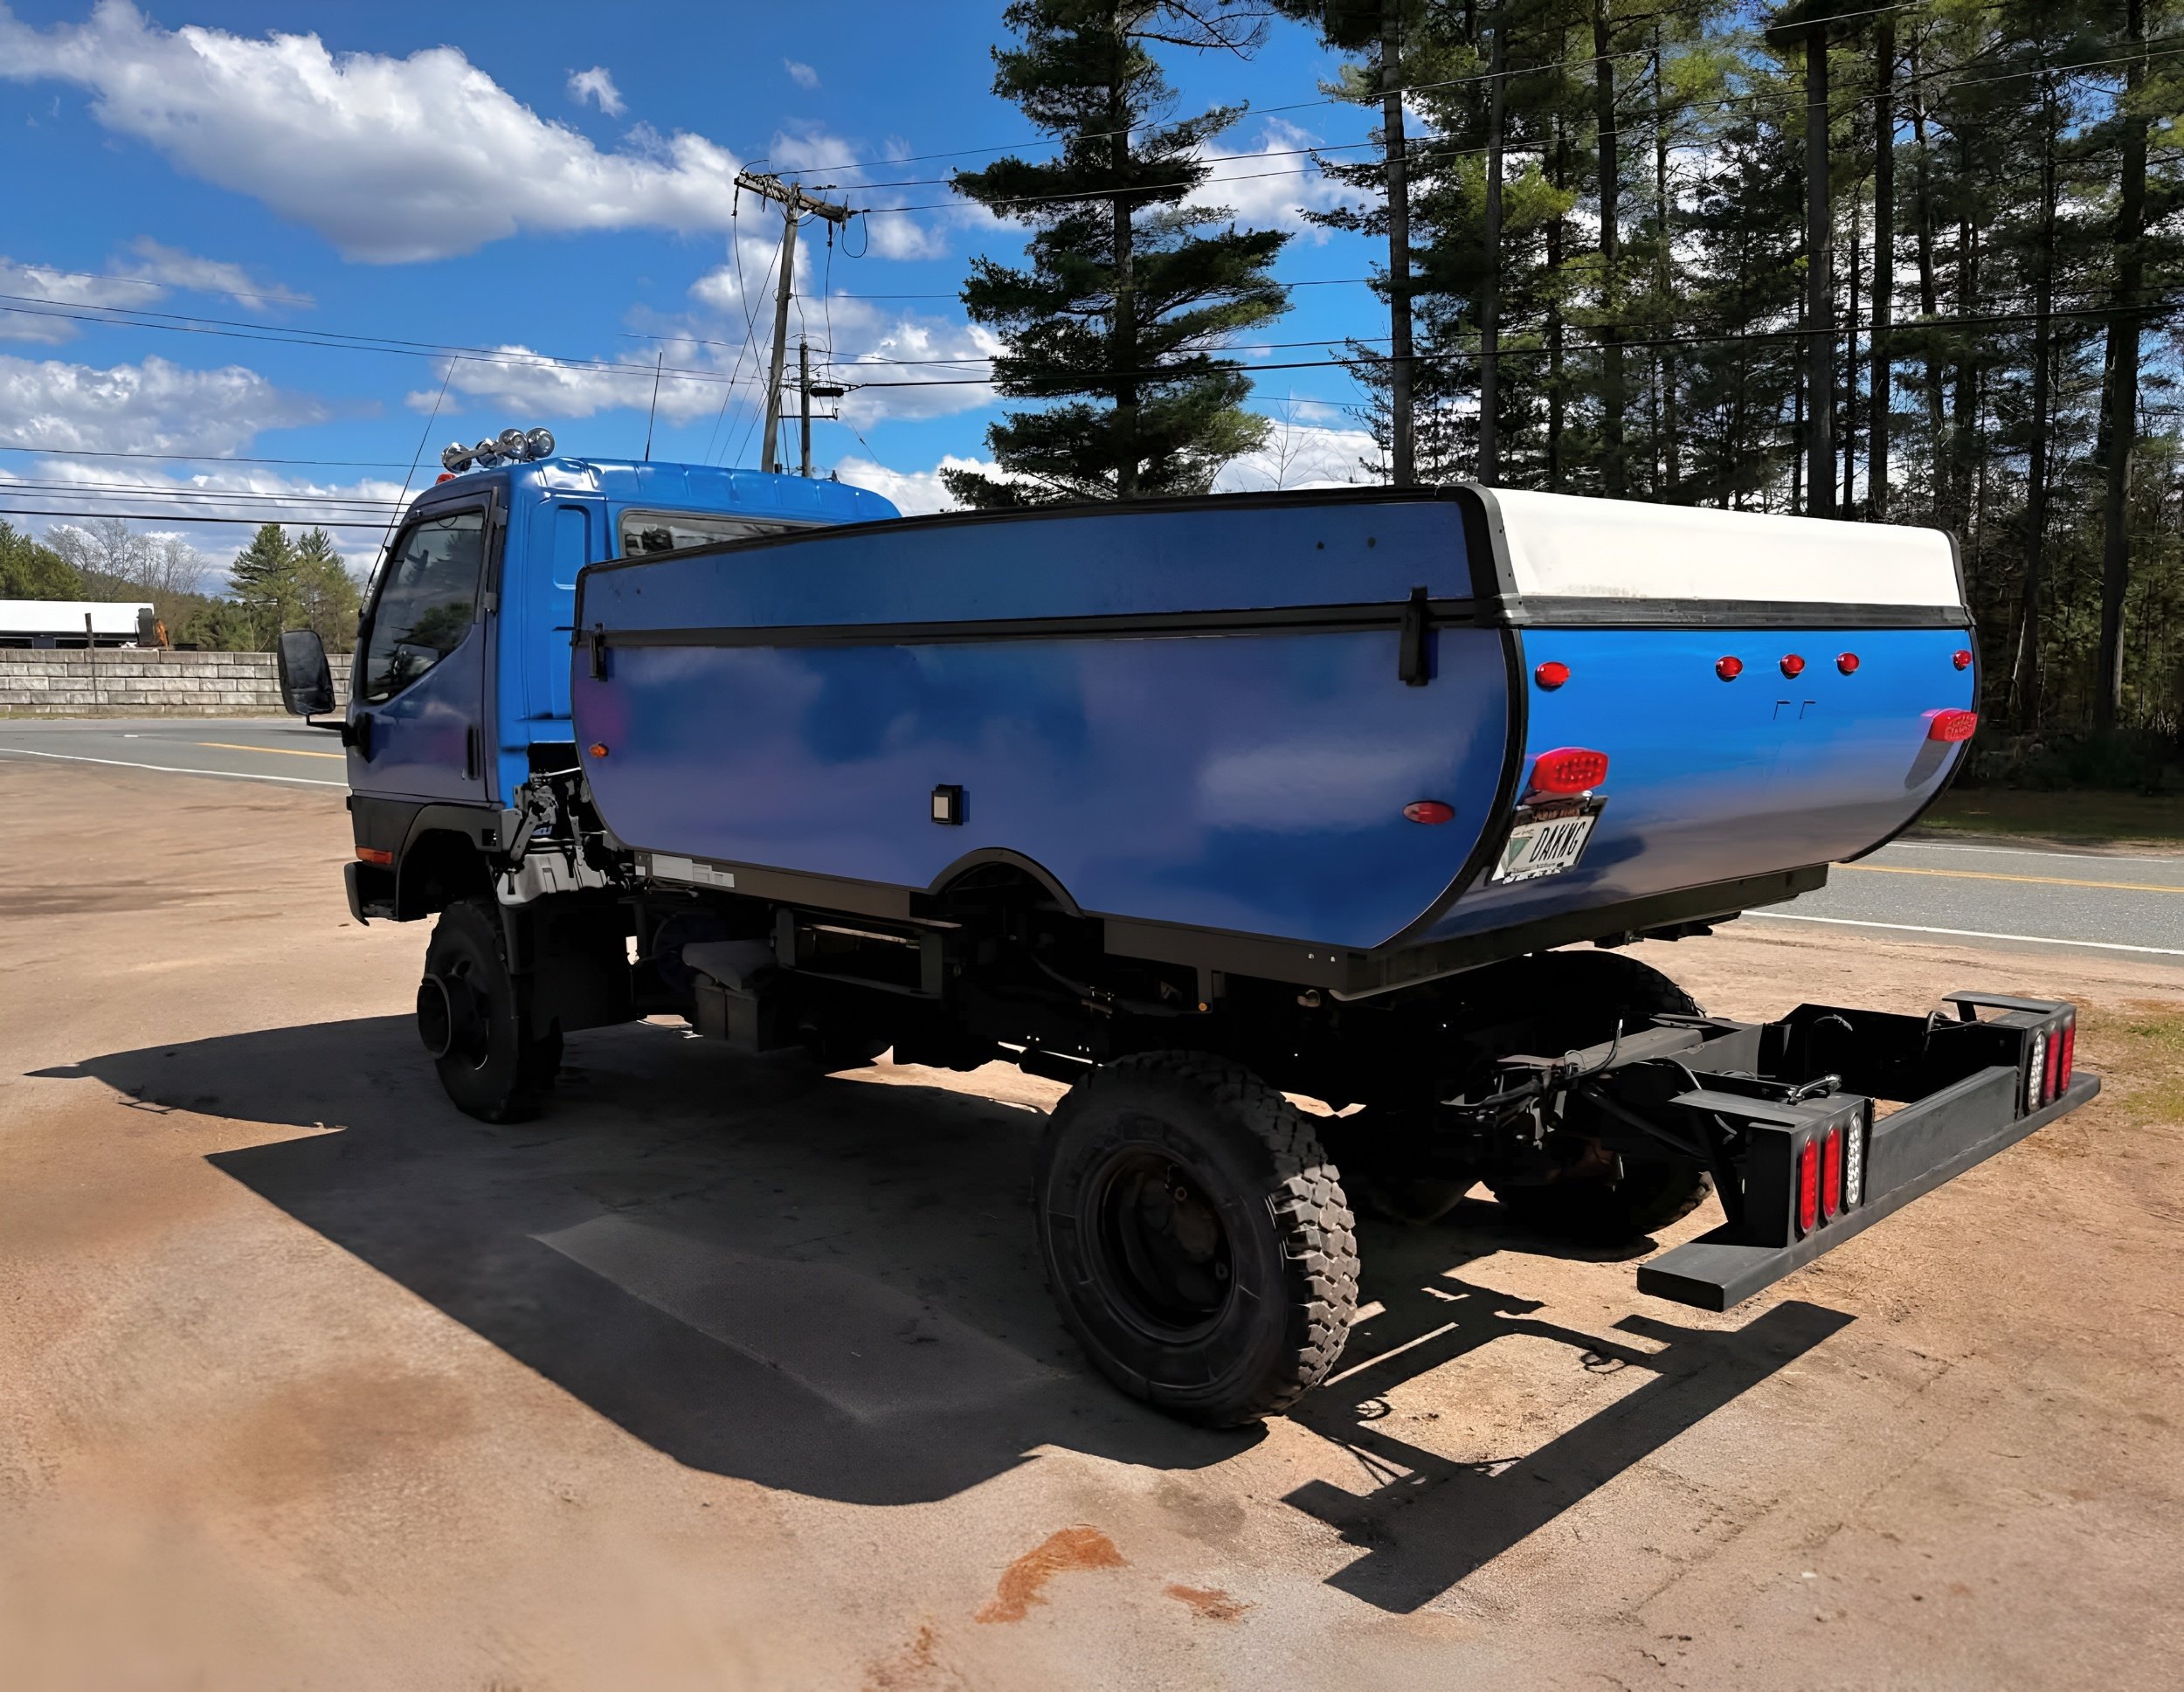
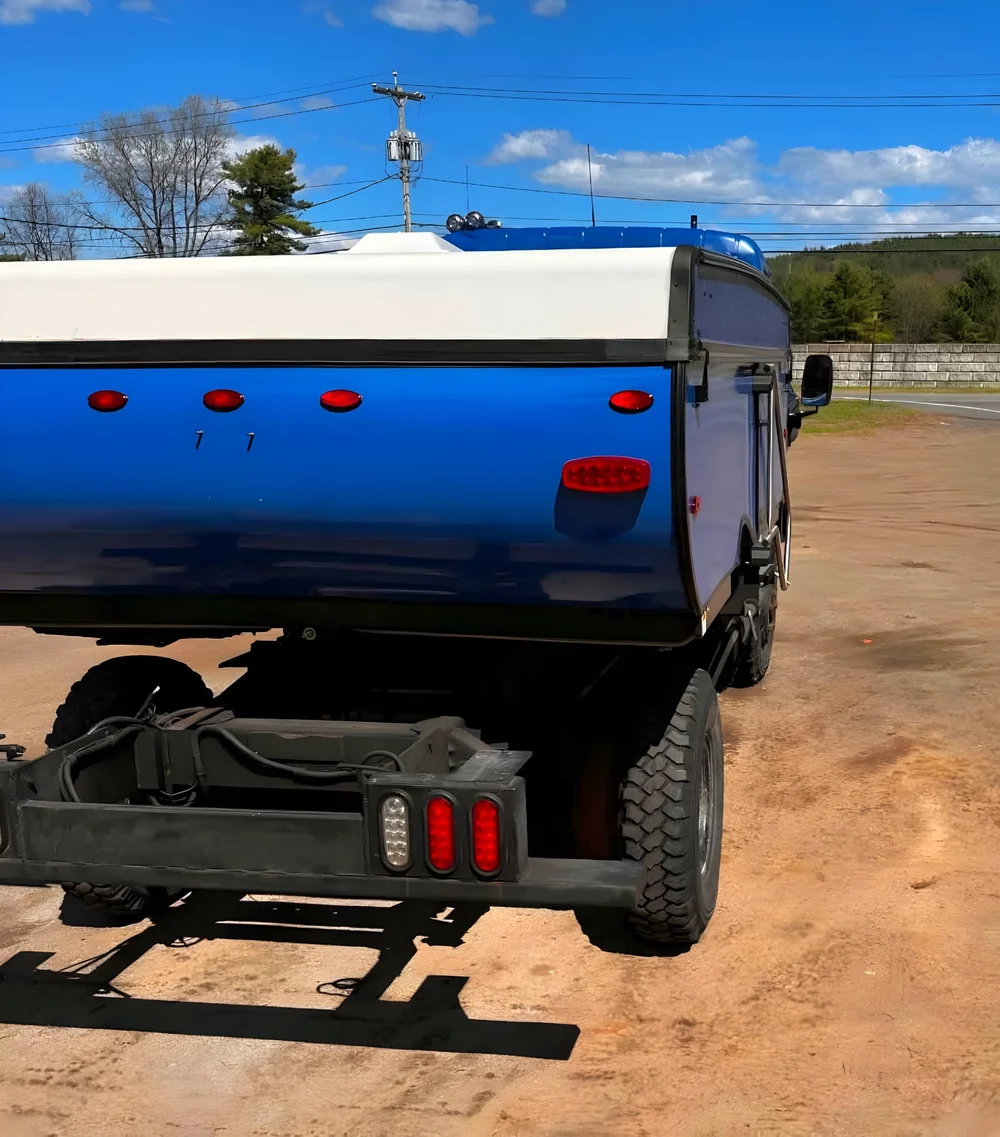
Here it is in the welder’s shop. Wheels removed, ready to mount on the truck.

Tongue shortened to get the camper as close to the cab as possible. Because the top cranks up using a hand winch, (under the black box), we couldn’t shorten it as much as we wanted, so there’s a gap between the two. I have a plan for this space, though.


The suspension on this trailer is MUCH simpler than the torsion arm suspension on the Aliner. Because the Rockwood has a leaf spring suspension, all that was needed was a crossbar to be welded to the fishmouth subframe. This crossbar is an inch thick solid steel, with gussets underneath welded to both the crossbar and the subframe. he then welded a small shelf for the leaf pack to sit on, and the stock suspension bolts hold it all together!

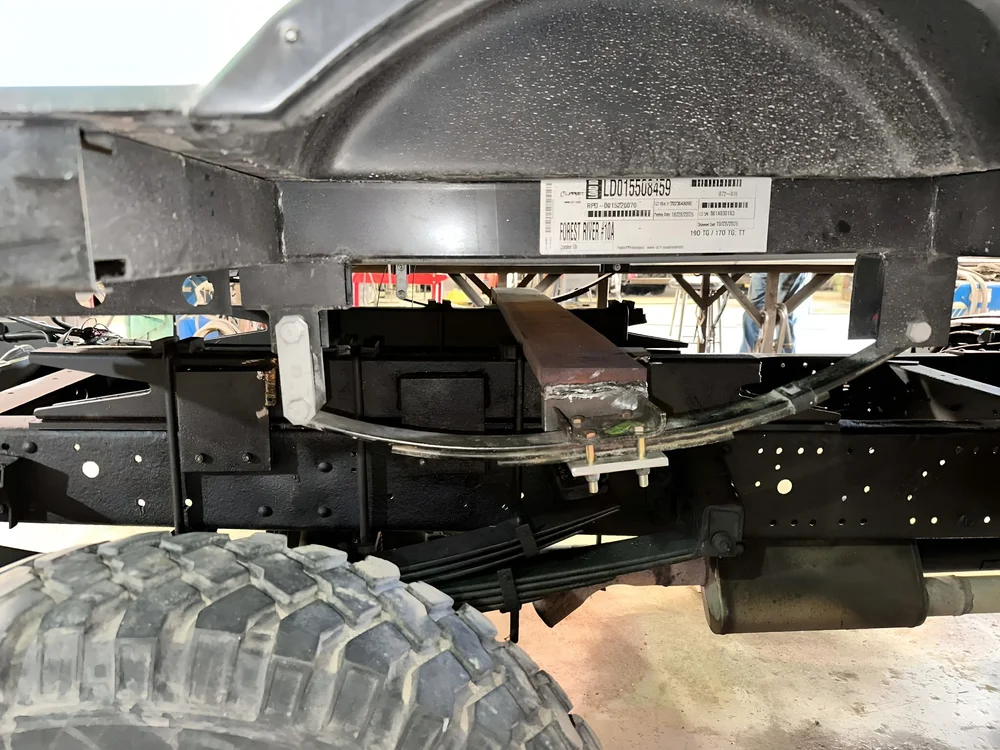
And here it is, mounted on the back of the truck, ready to go camping! The Rockwood, just like the Aliner, rides down the road on its own suspension and tongue ball. It doesn’t know its not on the road anymore!


And here it is out in the yard at Loya’s Welding.


Next task was a Sromberg Carlson model AC-500L folding grab rail. It can be folded 180 degrees forward or back for travel, as well as 90 degrees as a grab rail. It’s extremely sturdy while you’re pushing down on it, but a little wobbly side to side, nothing I can’t get used to. I also asked for a support brace inside the camper to spread the weight of using the bar to the floor. I bought a section of rollbar padding to go over it.


And a few shots of it in the yard.


And HERE’S what we have planned for the gap between the camper and cab…a spare tire carrier and ramp, and a box for lawn chairs!


You’d think it would be difficult to roll such a heavy tire up that ramp, but Stanton did it with ease! He’s a burly young man, so Barb and I figure we can do it too, (together, obviously!)
Below are a couple conceptual sketches I made in Picsart app.


Last couple pics from this long update. first is a pic Tristan sent me from Yipes Stripes in Plattsburgh showing one side wrapped. Pretty close match for the blue Rust-Oleum on the cab, huh? I wanted a wrap on the brand new camper so that after I’m gone, Barb can just peel it off, have Stan return it to stock, and tow it down the road normally. Second pic is my rendering in Picsart of the blue colored in on the back, the wood stripe planned for the sides, and a solor panel for the rear of the roof.


That’s all for now. Monday will be back down to Keesville to Loya Welding to go over the spare tire mount, and hopefully get it mounted. Our first planned camping trip is coming up soon at our favorite spot, site 21 at Ausable Point State Park in Peru NY!
5/12/26 Yipes Stripes!
Today was a good day! Finally got the camper wrapped. Came out really well, pretty close match on the blue, don’tcha think? The narrow white lines you see at the edges is caulking. Wrap doesn’t stick to caulking very well, so they cut it a little short. Ill go over it with lacquer primer designed to stick to caulking, followed by some blue Rust-Oleum like the truck cab. You wo'n’t even see it.


And a couple pics where I added a wood trim stripe down the side, (using the Picsart app on my phone).


That’s all for now! Next up, spare tire rack.
05/20/26 - Spare tire rack
This is what I came up with. Stan made it happen with his excellent welding skills. Basically, it’s a shelp with tie-down loops.

CAMPING PICS!
Ausable Point State Park -site 21. Our favorite place in the North Country, (except maybe Clare and Carl’s). Breeze was perfect, as it kept the bugs down. I wanted our first trip in our new Rockwood 19OTG to be here. The camper worked perfectly. Such a treat to be in a brand new camper.


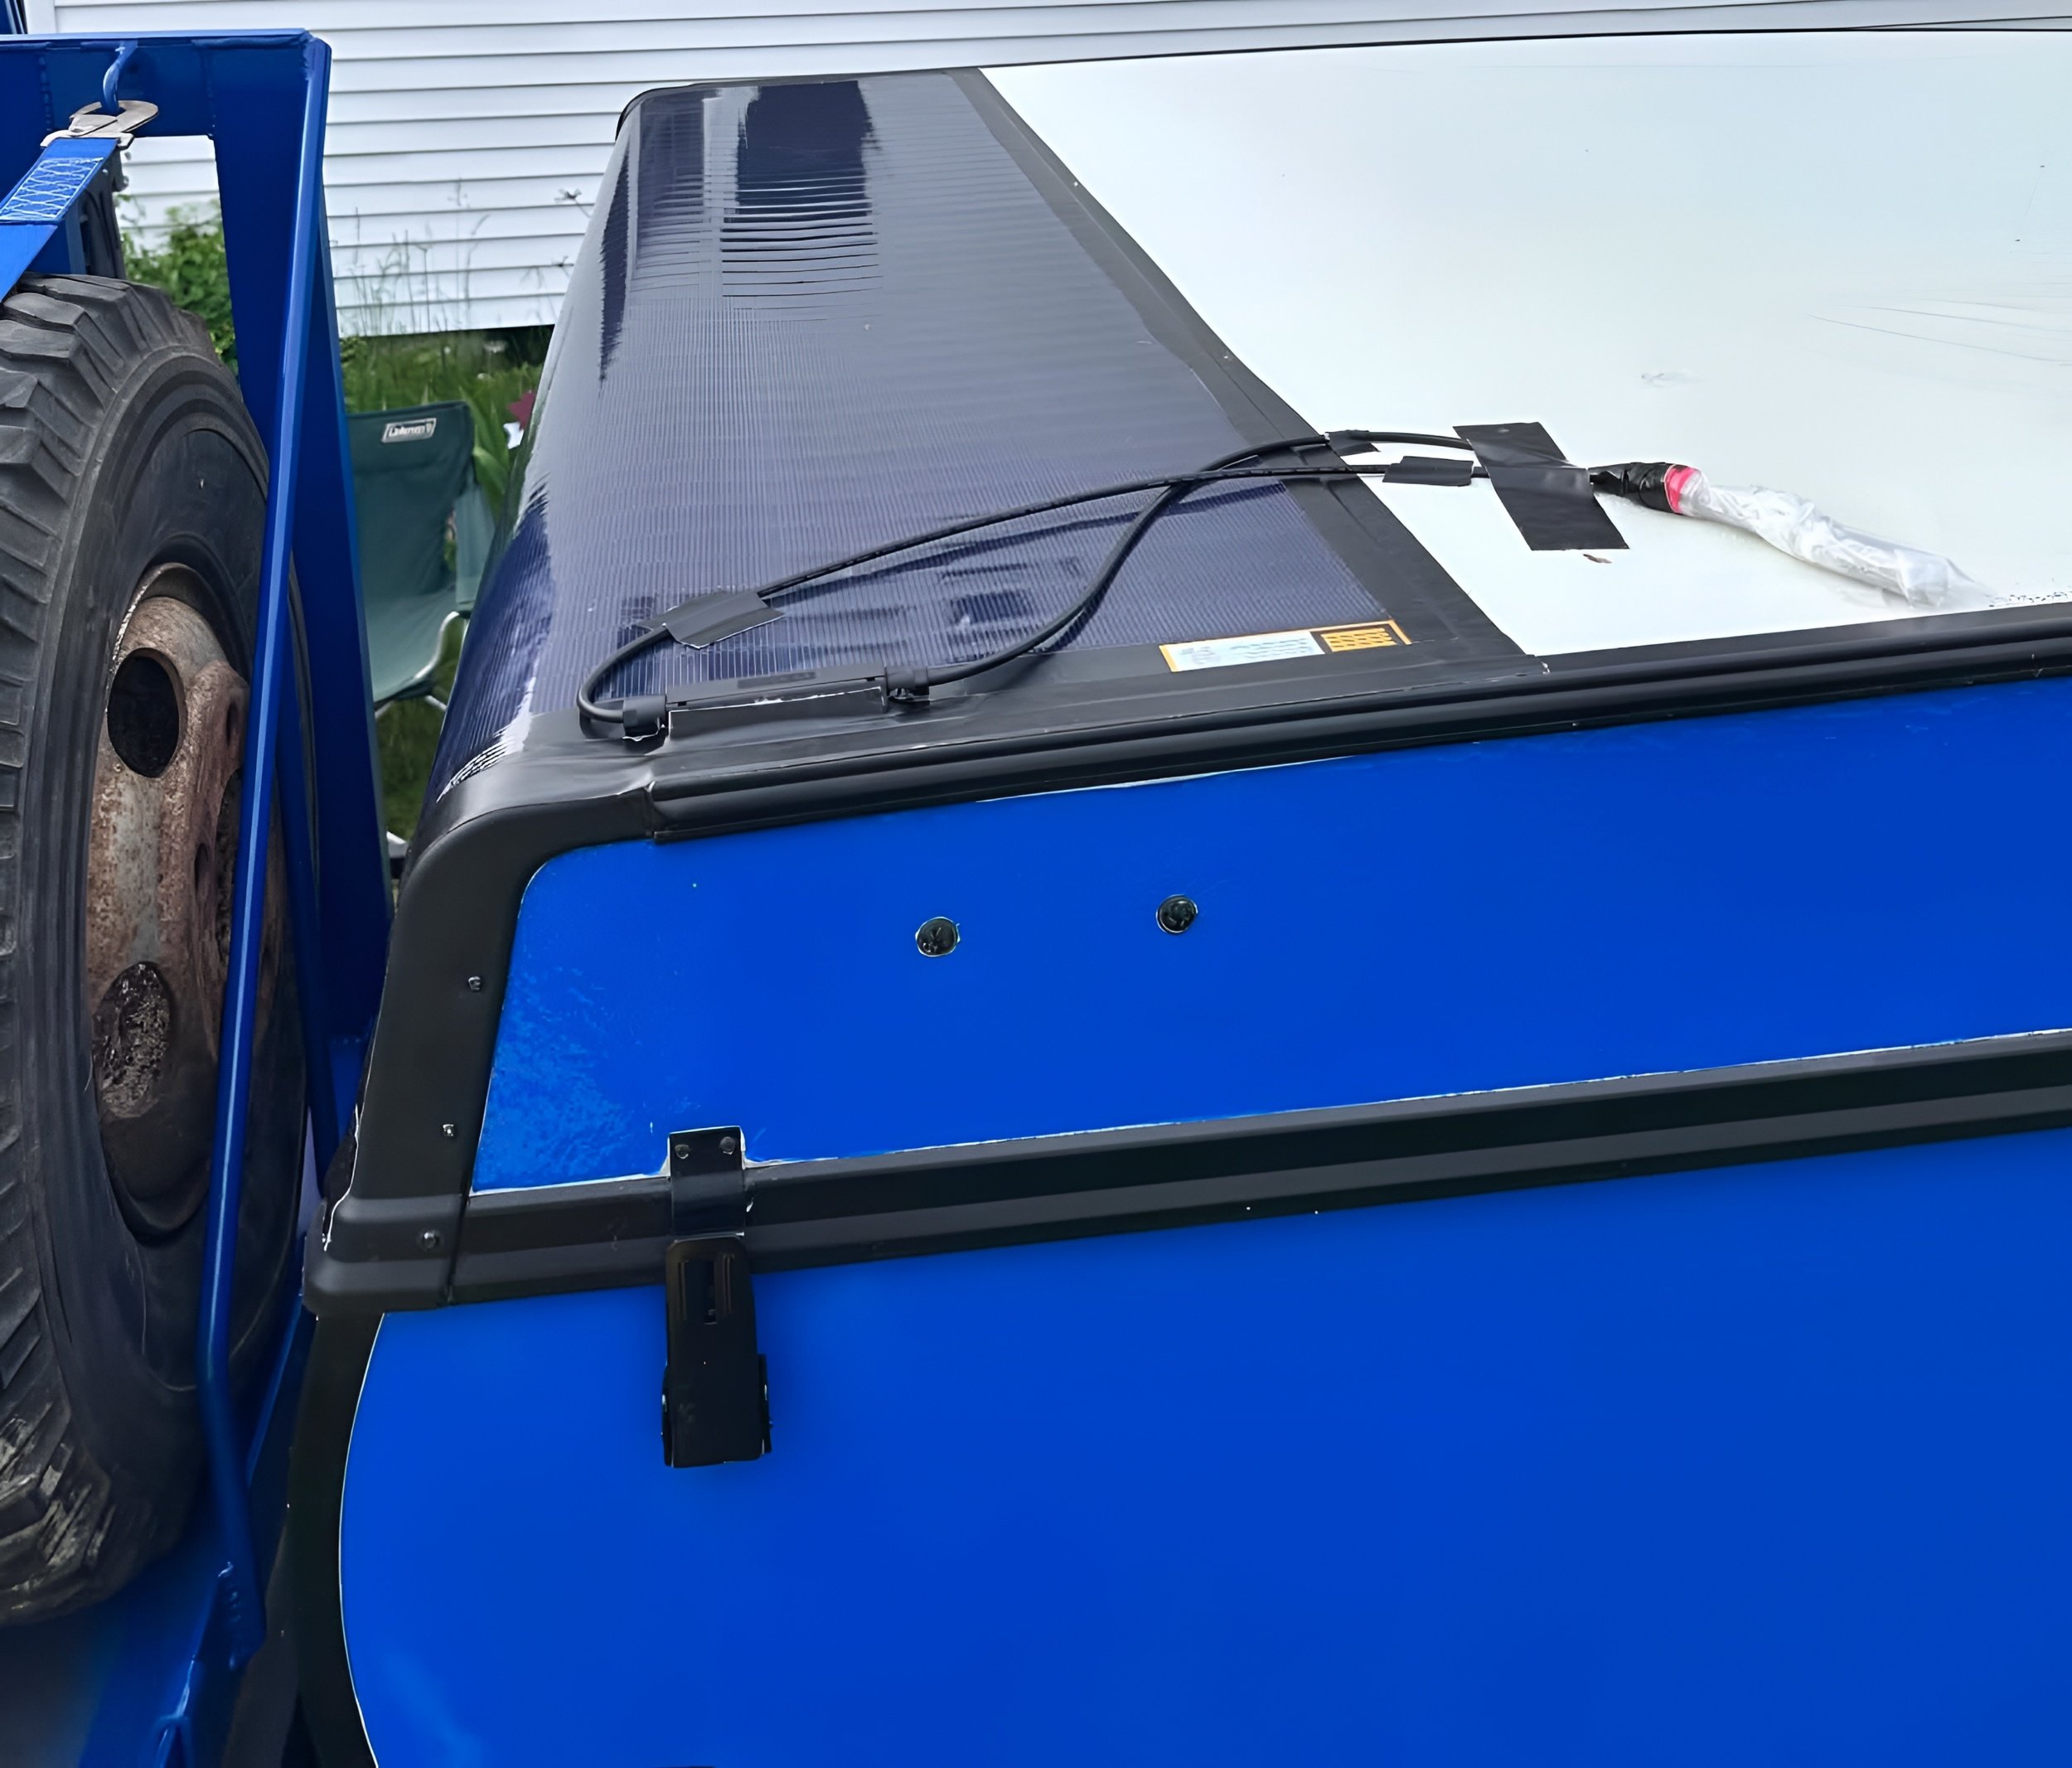
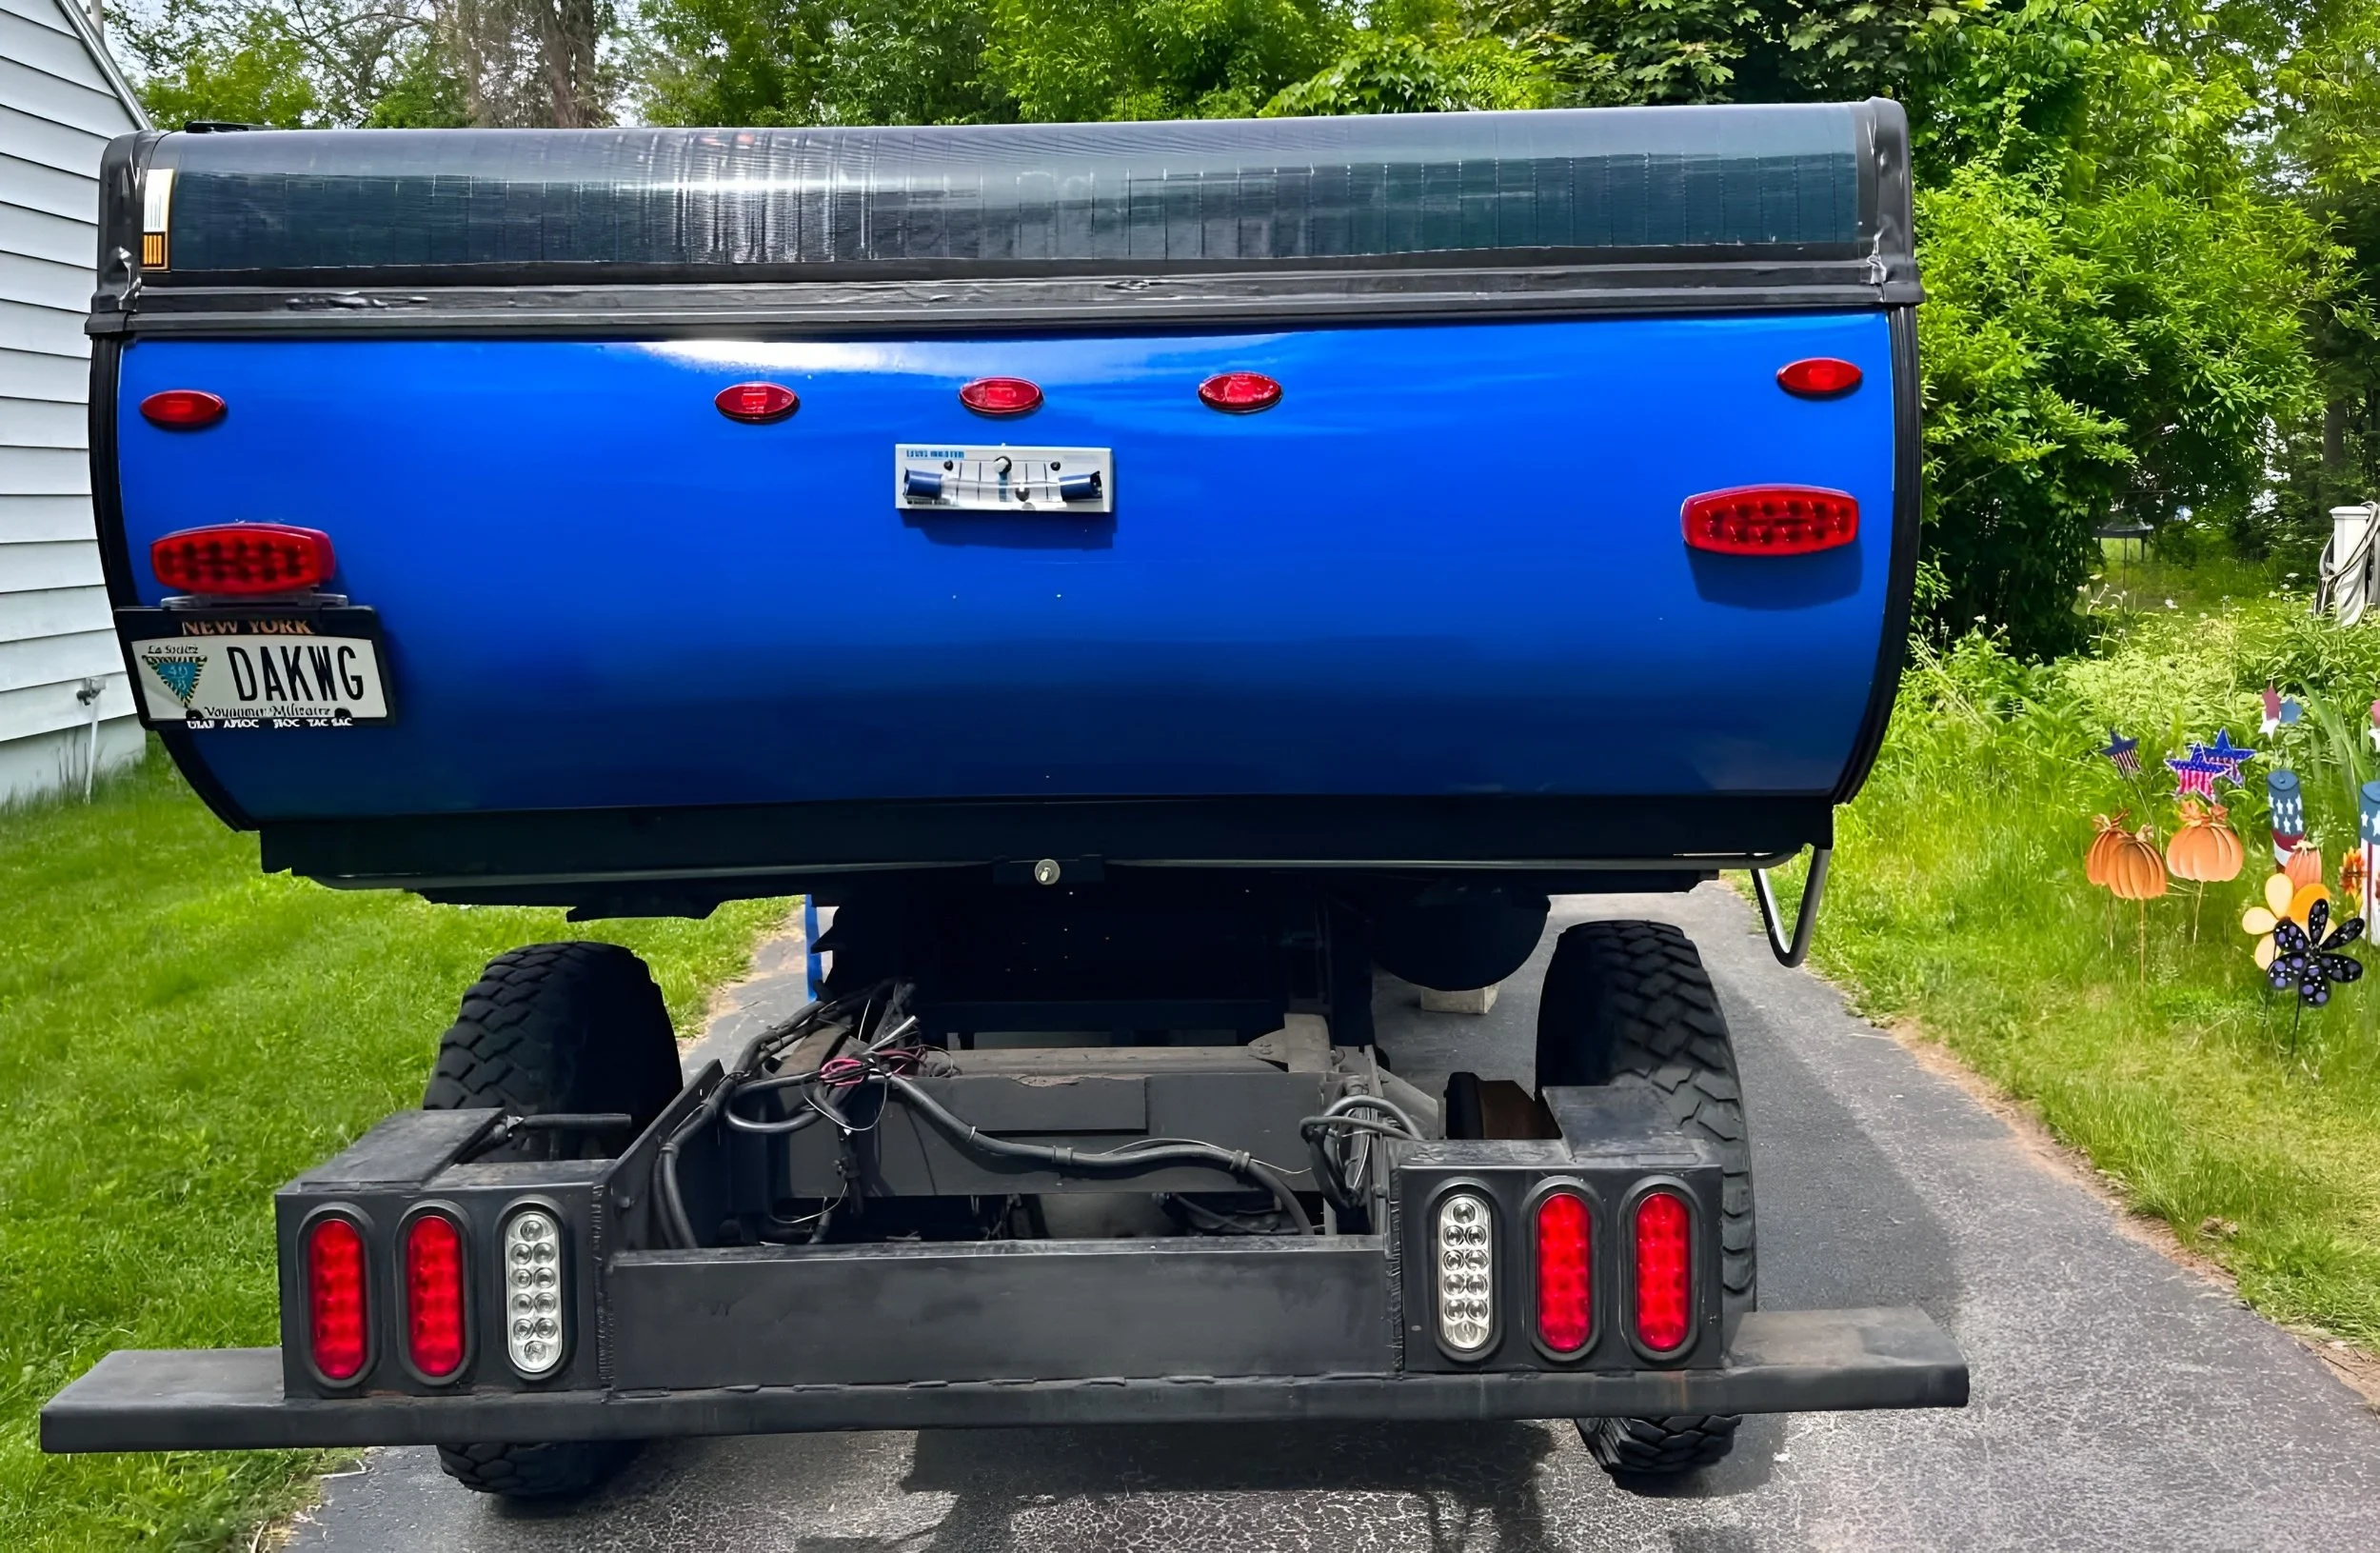
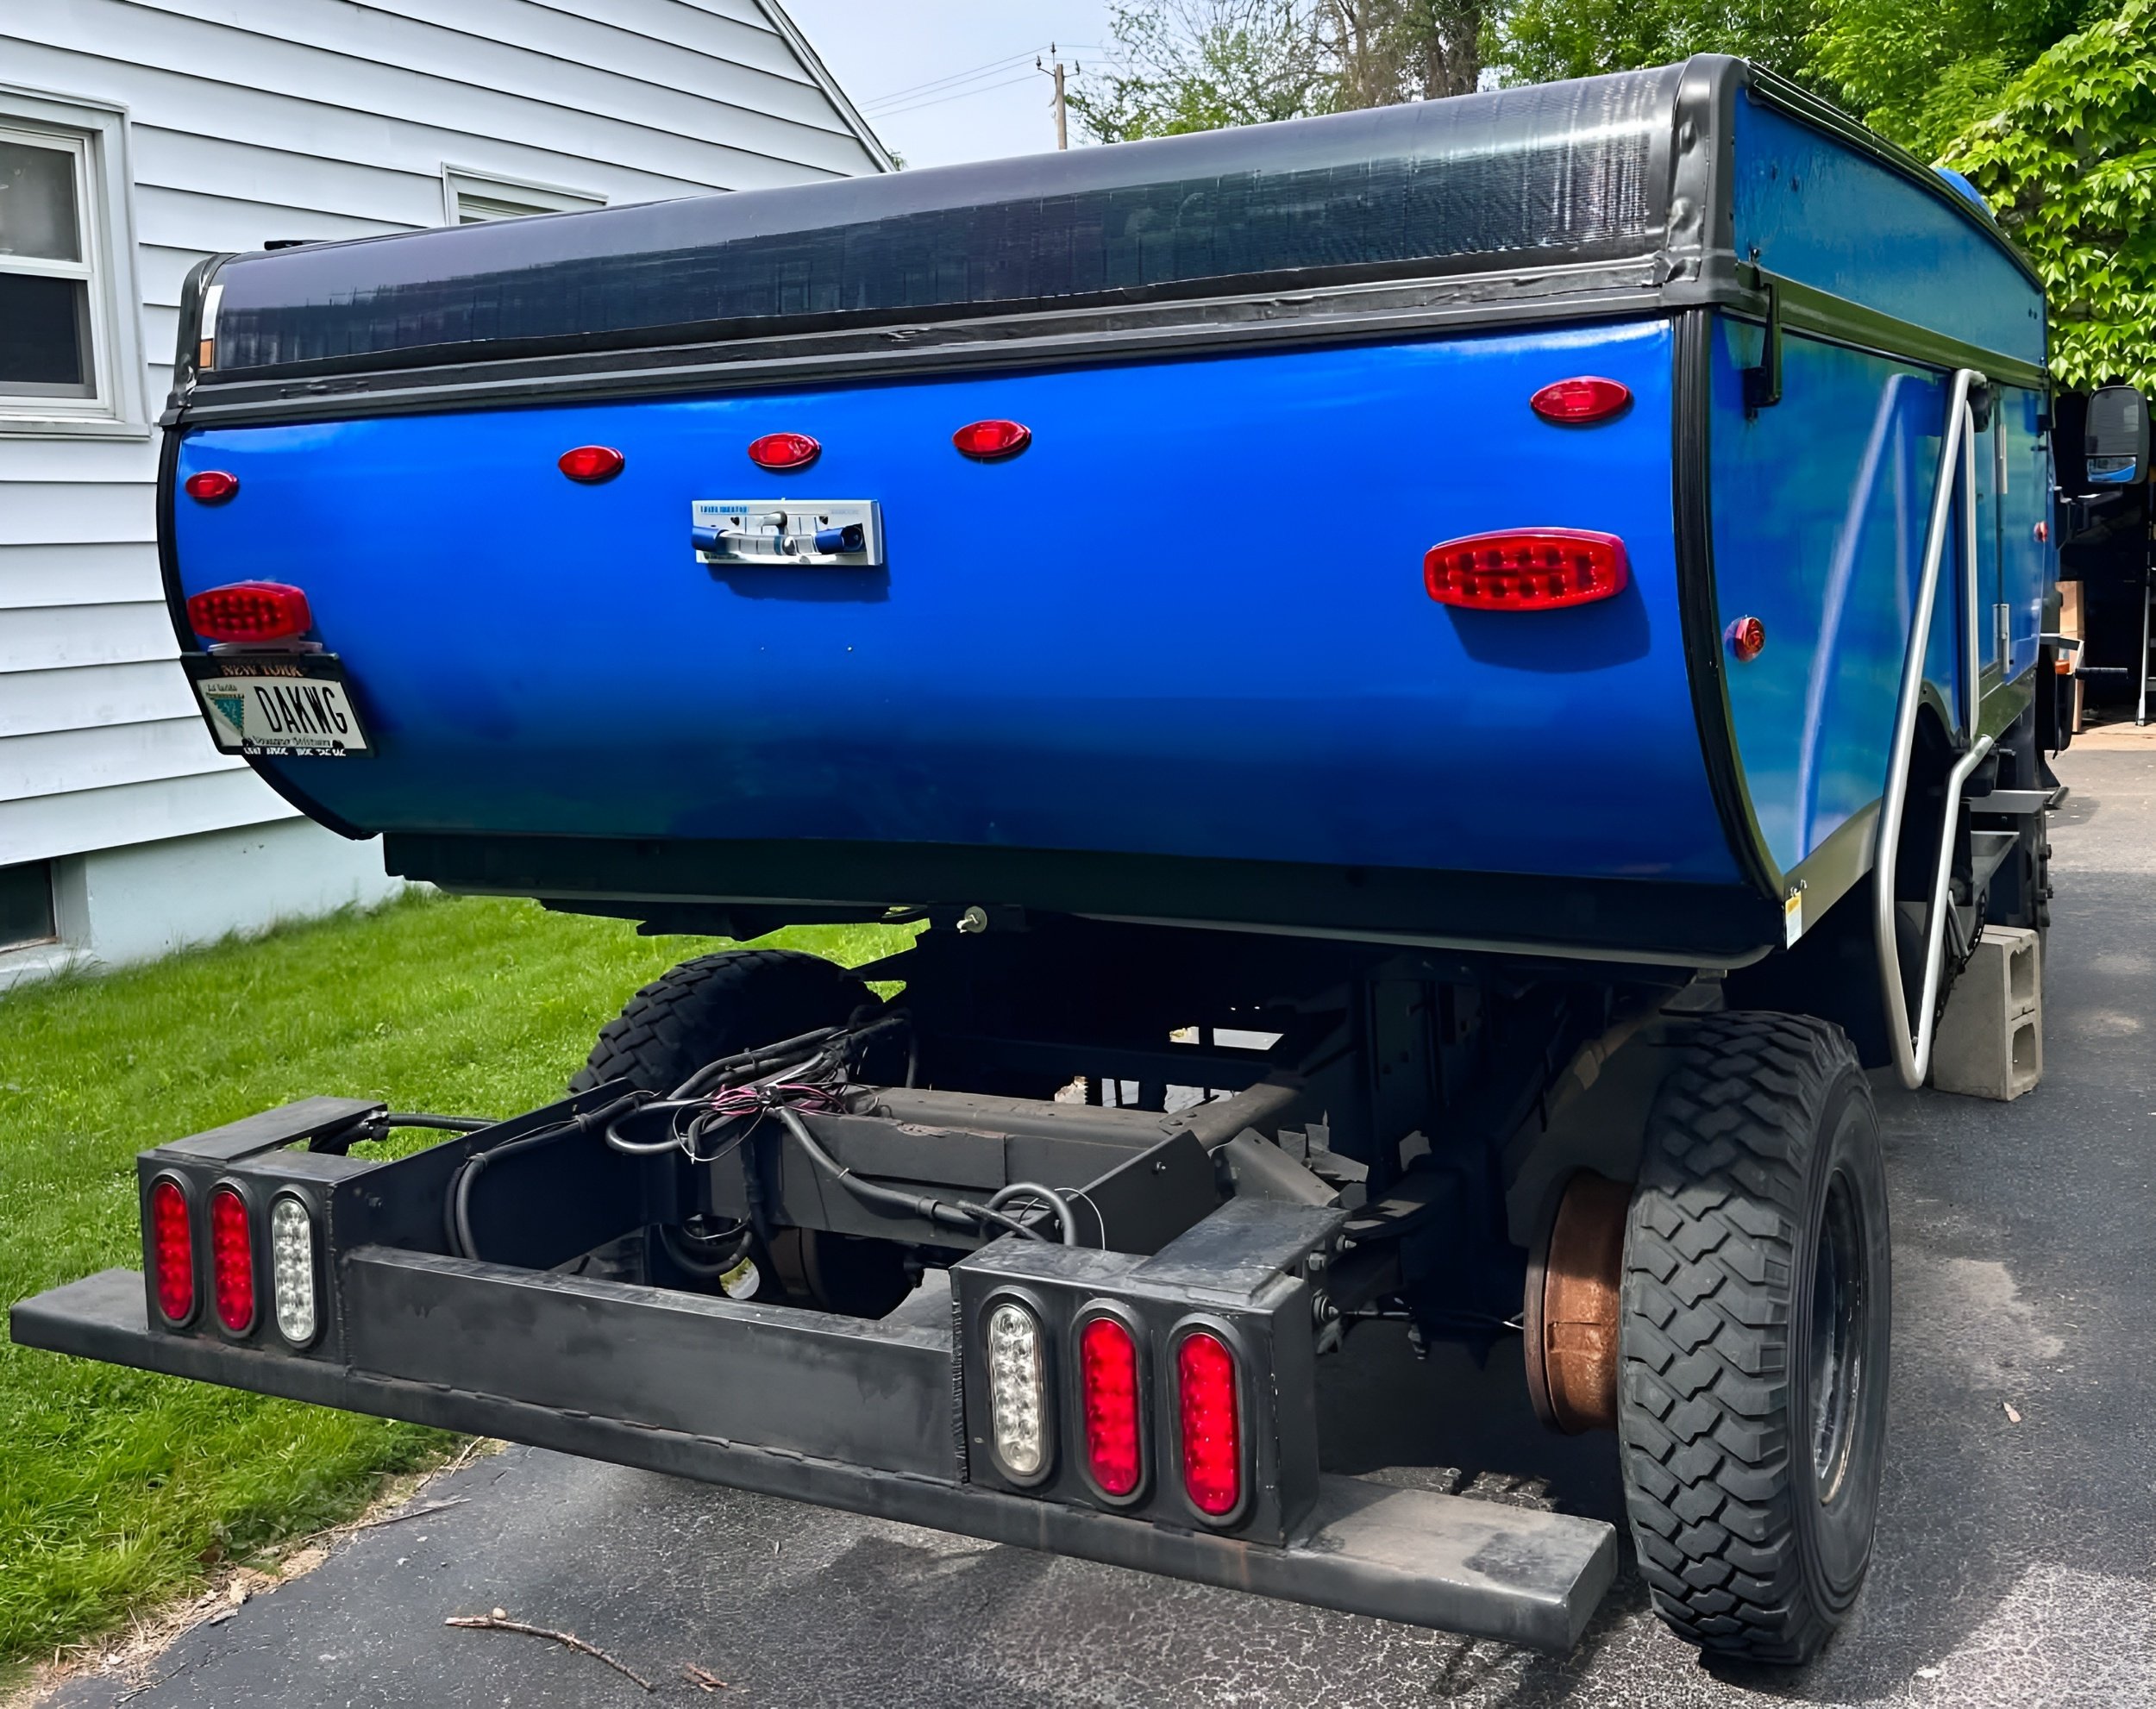
5/6/26 - Solar Panels!
I chose BougeRV Yuma 200w self-stick panels.They’re extremely light, super flexible, and have 3M brand VHB tape already applied. Only installed two for now, But I love the way they can be curved around a tight radius. This is why I left the roof front and rear sections unwrapped, so we’d have clean camper roof to adhere to. Thank god I have sons that are willing to help me. Here’s a YouTube video on just how tough these CIGS panels really are.
And here’s a six month follow up video, including a waterproof test on the panel with the bullet holes.
And here’s a few pics of them installed on Dackwagon! Thanks John and Matt! Gorilla-taped the edges.
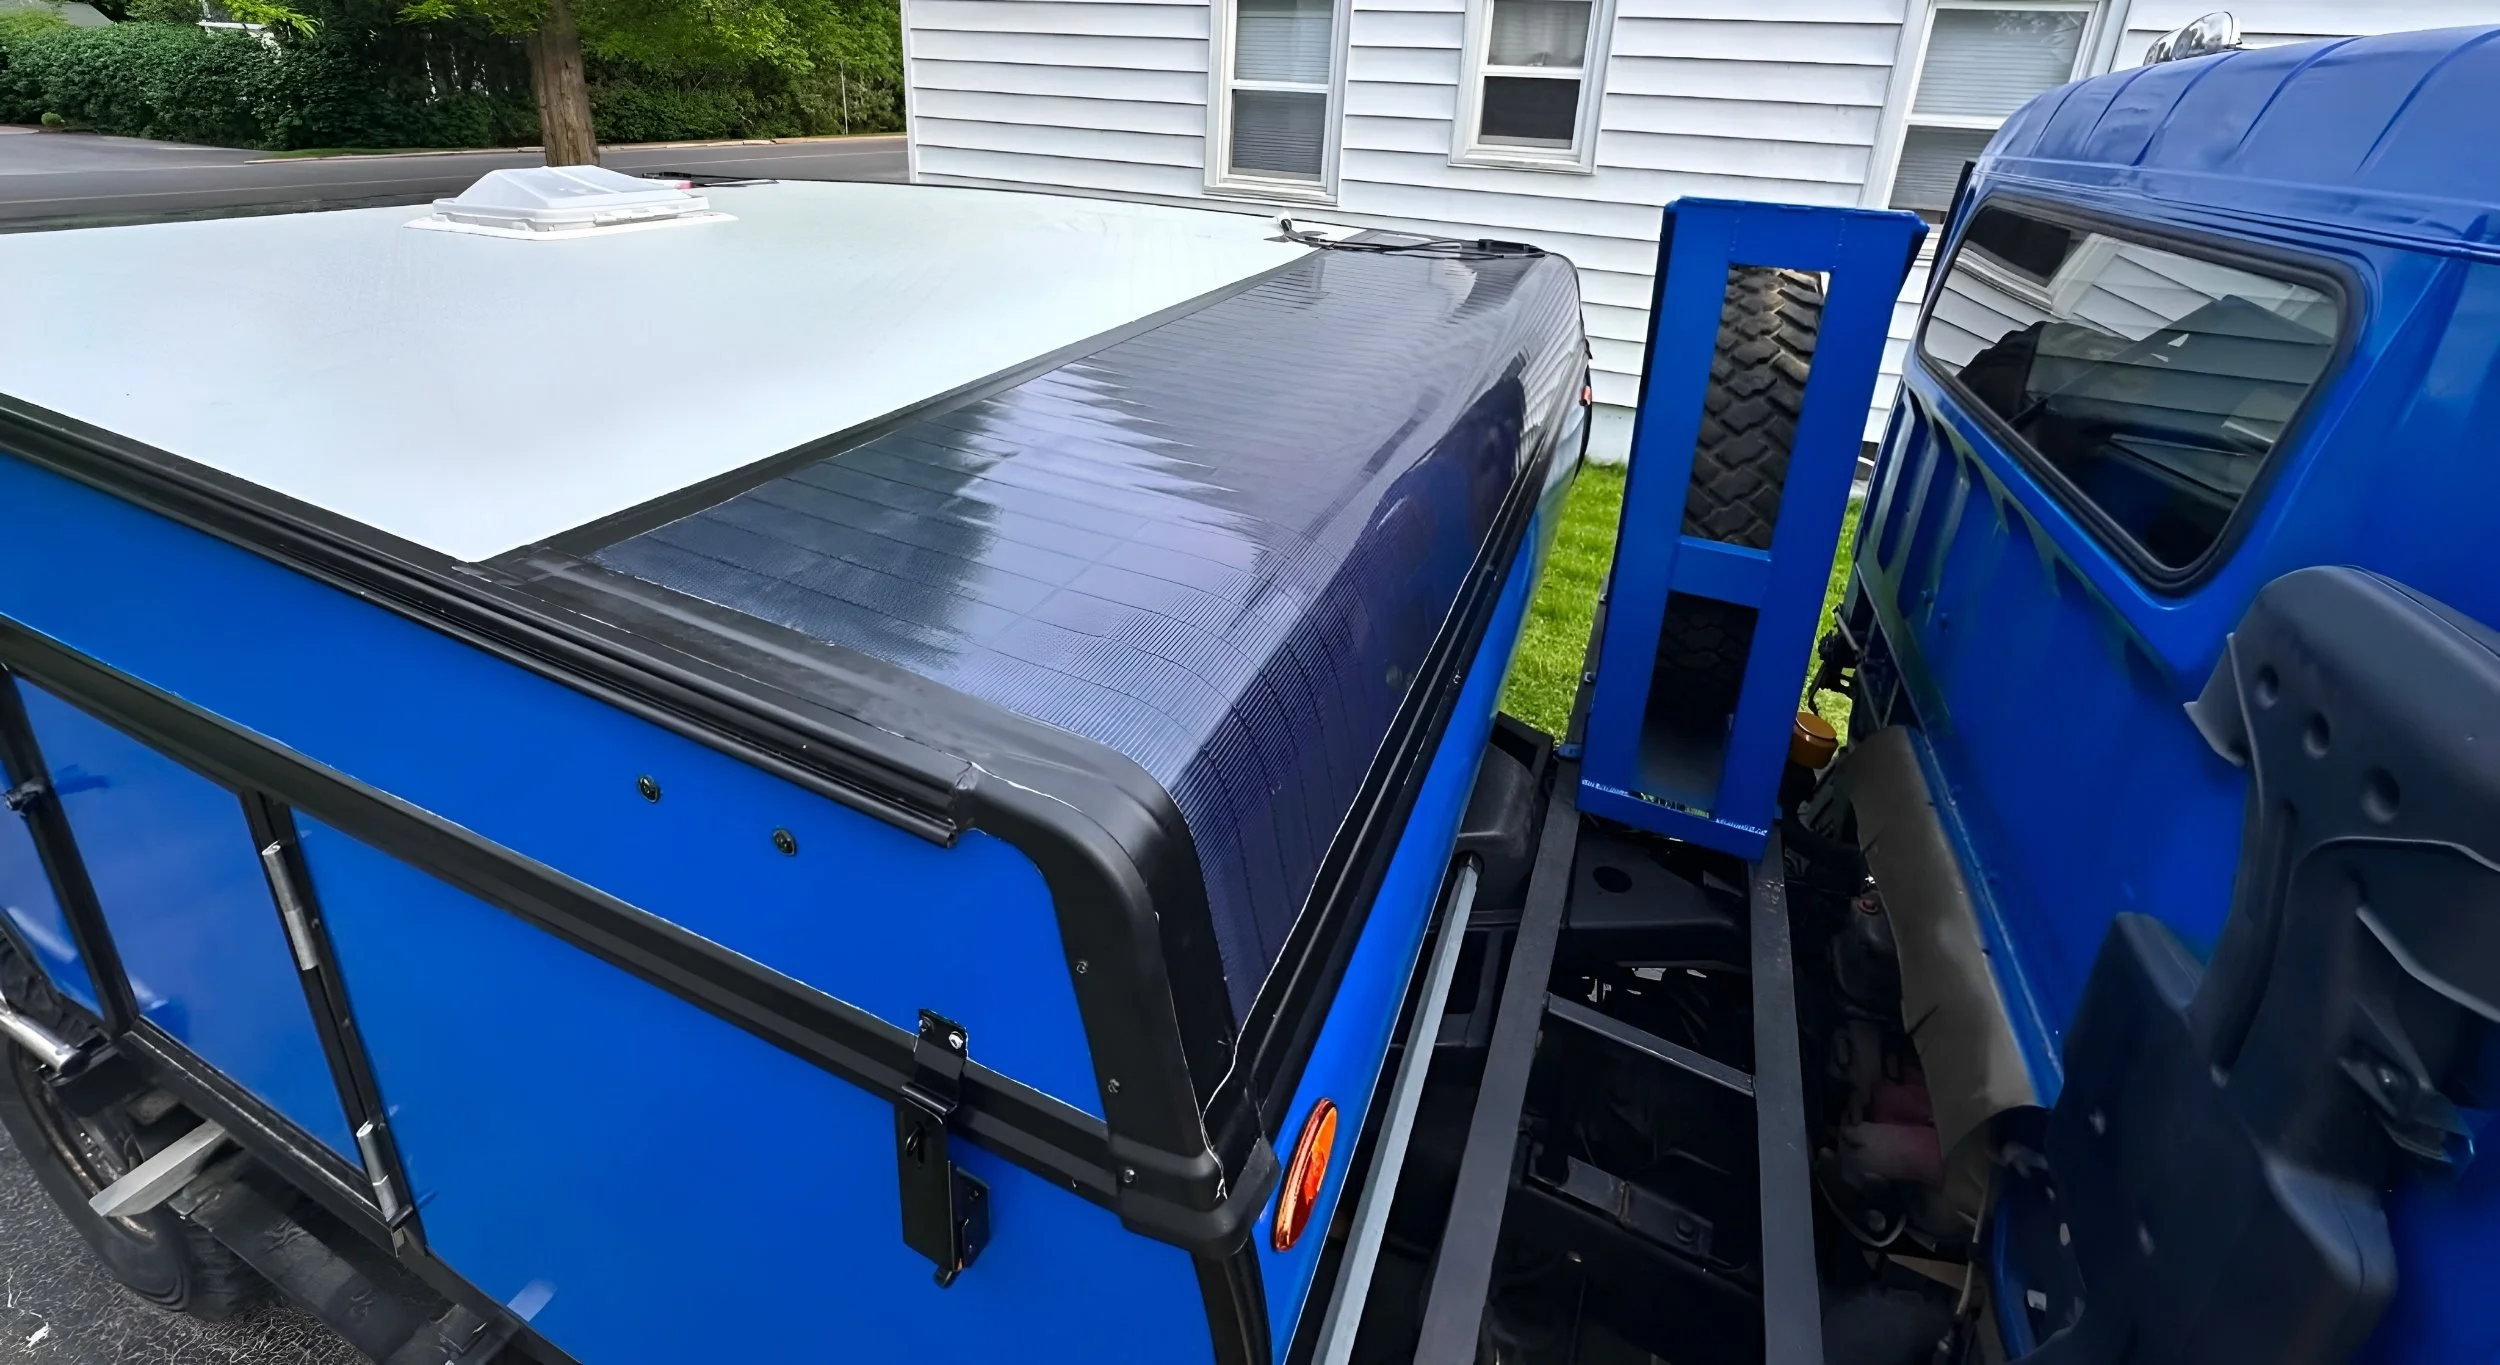


Also got the level installed, (yes, our driveway is tipped).

And one last camping pic for this update, Dackwagon in the pines!

That’s all for this update. Coming up, we’re traveling part of the new BDR-X route, the Adirondack Backcountry Discovery Route. Out to Lake Meacham for the beautiful sunsets, and campfire time. It’s the black route on the left side of this map.

6/12/26 -Lake Meacham!
Lake Meacham in Duane NY. Took the back country roads over to it. Great time there, slept like babies because of the loons.